Mix for plastering aerated concrete blocks. How and how to plaster aerated concrete inside the house: we consider the option of plastering for various surfaces
Aerated concrete blocks are incredibly in demand today - and not only in private construction, but also in the construction of frame-block multi-storey buildings. The products are compact, lightweight, easy to install, which allows a person to build a warm and inexpensive home with their own hands.
However, raising the walls and bringing them under the roof is not all. You need to know exactly how to plaster aerated concrete inside the house, and understand by what principle interior plaster is selected in general. These questions are the subject of this article.
Both aerated concrete and gas silicate concrete belong to the category of cellular concrete. There is an opinion that this is the same thing, but there is still some difference between them.
In both materials, there is a combination of two cement-lime binders. However, their percentage is different, resulting in a material with completely different strength characteristics.
Leveling coatings for aerated concrete
Up to 60% of cement is present in aerated concrete, and the rest is lime and sand. In gas silicate products, cement is only 14%, almost twice as much lime, and many times more sand. It is clear that if there is so little cement, then the strength of the products is no longer the same. In general, gas silicate concrete is no longer a structural material, but a heat-insulating one.
- Perhaps now you have a question: “What does the plaster of the walls have to do with it?”. And despite the fact that it is selected depending on the type of base, and in order not to have problems with the coating later, you need to know exactly what and with what can be combined. The characteristics of the binder are decisive here.
Note! Cement, or rather products and solutions based on it, always has greater strength than lime and gypsum. When creating multi-layer screeds, the following principle must be observed: the base must always be stronger than the coating - otherwise, its delamination will inevitably occur.
- It is not difficult to conclude from the above: if there is no or almost no cement in the blocks, then internal plaster walls, and even more so the outer one, cannot be made, for example, with a cement-sand mortar (see Optimal ratio of cement and sand for plaster). Applicable to gas blocks, it can be used, since they have a high percentage of cement, and the wall surface has sufficient strength.

- You can even use not special purchased mixtures, one of which we see in the photo, but knead the solution yourself. Just keep in mind that the plaster should not be done as for heavy concrete or clay bricks - in proportions of 1: 3, when a solution of the M150 brand is obtained.
Plastering of internal walls made of aerated concrete is carried out with a solution of half the strength: M75. For its manufacture, cement M400 is taken, and mixed with sand 1: 5.
With an increase in the brand of cement, its amount in the solution should decrease to 1:6, or even to 1:6.7 - this is the arithmetic. Everything is done quite simply, and the lower price of self-mixing plaster will significantly save on finishing work.
How to plaster gas silicate
Now, as for the gas silicate wall, in which there is very little cement. Accordingly, such plaster, as for aerated concrete, is not suitable for it. However, it is impossible to infinitely reduce the amount of a binder in a solution - only part of it can be replaced by another binder that is less weak in strength.
- There is a large percentage of lime in gas silicate blocks, and it is most logical if it is also present in the plaster. That is, the most ideal option for plastering such walls would be lime-cement plaster. It is more difficult to make it yourself, since lime dough must be present in the solution.

- It is much easier if the plaster inside the house is made with a purchased mixture. And by the way, if it is suitable for gas silicate, then it is also suitable for aerated concrete (and not vice versa). Manufacturers often orient plaster mixtures to both materials, which means that, in addition to cement, lime is also present in them.
- Sometimes the instructions on the packaging say that the mixture can be used for all cellular concretes. This means that they can also be applied to foam concrete walls, which contain only cement from binders. Just keep in mind that there are also cementless varieties of foam blocks made on the basis of lime.
- Like gas silicate, this material is also more of a heater than a structural material. Foam blocks, in which there is no cement at all, are used for the construction of interior partitions. They can also be plastered, but only there should be no cement in the solution.
It must be noted that the best option for leveling walls made of gas and gas silicate blocks, lime foam blocks, as well as silicate bricks, silicate plasters are used. But since they contain liquid glass, and they are very caustic, they are not used for residential premises - only in production workshops and on the facades of buildings.
The feasibility of using gypsum mixtures
The plaster inside the house, which has lime surfaces, can be made with a gypsum or lime-gypsum mixture. In principle, they are suitable for all types of foundations, but there is one thing, and it concerns walls built from cellular concrete.
Given their high vapor permeability, and the similar property of gypsum, it is not always advisable to use plaster based on it indoors:
- Here it is already necessary to consider the structure of the wall decoration as a whole, and oddly enough, you need to focus on the option exterior finish. For example, outside the cellular concrete walls will be monolithically lined with bricks, clinker tiles, or stone, or plastered over polystyrene foam.
- Due to their poor vapor permeability, these materials will lock moisture into the thickness of the walls, preventing it from escaping. In this case, only cement plaster should be used inside, or such decorative coating, which will become a barrier to steam.
- For example: if it is paint, then alkyd; if wallpaper, then vinyl or cork. Yes, the same tile or stone, any sheathing with insulation - all this will not allow porous walls to be saturated with moisture.
- In what case can the internal plastering of walls made of aerated concrete, or other cellular material, be done with a gypsum mixture? There are only two options here. The first is when the outer walls are leveled on the underlying base with plasters with a high degree of vapor permeability: silicate, silicone, special for cellular concrete.
- The second option is a ventilated facade. When there is an unobstructed outlet for steam and condensate on the outside of the wall, the internal plastering of the walls, as well as their finishing, can be done in any way. But note that if the facade is insulated, then the heat-insulating plates should be loose: soft mineral wool or the cheapest loose foam.

- Let's clarify this situation. Decorative plaster for interior decoration, most often made on the basis of gypsum. How to properly prepare a porous base in the case when the use of gypsum mixtures is undesirable. With cement-based blocks, there are no problems.
In any case, the base before decorative plastering should be leveled as for wallpapering. Therefore, the walls should first be leveled with a cement composition, and when it dries, decorative gypsum plaster can also be applied for interior decoration. You will learn more about this in the next chapter.
Internal plastering of aerated concrete
So, in our story, we came directly to the implementation of internal plastering works on aerated concrete walls. We will try to highlight the most important nuances this process, and for clarity, we offer you to watch the video in this article.
Nuances of preparation
Porous surfaces are characterized by the strongest moisture absorption, which must be reduced by priming. On aerated concrete walls, it is produced more abundantly than, for example, on brickwork. To do this, you need to take not just an adhesive primer, but a composition deep penetration.
Important! Primers are ready-made, and they are concentrated - that is, they are diluted with water in a proportion determined by the manufacturer, which must be observed. You should not think that if you apply undiluted primer, it will be possible, for example, to reduce the number of passes. The composition must have a normal concentration.

The first layer is applied liberally, preferably with a spray gun. You can also take an ordinary garden sprayer for this purpose, with which trees are sprayed. After the aerated concrete wall dries slightly after processing, another layer is applied, after which the surface should already dry completely.
Double impregnation significantly reduces the absorbency of the wall, but does not eliminate it completely. Yes, this is not necessary - otherwise how will the solution stick to the surface? The surface of the gas blocks is very smooth, and for plaster it is necessary to ensure good adhesion. It is impossible to make notches, as on heavy concrete. How to get out of the situation?
How to make the plaster coating as durable as possible
After priming, task number two is the reinforcement of surfaces. This is necessary not only for the best adhesion of the layers, but also to prevent the appearance of cracks.
This is especially important when the walls are built from gas silicate, which contains five times less cement than in gas blocks. The strength of such a base is rather weak, and plaster, even gypsum, will be more durable and will work to tear off.
- Your task is to make a strong layer between the base and the plaster, which will provide them with the best adhesion. Therefore, no matter what type of plaster you use, the starting layer must be made with an adhesive mixture, which is intended for the installation of cellular blocks.

- To create a reinforcing layer, ordinary tile adhesive is also suitable. Many craftsmen, due to the lower cost than that of the masonry mixture, prefer to use it. Why do I need an adhesive composition, and not just plaster?
Note! The fact is that the adhesive compositions are always modified with polymeric additives, which not only adhere, but tightly glue the surfaces. The layer of glue is thin and durable, fiberglass mesh is still embedded in it. It is not only an excellent base for plaster, but also securely fixes the blocks, preventing microcracks from appearing and expanding.
- A similar approach to preparatory work is especially important when home-made solutions are used for plastering. In them, unlike the factory ones, specially designed for gas blocks, there are no improving modifying additives, as well as fibers that reinforce the plaster in bulk.

- There are no words, factory mixtures solve all problems, but due to the high cost, they are more often used for facades. On internal plaster, which is not exposed to such influences as on the street, you can save money - you just need to do it wisely. If you do not want to have problems in the near future, the adhesive layer must be done anyway.
- Installation of the grid, in principle, is not necessary, and is carried out by craftsmen at the request of the owner of the house. But the customer must know that the creation of a reinforcing layer only improves the quality: both of the plaster and the base - after all, no one knows what shrinkage processes will occur in the soil.
- It’s better to be safe and spend a little on the grid than to incur the cost of a complete repair in the future. We especially advise you not to neglect the mesh when the walls are being prepared for painting - after all, any crack on them will be immediately visible. Under thick wallpaper, or tiled lining, cracks are invisible, but the task is not to hide them, but to prevent them from appearing.

- There is nothing complicated in mounting the grid, and you will see this in the video presented in our article. The canvases are overlapped on the freshly applied adhesive solution, and then pressed in, combing with a notched trowel. The use of such a tool is very important, because thanks to it, scallops from the extruded solution remain on the surface of the grid.
- When they dry, you get a beautiful relief surface on which you can apply any plaster. First, the mesh is pressed into the adhesive layer with chaotic movements, trying to press it as tightly as possible to the base. If the usual leveling plastering will be performed on the walls, in the end, you need to make a horizontal comb.
- This is necessary only so that the plaster, which at the next stage will be applied to this surface, does not slip off the wall. Well, under decorative plaster - if it is it that will be used for interior wall decoration, the base must be smooth. In this case, the relief is not left, and the solution on the grid, squeezed out with a notched trowel, is smoothed out.

When can I start plastering directly? Let's just say that doing it right the next day is undesirable.
Even if the surface seems dry, the cement adhesive layer has not yet gained sufficient strength. It is not scary if gypsum plaster is applied to it. If it is a cement mortar, then the adhesive layer must be given at least five days - and preferably a week, for strength gain.
Low-rise construction using gas silicate blocks has become widespread in all climatic zones our country. The unique properties of the material, which we will discuss in detail below, make it possible to build aerated concrete structures in hot regions and in places where negative temperatures prevail. However, directly construction works- only half the battle. The comfort of further living in the house, its durability and the preservation of operational characteristics depend on the competent finishing of the facade and the inner surface of the walls. One of the main stages is the plastering of aerated concrete walls inside the premises. Let us consider in more detail the technology of the finishing process and the nuances that affect the quality of the final result.
Features of plaster on aerated concrete
To figure out how, when and how to properly plaster aerated concrete, it is necessary to study the properties of the building material itself. Features of wall plastering are associated precisely with the unique characteristics of gas silicate blocks.

Initially, aerated concrete was developed as a material that is used to insulate buildings. Therefore, research was carried out in the direction of creating a porous structure, which, as is known, provides maximum thermal insulation.
As a result, two varieties have emerged:
- foam concrete, the porosity of which is achieved by forced mechanical foaming;
- aerated concrete, in which gas bubbles are formed by adding aluminum chips that react with the main composition (hence the name of the material).
In the process of creating blocks, gas bubbles tend to the surface, punching their way through the thickness of the mixture. Therefore, the cells in the structure of aerated concrete are not isolated, but represent a kind of system of interconnected channels. This is due main feature material, due to which the technology of finishing gas silicate is significantly different from other building materials. This difference is vapor permeability. Aerated concrete perfectly conducts saturated water vapor through its structure. At the same time, it has an increased hygroscopicity, that is, it is able to quickly absorb moisture and retain it inside for a long time.
Based on the foregoing, the fundamental principle of plastering for aerated concrete walls looks like this: water vapor must be able to freely remove from the thickness of the walls or should not penetrate at all. Failure to comply with this approach is fraught with the appearance of serious problems in the cold season: at negative temperatures, the moisture inside the blocks will freeze, and the material will simply “tear”: cracks will appear, shedding will begin, not only the appearance will deteriorate sharply, but also thermal insulation characteristics. To prevent this from happening, an integrated approach to the choice of options for external and internal decoration of the building is necessary.
We immediately answer the question: is it necessary to carry out outdoor work? Definitely yes, because:
- the impact of environmental factors on the porous structure of the material will lead to accelerated erosion;
- the aforementioned structure, consisting of practically through microchannels, makes the material sufficiently ventilated by air currents, which creates discomfort when living in a house in cold windy weather;
- insufficient mechanical strength of the exposed material makes it vulnerable to accidental impacts and other force impacts;
- a finished wall clearly has aesthetic advantages over unfinished masonry.

Dependence of internal plaster on facade finishing
To clearly demonstrate the reasons for the need to choose the material for interior work in accordance with the design option outer surface walls, consider the main characteristics of various types of aerated concrete. For ease of perception, we will form a summary table of parameters:

From the above data, it can be seen that even the most dense and durable brand of aerated concrete has high rate energy saving (the value of the thermal conductivity coefficient of 0.15 was compared with that of natural wood, traditionally considered the standard of warm materials). At the same time, vapor permeability remains at a significant level for all grades of gas silicate.
In the process of human activity in the interior, moisture is constantly released into the air. In addition to the usual breathing of the inhabitants of the house, there are economic processes, including washing and drying clothes, washing dishes, and high humidity in sanitary facilities is their inherent property. As mentioned above, excess moisture must either be freely removed through the gas silicate walls, or not reach the surface of the material at all.
If a special vapor-permeable plaster is used for outdoor work, then a similar composition must be used inside. As a result, the overall vapor conductivity will practically not change compared to the initial characteristics of aerated concrete, and the aesthetic appeal and wear resistance of the structure will increase significantly.

Ventilated facades
An alternative option for external finishing, in which vapor-permeable plaster is also used for internal work, is the creation of ventilated facades. This technique provides for the equipment of a ventilation gap between the wall surface and a layer of finishing material. The most common examples of such options are siding or brickwork trim. The creation of ventilated facades provides for the possibility of additional external wall insulation, but here it is also necessary to use materials with appropriate vapor permeability: mineral wool is quite acceptable, while foam and extruded polystyrene boards are categorically unacceptable.
Other finishes
Other materials for facade design (traditional plaster compositions, adhesive bases for decorative stone, porcelain stoneware, etc.) violate the vapor permeability of aerated concrete, so internal work should also provide maximum vapor barrier. In such cases, it is advisable to use special hydrophobic primers and finishing materials based on sand with cement, and the thickness of the plaster should be much larger than for the compositions used while maintaining the ability of the walls to pass water vapor.

With this method of finishing, the room must have a well-thought-out ventilation system. Otherwise, constant humidity will lead to multiple manifestations of fungus and mold.
materials
The above recommendations help to solve the problem of choosing budget options for interior decoration. Which is better: plaster or drywall? The vapor conductivity coefficient of the densest aerated concrete is 0.16, and the same indicator for gypsum sheets = 0.07, which is more than two times less. Therefore, it is recommended to use drywall only in the case of arranging deaf vapor barrier external facades; to create a ventilated structure, it is necessary to use plaster mixtures for aerated concrete surfaces inside the house.
With regard to the kitchen, bathroom and bathroom in houses made of gas silicate, the question often arises: is it possible to lay tiles? The answer is similar: since the vapor conductivity of ceramic products is close to zero, such a finish is acceptable with a hydrophobic design of the walls from the outside.
How to plaster aerated concrete
Having dealt with the features of the technology, let's move on to the choice of the finishing material itself. With today's variety of building mixtures, it is not difficult to decide what to plaster with.
Most branded manufacturers of building materials produce compositions for working on aerated concrete. Of the most popular, AeroStone, Bonolit, Ceresit or Knauf plasters can be distinguished. Vapor-permeable plasters are somewhat more expensive than conventional ones, so when deciding which one is better, the financial side plays an important role.
Before buying, be sure to read the product description and make sure that the mixture you are purchasing is really intended for working on aerated concrete.
Wall preparation

So, is it necessary to plaster - figured it out, with suitable materials decided, let's get to work. gas silicate blocks have standard size and are laid in perfectly even rows, so the preliminary leveling of the surface requires minimal effort and time. Usually it is done using grout nets or sandpaper.
The next step is a primer for plaster. This procedure must not be skipped, because otherwise the finishing material will not adhere well to the walls or crack quickly during operation.
Plastering process
Next, we move on to the finishing work itself. The technology of how to plaster aerated concrete walls indoors is not much different from similar work on any wall base and is easily done by hand:
- vertical beacons are installed along the width of the rule;
- preliminary puttying of the walls without plaster is carried out to fix the fiberglass mesh.

Do you need a grid
We will devote a separate section to this aspect. Plaster is a rather fragile coating. Therefore, at the slightest shrinkage of the foundation, cracks may appear on the surface, despite the monolithic reinforcing belts and other strengthening of the structure. To avoid such phenomena will allow the laying of a special mesh made of materials that are resistant to an alkaline environment. Strong fibers reinforce the surface and prevent cracking.
Despite the additional acquisition costs, the answer to the question - is a grid needed - is unambiguously in the affirmative.
If you want the finish to last for a long time, do not start work immediately after construction is completed. The house needs to stand for at least 6 months, and preferably 1 - 1.5 years. This will allow aerated concrete to reach optimal moisture levels, and the foundation to undergo final shrinkage.

We continue the plastering process:
- we throw a layer of plaster from the bottom up over the cultivated area;
- focusing on the beacons, level the surface;
- we dismantle the beacons and close up the places of their fastening;
- after drying, we finally overwrite the walls.
Instruments
The list of necessary tools is small:
- sandpaper and grout meshes;
- long profiles for beacons;
- brush or roller for applying a primer;
- container for diluting the plaster mixture;
- spatula for application;
- rule for leveling the surface

putty
If further painting of aerated concrete is planned, after plastering it is recommended to carry out finishing puttying. This will improve the adhesion of the paint to the surface and increase its life. To carry out the operation, use special compounds for puttying aerated concrete, sold in building supermarkets.
Often, developers have a question about how to plaster aerated concrete outside. Before starting work, it is recommended to determine the important characteristics and, based on this, select best option finishes.
Aerated concrete plaster must meet the basic requirements - the mixture adheres tightly to the surface and has good adhesion. The finishing layer is durable, frost-resistant, while it has the desired level of vapor permeability and water repellency.
When to do plaster work
External plastering is recommended to be carried out after completion of finishing work in the building. It is generally accepted that if you do not protect the surface of gas blocks from the street, it will absorb moisture. This is not so, primed walls can stand without a protective layer for the whole winter, when the climate changes in spring, moisture from the surface will evaporate. Otherwise, when the house is processed from the facade, the evaporation vapor will be directed inside the room, which will lead to dampness.

Note! An exception is the option of building a house on the coast of the sea or a reservoir. When it is required to protect the outer walls from the influence of a humid climate and winds.
Before plastering, the walls of the gas blocks should dry well. If during the construction process a cement mortar was used, which has the ability to absorb moisture. For this reason, exterior decoration during the rainy season will not be effective. But especially dangerous for walls is cold water which then turns into ice. In the process of melting, the structure of aerated concrete begins to collapse.
Facade insulation
If the building is properly insulated, then you can heat the room faster and save money on paying for heating. Insulation from the outside is recommended to be done with mineral wool, polystyrene foam, polystyrene foam or other options. For example, the insulation and plastering of the facade of a house can be replaced by building an additional brick wall or treated with liquid polyurethane foam.

Types of plasters
There are several types of plaster that are suitable for processing aerated concrete walls. There are certain requirements for the composition of the mixture for outdoor work.
- The material must be permeable and at the same time its coefficient must be higher than that of the treated surface - aerated concrete or sealant.
- The plaster must be resistant to frost and temperature changes.
- To prevent cracking, the applied layer must be elastic.
- The plaster must have strong adhesive properties with aerated concrete.
Mineral
How to plaster aerated concrete walls? Professionals and private builders recommend the use of mineral-based plaster compositions. They are among the thin-layer compositions specially designed for finishing aerated concrete. Such solutions are made by hand, they have an affordable cost, good vapor permeability and low weight.
The finished compositions include the following components:
- lime;
- white cement;
- marble chips and other fillers.
The color palette of such plaster mixtures is limited. They can be easily dyed, the only caveat is the use of vapor-permeable coloring compositions. Painting is able to protect the coating from moisture, because a humid environment can destroy mineral plasters.
silicate
The basis of this type of building plaster is potassium liquid glass, which is a binding component.

Advantages of the silicate mixture:
- Ease of application;
- Resistance to moisture influences;
- Vapor permeability;
- If necessary, painted in any color;
- Acceptable price;
- Long service life (up to 25 years);
- decorative qualities.
Silicone
plastering aerated concrete blocks better than facade silicone plaster. It has high technical and operational characteristics, surpasses other plaster mixes.
The advantages of silicone plasters include:
- properties to repel water;
- building material is easy to apply with your own hands, without the involvement of specialists;
- plaster has a high degree of resistance to atmospheric phenomena and vapor permeability;
- Long service life;
- Fillers have a different texture;
- The material is elastic.
Acrylic
The material has high decorative qualities and durability. Big minus acrylic plaster for processing aerated concrete and other cellular textures, is a low level of vapor permeability. For this reason, condensation forms in the inner layer of the plastered surface. As a result, with such an impact, deformation of the surface occurs - peeling and cracking.

Cement-sand
Cement plaster is not suitable for the treatment of external aerated concrete surfaces. For what reasons this popular building material is not suitable:
- The solution is not fixed on the smooth surface of aerated concrete due to insufficient adhesion properties. The mixture has a high density and high weight;
- When applying cement mortar to the surface, aerated concrete absorbs moisture, and the adhesion of materials is weakened. As a result of such rapid drying, the integrity of the layer is destroyed;
- Low vapor permeability of cement mixtures - non-compliance building codes, and violation of optimal microclimatic indicators in residential premises.
If cement plaster is used for interior work, it will protect aerated concrete walls from steam penetration.

Important! Expanded polystyrene and polystyrene are not recommended for use on aerated concrete surfaces.
Gypsum
The plaster in the base, which includes gypsum, has the following positive qualities:
- dries quickly;
- the solution does not shrink;
- the mixture lays down smoothly;
- no top coat required.
Cons of plastering walls with gypsum:
- average level of vapor permeability;
- more water is required compared to special mixtures, approximately 10-15 liters per 1 bag of 25 kg;
- the surface will quickly get wet after rain and snow;
- spots appear on the surface that need to be painted over.

facade
The mixture is most effectively suitable for processing both exterior walls and indoors, the material is easy to apply with your own hands. Plaster has a number of positive qualities - good adhesion to the base, attractive appearance. Including the material has vapor permeability indicators identical to those of gas blocks. When choosing plaster for the construction of aerated concrete, it is better to choose a high-quality special mixture, this will simplify the process of finishing the house.
If there is a choice of plaster or drywall, which is better for aerated concrete inside the house. The following facts should be taken into account: the walls made of gas blocks are even, and they do not require alignment. Accordingly, the plaster will cost less, the solution will lie in an even and beautiful layer.
Self-finishing
We plaster aerated concrete from the outside with plaster intended for outdoor use. There are two options for applying the mixture - a thick layer or several thin layers, which are applied no more than 3 layers and no more than 1 cm each.
Work order:
- the surface is prepared for plastering - pollution is removed;
- then you should do the hanging of the surface with your own hands along the beacons;
- spray is applied - the first layer of plastering;
- primer is applied and leveled;
- cutting corners;
- slope finishing;
- a covering layer is applied;
- the surface is rubbed off.
Technology of work outside
- If necessary, a heater for blocks under plaster is mounted.
- Wall preparation - leveling the surface to reduce the consumption of materials and the thickness of the application.
- Before proceeding with the plastering of the walls, aerated concrete must be treated with a primer. For this, compositions designed for the fine-mesh structure of materials are used.
- Application of a thin layer of plaster mixture for aerated concrete surfaces - up to 5 mm. This base will serve to attach the mesh.

It should be noted right away that plastering aerated concrete blocks from the outside with adhesive solutions is unacceptable. Because glue won't do the job. In order to protect and level surfaces, it is recommended to use specially designed mixtures that meet all operational requirements.
When plastering aerated concrete facade, it is recommended to follow some rules, which are described below.
- after the building is erected, it is necessary to withstand a certain period of time so that the internal moisture evaporates naturally;
- the brand of plaster must be suitable for outdoor work;
- the sequence of repair work - first inside the house, then outside;
- the temperature regime must correspond to +8 to +30 C0 - for exterior decoration;
- Construction rules to be observed in relation to the increase in thermal conductivity coefficients. Each mounted or applied material on the gas block should be taken into account.

Reinforcement
When asked whether it is necessary to reinforce the plaster, and whether a mesh is needed. The answer is simple, since the plaster layer of the aerated concrete coating can vary from 5 to 15 mm. If the layer exceeds 10 mm, a metal mesh with a fine mesh texture is used as a reinforcing layer. For example, a mesh with a wire diameter of 0.1 mm and a mesh size of 0.16 x 0.16 mm, or fiberglass meshes with cells of 5x5 cm, is suitable.
It is necessary to mount the grid with an overlap of 5 cm; perforated corners with a grid are used for the corners of the house. This method will help prevent the formation of cracks in the plaster after shrinkage of the building. It is better to install the grid in the applied solution with a spatula. Especially important point is the installation of the grid in places with an increased level of voltage - the area of \u200b\u200bwindows and doors.
Advice! If you attach the mesh to a dry surface, the result will be zero. Because the grid needs to be fixed to the wall with self-tapping screws, and then apply a layer of mortar. Otherwise, an unfixed mesh will move along with the putty.

Work order:
- Align the plaster layer on the grid with a vapor-permeable plaster.
- It is necessary to wait until the first layer is completely dry. Otherwise, it will fall off under the weight of the next layer. This technique provides for thin-layer application of the mixture. Wait for complete drying will have from three to four days. Accordingly, the thicker the layer, the longer it takes to dry. Checking whether the surface is dry is carried out with water. Having splashed liquid on the surface, it was quickly absorbed - this means that it is time to proceed to further work.
- A second layer of plaster is applied, which is considered leveling. Therefore, the layer must be even and smooth;
- The third finishing layer of plaster is applied, and if necessary, it will require subsequent grouting.
- Painting the surface, materials for outdoor use or applying putty.
- Hydrophobic treatment. Experts recommend applying this solution 12 months after painting and completing all facade cladding work. The water repellent gives any coating additional water-repellent properties.

Note! When the plaster layer dries, it must be protected from the influence of such undesirable factors. environment like moisture, snow, rain.
putty
When deciding whether to putty aerated concrete, it is recommended to learn about the types of building mixtures. There are 3 types of product variety on the market, which is designed for finishing. By and large, this is a facade plaster intended for thin-layer finishing of an already plastered surface, differing only in composition. Ready mixes are sold in buckets and come in silicate, silicone and acrylic.
Important! When performing work on plastering a house outside, it is recommended to use only steam-permeable building materials. This will provide not only a reliable finish, but will serve as a decoration for the building.
One of the popular wall materials used for the construction of private houses is aerated concrete. But despite its fame, very often fatal mistakes are made at the stage of finishing an already built house, due to which the natural microclimate of an aerated concrete house is disturbed. And before proceeding to a detailed description of the process of processing the facade, you need to understand why such misconceptions are born, how to avoid them, and what kind of facade plaster for aerated concrete should be.
A little about aerated concrete
To understand the issues of finishing, let's move away from this topic a bit in order to understand how important it is to do everything right and what affects the cladding technology. To do this, you need to plunge into the technology of block production. And if you briefly state its description, then in the finished cement - sand mortar special additives are introduced, the result of the reaction of which is the formation of a porous structure. If we consider in more detail the body of gas silicate concrete, we can see not only microvoids, but also a lot of tubules that dot them, forming an “open” cellular structure, which has a lot of positive properties, such as:
- high heat capacity. It is provided not only porous body blocks, but also their exact geometry, which allows the use of a minimum butt joint from a special adhesive composition that does not allow the formation of "bridges" of cold;
- noise isolation;
- not susceptibility to various fungal formations;
- The "open" structure of the concrete creates a unique atmosphere inside the building - it will keep you cool in summer and warm in the cold season. But if you break this natural system vapor permeability, for example, illiterate plaster walls made of aerated concrete, then the house will be stuffy, and condensation will begin to accumulate on the walls, which will lead to mold.
But the cellular structure of aerated concrete blocks also has certain disadvantages:
- a high degree of water absorption leads to the rapid destruction of the walls without the possibility of recovery. Therefore, special attention is paid to waterproofing;
- the structure, consisting of open pores, is very well ventilated, which makes the house quite cold, even despite a good heating system;
- the heterogeneity of the body of blocks, even of the highest density, makes them susceptible to mechanical stress, which are imprinted in the form of large chips and potholes.

But is it necessary to plaster aerated concrete blocks or is it necessary to install a more solid cladding? Of course, the ventilated facade system is an ideal option for decorative wall protection, but if you choose the best way to plaster aerated concrete outside and follow the technology, then this finishing method will be no less effective.
When is the best time to plaster gas silicate walls
Aerated concrete belongs to the family of cellular concrete, so it has some of its general properties, namely shrinkage. This phenomenon is inevitable, and if finishing is done earlier than six months later, then its cracking is inevitable.

But as we remember, aerated concrete does not like water, therefore, after the walls are erected, rhinestones need to be treated with a deep penetration primer, which reduces water absorption. For reinsurance, you can cover the walls with polyethylene.
The rest of the plastering is best done in the summer, but if the planned finishing falls on the colder period of the year, then it is allowed to be carried out when the temperature at night does not fall below 0 0 C.
The quality of the erected structure of aerated concrete directly depends on the sequence of production of finishing outside the premises and inside. Consider possible methods, analyzing their advantages and disadvantages.
Method 1 - parallel plastering inside and outside the house
The production of such a finish is very convenient from a technical point of view, and saves a lot of time. But if we consider this method from the other side, then it is less preferable, since the quality is lost and the characteristics of the newly built house suffer.
Any technology for plastering walls made of aerated concrete implies significant evaporation of moisture. Of course, most of it will be weathered with the help of natural and artificial ventilation, but the bulk of the moisture will fall on the walls. Simultaneously carried out plaster from the outside will clog it for a certain time, which is undesirable.
Method 2 - when the exterior finish is carried out first
It is more logical to initially finish the walls of aerated concrete from the outside in order to prevent their destruction under the influence of atmospheric phenomena. But this is not entirely true, if this is done, then the vapors will be directed inward, which is highly undesirable.
But even overwintered primed walls will easily give up moisture and all vapors in the spring, without destroying the structure. But if a house is being built near a body of water, then priorities change, and under such circumstances, you first need to protect the walls from the street from exposure to abundant moisture.
Method 3 - when interior decoration is carried out first
Of the proposed options, this one is the best, because the volume of moisture formed during the finishing will freely come out through the non-clogged pores of aerated concrete. After the plaster is completely dry, you can safely proceed to the cladding of the facade.
Treating the walls with a deep primer with this method of finishing will not interfere with the removal of excess moisture.
What mixture to prefer as facade plaster
The building materials market is replete with a huge range of plaster mixtures intended directly for the processing of aerated concrete. If you believe the manufacturers, then they are all the best in their field. But this is far from true. The characteristics of the main groups of plaster compositions summarized in the table will help you decide.
| Type of plaster | Advantages | disadvantages |
| Silicone blends based on organosilicon polymers | resistance to water absorption; does not deteriorate under the influence of precipitation; high level of vapor permeability; easy to apply | high price |
| Silicate plaster based on liquid adhesive glass | hydrophobicity; low water absorption | unaesthetic appearance after dust settling; limited choice of colors |
| acrylic blend | high strength; good decorative qualities | flammability; low vapor permeability. But this can be corrected by using enhanced protection against moisture and organizing the ventilation system of the room with power. |
| Mineral plaster: lime-sand; cement-sand | resistance to temperature extremes; good adhesion; resistance to cracking; vapor permeability; low cost | does not have high decorative qualities |
All vapor-permeable plaster, except for mineral, is available as a ready-mix. In this regard, when studying the characteristics of various types, pay attention to the setting time. The longer it is, the easier it will be for beginners to apply the mixture.
But still, the preparation of a conventional cement plaster composition is much more profitable from an economic point of view. Therefore, all inexperienced builders are tormented by the question: “is it possible to plaster aerated concrete cement mortar? The answer is unequivocally no, for the following reasons:
- low adhesion with a gas silicate surface;
- high humidity, which is detrimental to such cellular walls;
- low coefficient of vapor permeability, which will not allow moisture to escape.
Some craftsmen even contrive to mix concrete with stucco for profit. But instead they get a lot of problems and the need for large funds to correct the consequences.
Self-finishing the facade with plaster
There is nothing clever about how to plaster aerated concrete as competently as possible. Next is the matter of technology. Plastering can be carried out using several technologies:
- thin layer;
- thick layer.
There is no particular difference in them, the choice is yours, depending on which way it will be more convenient to apply the plaster.
Training
In both cases, before finishing, you need to prepare the base.
Stage 1. The walls are cleaned with a stiff brush from dirt.

Stage 2. Defects in masonry joints are eliminated with an adhesive composition.
Stage 3. If there are potholes in the blocks, they also need to be “patched” with the same masonry adhesive or mounting foam.
Stage 4. Beacons are mounted on nails - a profile along which alignment will occur.
Stage 5. The base of the walls is primed with a hydrophobic composition with a surface 2–3 mm thick.
Stage 6. After it dries, a composition for a 5 mm reinforced cloth is applied.
Stage 7. A reinforcing mesh (fiberglass or metal) is fixed on the walls with an overlap of 5 cm. It is better to do this with a solution than with self-tapping screws. Since in the first case, the grid will become one with the wall and, accordingly, will “sit down” together with aerated concrete, preventing the appearance of small cracks in the plaster layer. By the same principle, plastic corners are installed and fixed. Only after the reinforcing plaster has dried can it be continued.

Thick plaster surface
When carrying out plastering using this technology, it is implied that one layer is applied, sufficient to perfectly level the wall - at least 10 mm.
Stage 1. Dilute the plaster mixture in a small amount.
Stage 2. The composition is thrown onto the walls.
Stage 3. The plaster is aligned with the beacons by the rule.
Stage 4. After plastering the entire surface of the walls, wait until it is completely dry and only after that you can paint as desired.

Thin-layer plaster surface
Plastering walls using multi-layer technology is also not difficult and is more suitable for beginners.
Stage 1. The first layer is applied in 3-4 mm on aerated concrete. Only after it has completely dried can you continue further.
Stage 2. The applied plaster is considered to be leveling, so special attention should be paid to evenness. Again, we are waiting for complete drying - about 3-4 days.
Stage 3. The final step is to cover the finish surface, which can then be rubbed down if necessary.
Stage 4. After the previous application has dried, the walls can be painted.
To increase the life of the plaster, it is necessary to treat it with a water-repellent solution. It will extend the life of the plastered surface by almost two times. Especially the use of such compounds is relevant in areas with high humidity.
As you can see, plastering the walls yourself is not so difficult. In the first 10 m 2 you will develop your application style, after which the process will go much faster.
TagsIncreasingly popular in Russia suburban construction. For this, blocks made of aerated concrete are used. Many Russians are attracted by their low price and good building characteristics. Outwardly, aerated concrete blocks resemble porous rock, but have clear shapes with a smooth surface.
They are characterized by poor moisture resistance. To get rid of this serious drawback, aerated concrete walls are covered with a layer of plaster.
Those who decide to acquire a house from this material should know that in order to create a normal microclimate, it is necessary to choose the right components of the plaster and the thickness of its layer applied to the walls.
Aerated concrete blocks
Such blocks are most suitable for low-rise construction. The walls erected from them have a number of significant advantages, for example, a small specific gravity, which ensures a higher construction speed and reduces the labor intensity of work.

Due to the porous structure of aerated concrete blocks, the microclimate in the building can be compared to the atmosphere wooden house. This is another property that makes aerated concrete popular. The material has excellent sound insulation.
It is believed that aerated concrete walls breathe. They let oxygen into the house, releasing water vapor and gases from it, formed by the natural processes of human life.
Like any other material, aerated concrete blocks have some disadvantages. The main one is the low parameters of the bending strength of the material, therefore, when building a house, these features must be taken into account. The foundation of the house must be monolithic, so the masonry must be reinforced with reinforcement through an equal number of rows. These works make it durable and more reliable.
The sequence of finishing works
It should be noted that they have a very high vapor permeability. In this they differ markedly from brick and foam concrete. Plastering of aerated concrete walls should be carried out taking into account the individual characteristics of the material.
Aerated concrete was originally used as a heater, and only after some time they began to build outbuildings and residential buildings from it. If there are enough blocks, then additional insulation no need. As for finishing, the interior walls of the house are finished first, and then the facade.
Many builders do the opposite. Taking advantage of the good weather, they perform on the facade of the house, and then proceed to its interior decoration. Plastering aerated concrete walls in this order is the most common and rather gross mistake that can lead to peeling of the finish from aerated concrete and the formation of numerous cracks.
Internal finishing works

Moisture is the enemy for any design. Aerated concrete walls are no exception. Water falling on them penetrates the porous structure of aerated concrete. Through the walls, it does not get inside the building and cannot damage interior decoration, but reduces the protective characteristics of the house. Water from the pores of the material evaporates very slowly, and if the weather is rainy, then this process simply stops. Moisture accumulated inside the walls of aerated concrete significantly limits its natural ventilation and thermal insulation parameters. Plastering aerated concrete walls on both sides will help to avoid inconvenience. In addition to the protective function, it will also perform a decorative one.
There are several methods for finishing aerated concrete walls. The most common and affordable is plastering, which belongs to the technology of finishing vapor-proof materials.
The plastering of internal walls is not much different from ordinary finishing works. Before they begin, the wall must be well prepared. It is cleaned, leveled, and then a primer layer is applied, which must dry completely. Only after that you can start finishing work.
There is also mechanized wall plastering. When finishing in this way, the mixture lays down in a dense and even layer, but it is quite expensive and many Russians cannot afford it.
Finishing mixes
Manufacturers produce various ones. Their choice depends on the purpose of the room. For finishing a small living room, a standard mixture is used. Walls in rooms with a high percentage of moisture after finishing work are covered with a special primer, which perfectly resists the influence of water.
Novice home craftsmen need to know that the plaster applied to the aerated concrete surface must meet certain requirements. Some features of the material itself affect the finishing of aerated concrete walls. The blocks are strong, smooth and fit perfectly to each other at the joints, and this complicates the fixing of the mortar on the wall surface.
One of the main ones is vapor permeability. Simply put, the material must take and give away excess or missing moisture.
If the mixture is not properly selected, the following defects may occur:
- The appearance of cracks on the internal and external surface of the building.
- When the surface of the wall gets wet, a masonry silhouette may appear on it, which will disappear after drying.
- Increased humidity in the rooms of the house, the appearance of an unpleasant odor.

The most popular plaster based on gypsum. It is easily diluted and after application and drying forms a smooth matte surface. The disadvantages include poor vapor permeability. Because of this, when precipitation occurs, the surface of the walls quickly gets wet, which dry for a long time. Sometimes yellow spots may appear, traces of which can only be painted over.
The most expensive and most effective is acrylic facade plaster. It is only used in conjunction with fiberglass. It has good adhesion, vapor permeability and excellent appearance. The disadvantages include the fact that only an experienced craftsman can work with this mixture. Only he can create a perfectly flat facade of the building.
How much does wall plastering cost? The price depends on the cost of mixtures and ranges from 236 to 550 rubles per 1 m². An important role is played by the manufacturer and the volume of containers.
The plaster must first be applied to the wall and only after an hour to start leveling. Next, the mixture should dry out during the day. The second layer, which makes the wall perfectly even, is applied to the already dried surface slightly moistened with water. After complete drying, the wall can be painted with a special paint for aerated concrete blocks. Remember that plastering interior walls is a demanding job that requires full concentration and patience. Only then will you get the expected final result.
Developers need to remember that you should not save on building and finishing materials. Cheap aerated concrete blocks made in a handicraft way will not be saved even by very high-quality plaster - it simply will not be able to gain a foothold on them.
Facade finishing
It is necessary to plaster the surface immediately after the construction of aerated concrete walls in order to protect the walls from all external factors. Otherwise, under the influence of temperature differences and precipitation, cracks form.

Cement plaster walls in this case will not work. Outside, aerated concrete walls are finished in the following sequence:
- The facade is cleaned of dirt and dust.
- A special primer for cellular concrete is applied.
- An armored mesh made of fiberglass is attached.
- Porous plaster is applied to the walls.
The reinforcing mesh is attached with self-tapping screws. When choosing it, it must be remembered that the mesh must have sufficient resistance to the effects of an alkaline environment. If this is not observed, then during the finishing work, the mesh may dissolve under a layer of plaster.
The mesh made of galvanized steel must be coated protective layer, after all, after a while, it collapses under the influence of corrosion.
Wall plaster gypsum plaster outside the building should protect it from the harmful effects of moisture, so the mixture must have water-repellent properties.
The material used for the construction of walls is gas permeable, so the plaster used must also comply with this parameter. And taking into account the harsh climate in most regions of Russia, it must be frost-resistant and have good compressive strength. To do this, manufacturers add protective synthetic components to the facade plaster, which looks like a dry mix.
Preparatory work
Plastering of walls with gypsum plaster is carried out after certain preparatory work:
- Walls under plaster are cleared of dirt and dust.
- Existing defects are filled with special glue.
- Plastic corners are installed on corners and slopes.
- Beacons are installed, which control the evenness of the walls.
- The wall is wetted with water.
Facade and internal plastering of aerated concrete walls must be carried out at a temperature not lower than +10 °C.
Solution preparation
Plaster mortar is quite easy to make. IN ready mix a certain amount of water is added. For optimal consistency, 0.2 liters of water per 1 kg of the mixture will be required.
The solution is thoroughly mixed. You can do this manually or use an electric drill with a special nozzle. After 15 minutes, the prepared solution must be mixed again. If the consistency does not suit you, then you can add more water or a mixture. The prepared solution should be used within an hour, otherwise it will lose all its properties.
Finishing work

The mixture is applied to aerated concrete walls with a trowel or a small straight thin board. Small sections of the wall can be leveled with a 30 cm steel trowel. High-quality, control leveling of the plaster is carried out with a ruler 80 cm long. Excess plaster removed from the wall surface can be reused.
If the estimated layer of plaster exceeds 7 mm, then the work on finishing the wall is carried out in two stages.
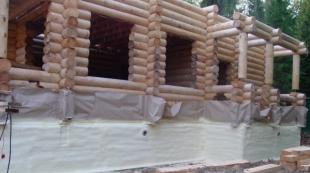
According to this scenario, work is underway to apply plaster on aerated concrete walls. Works should not pose unsolvable questions to the home master. The most important thing is to take into account the recommendations of experienced craftsmen and follow their instructions, then the developer will be able to protect his home from adverse consequences. Pay attention to the picture on the left - this is the plaster of the walls. The photo shows one of the moments of work.
Problems Caused by Improper Finishing
If during the work the rules were violated or the mixture was incorrectly selected, after some time various defects will appear on the surface of the wall.
They can appear as small cracks in the finished surface or swelling. Vertical cracks may appear on the facade, peeling of the plaster may begin.
Defects must be repaired immediately. This will increase the final cost of wall plastering and prove once again that it is necessary to use high-quality building and finishing materials from the very beginning.
Mechanical plaster walls
Mechanized wall plastering is the process of making and applying a mixture using special equipment. These machines greatly simplify heavy physical work. With their appearance, there was no need to perform Finishing work manually.

The machines not only facilitated the work of plasterers, but also raised the quality of the work performed to a new level. Even an experienced craftsman cannot always prepare a solution of a mixture of a homogeneous consistency, and then distribute it over the entire surface. The work takes place in stages: the solution is mixed, placed on the wall, leveled. As a result, part of the wall has already dried up, another has begun to dry out, and plaster is still being applied to the third. This does not guarantee the final high quality finish.
When mechanizing work, the plaster is applied evenly and quickly. The time spent on work is noticeably reduced. The machine applies the prepared mixture faster, which allows you to use larger rules. Aerated concrete wall is more even.
Mechanized wall plastering allows you to reduce the time to complete the work and save the amount of the mixture.
The advantage of mechanized plastering of walls and facades:
- Reduced plastering time.
- Savings on material cost.
- Loss of material is reduced by 5 times.
- High quality.
- The service life is increased.
Mechanical plastering of walls, the price of which depends on the amount of work, ranges from 300 to 580 rubles per 1 m². It guarantees a high quality finish. It all depends on the developer and his financial capabilities.
Outcome
aerated concrete Vacation home you can plaster yourself. You should correctly use the advice of experienced craftsmen, choose the mixture correctly, perform all the finishing work, adhering to the sequence described in this article. The result is a beautifully plastered nice house.