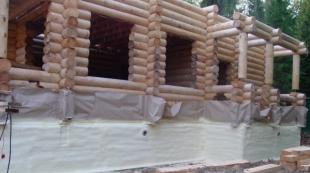
Do-it-yourself decorative plaster - we make it from ordinary putty. Types of decorative plaster for interior wall decoration We decorate the walls with plaster
Decorative plaster looks not only very attractive, but also significantly expands the possibilities of masters in interior design. The cost of the finished building mix for decorative finishes The walls are quite high, which significantly limits the possibilities of its use. In some cases, experts reveal their secrets of craftsmanship and show by examples that decorative plastering with their own hands is in no way inferior to ready-made solutions.
It is to such a master that I would like to express special gratitude for the understandable and accessible video instructions that allow us to implement various ideas for decorating the premises. The review includes the cumulative experience of the masters, which is collected in a separate publication. The recipe and tips will help you endlessly experiment with decorative design in any room where each wall can acquire a unique appearance.
Decorative plaster in different techniques
Versailles plaster from conventional mixtures
How to make decorative plaster with your own hands like the walls in the apartments of Versailles? It turns out that a similar texture can be achieved using the usual dry starting gypsum plaster and finishing putty, which, when mixed and applied, give an attractive texture with light inclusions of the middle fraction. This finish requires the use of acrylic varnish, metallic paint and glitter. A detailed master class from the REDecoration studio is shown in the video at the end of the publication.
The sequence of work on applying Versailles plaster:
- glue the perimeter of the future coating with plaster tape;
- prime the surface with quartz primer, which will ensure good adhesion and allow you to work with the model mass longer. For these purposes, Ceresit "Primer paint for thin-layer plaster and paint" is suitable;
- the model mass for decorative plastering is mixed with water in a 1:1 ratio of finishing putty and starting gypsum plaster. The manufacturer of the mixture is not important, but you can use, for example, G-Start and Satenpro dry mixes;
- the mixture is mixed with a mixer twice, the first time immediately after adding the mixtures, the second time - after the mass has stood for several minutes;
- plaster is applied to the wall with a layer of 2-3 mm using a spatula and trowel, making random stains to create the desired texture, special attention is paid to the corners and space near ceiling baguette and doors;
- the model mass is applied in an even layer on the wall, and then an additional “textured” layer is made using a plastic trowel, which creates the desired volume;
- after the plaster has dried, the resulting irregularities are smoothed out and sanded with a spatula, paint grater and sandpaper (No. 60), resulting in a beautiful smooth coating with a pronounced, but shallow texture;
- the next step is to apply a primer deep penetration, well smearing all the bumps and avoiding smudges;
- after priming, the surface is painted, for this white paint is mixed with any selected dye, it will take about 2 hours to dry this layer;
- with the next layer, the wall is painted with a metallic decor, silver is diluted on a primer in a ratio of 1: 1, then it is applied with a foam roller on the first layer of paint with light movements, without filling all the irregularities (pay attention so that there are no traces of the roller);
- the finishing layer of the surface is made with varnish with the addition of glitter. First, the varnish is diluted with water by 30% in order to avoid a varnish “peel” on the finished coating, then glitter is added at the rate of 1 tsp. per 1 liter During operation, the varnish must be stirred regularly in order to “lift” the settling sparkles.

Obviously, in this way you can make plaster in any color with a metallic paint finish of any shade and decorate with colored and plain glitter. You can also change the manner of applying plaster, creating different textures. The lacquer gives the coating a fairly high strength and protects the wall from fading in the sun; both matte and glossy lacquer coating can be used for coating.

Flemish plaster - two-tone tinted in mass
Working with Flemish plaster differs from the above Versailles and Venetian ones in the way it is applied and finished, it is also made from ordinary putty based on the model mass, the recipe of which is given above. The approximate consumption of such plaster is 80 g per 1 sq. m.

The key difference between this coating is that the finished decorative putty is tinted in bulk, that is, the dye is added to the plaster finish mixture, and not applied as a separate layer. In the video tutorial, yellow-brown and coffee plaster is used, which is applied with a large spatula on the prepared surface with movements “from yourself to yourself”, thus creating a beautiful two-tone texture.
At the next stage, the wall is smoothly smoothed with a trowel or spatula. It does not need to achieve perfect smoothness. The main goal is to mix two colors of plaster and get an interesting two-tone finish.
Flemish plaster is applied in three layers, using spatulas of different sizes, reducing their size from layer to layer. On the second and third - you can use a 20 cm tool. Subsequent layers are applied in such a way that a texture forms on the wall and irregularities form inside smooth surfaces. The size of the "islands" will depend on the volume of the mixture used in one putty application cycle. The more model mass is on the spatula, the larger “islands” of a smooth surface can be made on the wall. The last layer can be applied with a Venetian trowel according to the “press-smooth” scheme, in which case a different texture is obtained.
After applying the plaster, the wall is painted with a deep penetration primer. After complete drying, the plastered area is covered with azure using a trowel. The mixture can be prepared according to the following recipe (consumption 120 g per 1 sq. M):
- glue for non-woven wallpaper, diluted according to the instructions - 2 parts;
- panel varnish - 1 part;
- paint "Silver" - 0.5 parts.
In its structure, azure is a regular wax, which is covered with plaster as a finishing layer. Please note that the wax is not completely removed in the recesses, which results in a texture with areas of varying degrees of silvering. Instead of silver, mother-of-pearl or gold can be used to prepare azure, which allows you to achieve different lighting effects.
If desired, the wall can be additionally decorated with varnish, which will give the coating strength. For wet rooms, yacht varnish or waterproof facade plaster can be used.

Prague plaster
Prague plaster or, as some craftsmen call it, "Venetian fresco" is applied to a pre-tinted surface. To do this, facade paint and color are added to the soil. desired color. The main task is to make a colored base layer simultaneously with the application of the primer. When applying a primer layer, it is not necessary to achieve uniform "coverage".

In order to prepare a model mass of decorative Prague plaster, any acrylic putty is used, 1/10 of the sand and color are added to it (preliminary consumption of 1.5 kg per 1 sq. M). The first layer of putty is applied with a Venetian trowel, forming an uneven surface in the form of "islands". Due to the sand, a more voluminous texture and a rich finish are obtained.
The second layer of putty is applied to the wall by trimming with a trowel. Movements involve pressing the trowel with mortar against the wall in a chaotic manner. Please note that the required two layers are applied one after the other. First, approximately 1 sq. m of surface and the first layer is applied, then the same area is decorated with a texture by trimming.

In the same way, the next section is covered with a solution. After that, you need to return to the previous section and smooth the plaster "on the tops" with a 20 cm spatula, removing the remaining mortar from the tool. After about five minutes, the finished surface must be polished with a Venetian trowel, while not applying much effort. The degree of readiness of the coating for this operation can be determined by touching the hand, the putty should not stick to the fingers.
At the final stage finished surface painted after applying a layer of deep primer and its complete drying. For the finish coat, a special paint composition based on Venetian plaster, diluted with water (consumption 150 g per sq. M). Using Venetian plaster as a paint will result in a more interesting slightly shiny surface.
At the final stage, the lined surface is covered with a special wax for decorative plasters, this is done using a plastic wallpaper spatula. For these purposes, the so-called Parmesan blue can be used, which gives a very beautiful effect noble brilliance.

Decorative plaster for finishing facades and fireplaces - stone finish
The proposed method of decorating surfaces can also be used for finishing facades and fireplace portals, but other mineral fillers are used for these purposes. Dolomite plaster can be considered a good option for choosing a “stone-like” finish, but, unfortunately, its price is quite high for finishing the facade.

To reduce the cost of the initial decorative mixture, dolomite flour is used, which is added to a stylo-acrylic dispersion (UCAR™ Latex DC 640) for exterior use, which has a high water repellency, or an acrylic putty (Sniezka Acryl-Putz) for interior use. Dye, metallized filler, glitter or mother-of-pearl are also added to the finished material.
It is necessary to apply dolomite putty on the fireplace in two layers, first with an even layer with a large Venetian trowel, then make a drawing layer by trimming the surface, followed by smoothing with the same trowel.
The surface is lightly sanded with sandpaper No. 150, primed and then decorated with Venetian plaster. It is applied diluted with water like paint using a conventional roller. After application, the plaster is polished with a trowel.
The natural texture of the stone is always distinguished by shiny blotches, so the surface “under dolomite” is also decorated with a coating with a metallized filler. To do this, copper is added to the wax, it is applied according to the texture of the surface, bypassing the smooth areas of the cladding. At the final stage, the surface is waxed without glitter and polished with a soft trowel. Two-color stone-like plaster can be obtained using the Flemish application method described above. As can be seen from the examples, it is not at all difficult to make a decorative stone on any surface with your own hands and it will not cost much, and the effect will exceed all expectations.

Facade decorative plaster
After gaining experience in applying decorative plaster for interior work, the question arises about the exterior finish. For this purpose, you can use liquid glass, with which a waterproof version of the plaster is made:
- first, a primer layer is applied using a dilute solution of liquid glass;
- a model solution of waterproof (hydrophobic) plaster is mixed in the following proportions: a ready-made plaster mixture is used in a ratio of 7: 1 with liquid glass or a plaster is prepared 1: 2: 5 from liquid glass, cement and sand.
Video instructions for applying decorative plaster
In conclusion, we give examples of how do-it-yourself decorative plaster is made video using all the methods mentioned. Good luck. These examples will help you make expensive repairs in your home at a low cost.
Decorative plaster is a solution used for finishing walls outside public buildings and private houses, as well as inside apartments, offices and other premises. Its main purpose is to improve the aesthetic and decorative qualities of the surface. In the article we will consider all types of decorative plaster for walls.
The word "plaster" is of Italian origin and literally translates as "gypsum" or "alabaster". The composition of the plaster mixture for decoration has common components with ordinary plaster - sand, lime, cement, but its main difference lies in the addition of various granulates - dry bulk substances in the form of small granules, for example, stone chips, wood fibers, etc.

- Decorative plasters can be sold ready-made, that is, previously diluted with water or a special solvent, such mixtures can be used immediately for work. Dry components can also be supplied, which must be diluted according to the instructions before application.
- Depending on the end result and design ideas, you can independently add various fillers to decorative plaster: small pieces of mica, shells or small pebbles, which, after the plaster layer has hardened, will organically look on the wall. In addition, in this way it is possible to achieve the effect of additional surface volume.
Types of decorative plaster for walls
The surface can be decorated in various ways, for example, simple plaster can decorate a wall, giving it a perfectly smooth structure. Of course, thanks to the special composition, it became possible to obtain a relief effect, achieve a glossy surface or imitate any natural materials without much effort.
Decorative plaster is distinguished according to several principles. For example, according to the type of filler, it can be:
- textured;
- structural;
- Venetian.
The textured and structural appearance form a rough surface and they are usually called relief plasters, and the Venetian forms an ideal flat surface, therefore it is referred to as a smooth type of plaster.
All of these types are made on the basis of environmentally friendly substances, due to which they are considered safe, reliable and durable materials.
There are several types of plaster according to the binder used.
- Acrylic. The binder is a high molecular weight polymer (acrylic resin), which provides good elasticity of the applied layer. It may contain organic and inorganic pigments, due to which the composition acquires a different color. Acrylic decorative plaster is sold in the form ready mix. The disadvantage of this type of coating is low vapor permeability, so the material is limited in use. Also, plaster is exposed to UV rays, over time, the coating may begin to crack. Acrylic resin in the composition, allows you to paint the mixture in any desired color using pigment pastes.
- Mineral. The binder is cement. It has a relatively low price and is most often produced in the form of a dry mixture, which must be diluted with water before work. An excellent option for decorative plaster for bathroom walls and for outdoor use. In humid weather, slightly less water should be added to the solution. It is considered the most environmentally friendly decorative material. Over time, such a coating only becomes stronger, has good resistance to UV rays, but is afraid of mechanical damage, in addition, it is not advisable to wash it with devices that use high pressure. The standard color of such plaster is considered to be a light range.
- Silicone. The binding component is synthetic resins. It is used for exterior decoration and for interior work, it has plasticity and ease of application. They are resistant to UV rays, do not attract dust and odors. Forms a water-repellent layer during application, due to which silicone decorative plaster is used for facing external walls in a zone of high humidity. Produced in the form of a ready-made mixture, various colors.
- silicate. The binder is liquid glass (alkaline potassium carbonate, quartz sand and potassium hydroxide). It is distinguished by high strength of the applied layer, resistance to mold and decay, as well as the ability to repel water. The mixture has impregnating, adhesive and astringent qualities. It is applied practically on any surfaces, has an excellent indicator of fire resistance and vapor permeability. Supplied as a ready-mix, various color shades. One of the most reliable plasters, the service life can reach 50 years or more.

Silicate and silicone plasters are most often used in facade decoration and construction in humid climates.
Textured plaster
- This is a plaster with a coarse, highly viscous structure. The filler is linen fibers, wood, mica, mineral chips (granite, marble) or small pebbles. It is used for decorating brick, concrete, plastered and wooden surfaces. Great for outdoor decoration and interior work.

- Due to the special particles in the composition, textured plaster hides large defects and most surface irregularities. For its application, it is practically not necessary to pre-prepare the walls, it is enough to dry and clean them, if there are peeling coatings, they should be removed, and then an adhesive composition or a special “concrete contact” solution should be applied, this is necessary for reliable adhesion of the plaster to the wall.
- The applied layer has high hardness, water resistance and forms an air-permeable coating. The resulting surface can be an imitation of natural stone, genuine leather, wood or fabric. Among the types of decorative plaster, textured is the most common, in addition, it has a relatively low price.
- The plaster is supplied for sale in various containers, weighing 9, 18, and 50 kg, dry and ready for use. It can be tinted in any color during application, or painted after drying. Average consumption up to 2 kg per 1 m2. The larger the filler, the more composition is required for applying one layer. It is not recommended to use plaster for outdoor work during rainy or damp weather, and at temperatures up to + 7 degrees.
- It is possible to apply textured plaster without the use of highly specialized tools, and there is also no need to involve professionals, even with self-decoration of walls, many design options are obtained.
Subspecies of textured plaster
- Lamb- plaster has various sizes of stone grains, is applied to mineral bases, the surface is rough and uniformly grained.

- Fur coat- the surface after application is rough, in the form of a slight "hairiness", the main component of this mixture is cement.

- bark beetle- composite plaster, with fine stone filler, when applied, forms a grooved texture resembling the surface of corroded wood.

The peculiarity of textured plaster is that the surface relief appears immediately after application.
Structural plaster
- A material having a thin layer structure, made on an acrylic or silicate basis. As a structure-forming substance, marble chips or quartz elements are used. Outwardly, it looks like a granular heterogeneous mass. It is applied to decorating of walls in rooms and finishing of facades.

- It may be fine-grained and look like an almost even layer when applied, as well as medium-grained, after drying such a plaster, a kind of relief appears. It adheres well to most mineral surfaces, drywall and chipboard.
- Structural plaster forms a layer with excellent air permeability, resistant to moisture and atmospheric phenomena. Available in 9, 18 and 50 kg packages. Supplied in the form of a ready-mix, it is not allowed to add coloring pigments to the composition. Apply with a trowel to a dry, clean surface, previously treated with a deep penetration primer. The consumption rate when applied in one layer is 3 kg per m2.
- Not recommended for use in wet rooms or during rain during outdoor work, the air temperature should be above +7 degrees. Plaster can be applied in various ways and with tools: with a smooth spatula, roller or sprayer. So, to obtain the effect of waves, coarse-grained plaster is used, which is applied in a circular motion with a spatula.
- Very often, structural plaster is used for finishing walls in corridors and bathrooms, as well as for finishing facades, fences and gates. For interior work, it is recommended to use material made on water based, quick dry and odorless. The resulting surface is sufficiently impact-resistant and resistant to mechanical damage. Wet cleaning of the plastered wall is allowed.
Venetian plaster
- This phrase appeared as a result of the literal translation of the phrase "stucco veneziano". It is a decorative multilayer coating. Such a plaster mixture is made with the addition of marble chips and slaked lime. It has a fairly homogeneous structure. Widespread in the ancient rome when a lot of dust and small particles remained when working with marble, which began to be used as a material for facing.

- Visually finished layer resembles the surface of natural marble or onyx. The right finish Venetian plaster requires special skill. It should be applied with a flexible rubber spatula, in thin strokes, in several layers (5-6), each of which requires thorough drying. The material is quite expensive, but the resulting effect fully justifies its price. Most often, Venetian plaster is used in rooms decorated in antique or classical style as well as in the Baroque style.
- Thanks to various application methods, matt or glossy surfaces can be achieved. The plaster is intended for indoor use only. The mixture may be tinted. Available in containers of 8 and 16 kg. The surface to be decorated must be clean, level and dry. Before facing the walls, it is recommended to pre-reinforce, and then putty and prime. If the technology is violated, cracks can form on the decorative plaster, which are very difficult to get rid of.
- In addition to the stone surface, Venetian plaster can imitate precious metals, due to the special staining with special pigments. Using such a finish indoors, you can achieve the effect of increasing space, due to the refraction of light. This coating often acts as a basis for complex panels and frescoes.
Specific types of decorative plaster
- Colored plaster - made on the basis of acrylic and marble chips. Possesses high adhesion to mineral surfaces, water resistance and sufficient hardness. The color scheme is represented by fifteen shades. It is applied to a dry, cleaned surface, in one layer. To prevent noticeable joints, the mixture must be brought to the corner. Equally suitable for both outdoor and indoor work.

- Roller plaster- contains a filler of natural origin of various fractions from 1 mm to 2.5 mm. When applied, a texture is formed with small channels-recesses. It is applied to registration of facades and decorating of walls in office and premises. Tinting or surface staining is allowed. It is applied to the surface with a wide spatula, and then rubbed with a trowel in circular, cross-shaped, vertical or horizontal movements.

- latex plastic- allows you to create a smooth finish with a slight gloss, imitating the texture of a smooth stone or marble, as well as various relief surfaces. The material is resistant to cracking, has high moisture resistance, so that the plastered surface is easy to clean. The mixture can be tinted various colors, while in order to achieve the effect of the structure natural stone, you should not thoroughly stir the colors. The mixture is applied only on even walls, previously puttied and treated with a deep penetration primer.

- "Wet Silk"- the coating, which resembles the surface of a fabric, contains mother-of-pearl particles, the overflows of which imitate the overflows of flowing silk. Tinting in any color is allowed, several color variations are initially produced: white, gold, garnet, silver and bronze. The formed surface possesses high moisture resistance and perfectly transfers damp cleaning. An excellent option for decorative plaster for kitchen walls.
- "Sea breeze"- the coating has a translucent structure, with a slight pearly sheen. Fine-grained sand is added to the composition. Can be tinted, several basic colors are available: gold, white, garnet, bronze and chameleon. Used for interior design.

Advantages of decorative plaster
Plaster-based decorative coating has won the love of many designers, thanks to its special properties and qualities that distinguish it from other materials for interior decoration.
- Able to hide irregularities and defects of the decorated surface;
- applied to most known materials (brick, stone, concrete, wood, drywall and many other coatings);
- does not absorb odors;
- has high sound-absorbing properties;
- has a unique and inimitable design;
- application does not require special surface preparation;
- is different high rates resistance to any atmospheric phenomena;
- The resulting coating has breathable properties;
- forms a moisture and frost-resistant layer;
- due to the special plasticity, it is possible to process structures of any complexity, as well as create all kinds of patterns and drawings;
- forms an environmentally friendly, practical and durable coating that is resistant to mechanical stress;
Decorative plaster walls in the apartment
To obtain a high-quality decorative coating, the mortar should be applied using tools that do not have defects, damage, chips, cracks or nicks. Each type of plaster mixture involves its own finishing methods and techniques, to give the surface expressiveness and special artistic properties.

Venetian plaster
- Venetian plaster, for the manifestation of the necessary pattern, requires multi-layer application. The work is carried out with various widths of stainless steel painting tools (spatula, trowel). The main layer is applied with the widest tool, while gaps should remain on the surface. Strokes are made wide and asymmetrical. All subsequent layers should cover the gaps of the previous application. To give more expressiveness, each layer can have its own color shade.

- The applied layers are dried in turn, each of them is leveled and additionally polished with a smooth steel tool. This method is called ironing, due to which the surface acquires a glossy appearance. If additional gloss is required, then the plaster can be covered with a special varnish or wax. Due to the translucent layers, the effect of depth and volume is achieved.
Relief decorative plaster

- A slightly different finish is embossed decorative plaster. In this case, no special treatment of the walls is required, as for applying smooth plasters. It is enough to remove old finishing materials (painting, wallpaper, whitewash), clean and dry the surface.
- After that, the walls are treated with a primer. This procedure is carried out about a day before finishing with embossed plaster. It is best if the primer will have antibacterial properties that prevent the development of fungi and mold.
- The plaster mixture is applied to the primed surface with a wide soft spatula. Immediately after that, you need to give the layer a relief. It is worth doing this very quickly, as the composition instantly seizes.

- You can get the desired pattern on textured plaster using tools such as spatulas, sponges, rollers, trowels or stencils. For example, using a rubber roller, before each application of the texture, moisten it in water. The work is carried out immediately over the entire area of \u200b\u200bthe wall (from corner to corner), otherwise noticeable seams cannot be avoided.
Structural plaster
- Structural plaster is applied with a stainless steel trowel. The layer should slightly exceed the grain size. The treated surface is kept for 2-3 minutes, and then smoothed in a circle with a plastic trowel.
- This method provides a uniform distribution of the granules present in the composition over the treated surface. The excess mass of the mixture is regularly removed from the trowel with a small spatula.
- Structural plaster, as well as textured, forms joints when applied, so the work is carried out from corner to corner at a time.
Tip: if there is a need to paint relief plaster, then it is worth doing it 10-14 days after application.
Basic coating care
The decorative coating formed by embossed or smooth plaster is sufficiently durable and resistant to mechanical damage and atmospheric phenomena, therefore, in the first year after application, no special care is required.
- This material does not absorb odors and does not attract dust, and also contains water-repellent substances, due to which the surface, if necessary, can be easily washed with ordinary detergents without chemical fillers. When cleaning, it is better to use soft cloth or sponge, avoiding hard brushes, metal scrapers, pumice or plastic.
- To increase the service life of the plaster coating, special waxes or glazing compounds are applied over the dried decorative layer. artificial or beeswax helps to increase the waterproofing of the surface, and when applied to Venetian plaster, an additional shine appears.
- The wax composition is supplied ready-made. With it, you can emphasize the smallest details and the depth of the relief applied decorating mixtures, while increasing their resistance to mechanical stress, there is additional protection from dust, dirt and moisture. Protective wax is available in two versions: with a mother-of-pearl effect, which has a silvery-white tint and in a translucent form, with a yellowish tint.

- It is necessary to apply such a product in a double layer, using a spatula, sponge or brush, and after drying, polish with a soft cloth. Wax surfaces must not be cleaned with solvents, only soapy water or clean water is allowed.
- Glaze is an almost sheer, light coating designed to give additional shade, in addition, it adds volume and emphasizes the contours of the relief. It can have several shades imitating gilded, silver or bronze surfaces, as well as just white, transparent or iridescent. The agent is applied with a brush, sponge, rubber spatula or a special mitten. Can be washed with detergent or soapy water.

Protective compounds are used for all types of plaster used for wall decoration indoors and outdoors. Thanks to such means, it will last longer, will not crumble or crumble, which means that care for it will be minimal.
How to update the decorative plaster coating
If necessary, remove the decorative coating from the wall, you can use several methods:
- repainting in a different color - is made in the case when it is required to change the color scheme;
- withdrawal before concrete base- when it is necessary to apply another version of the plaster;
- puttying on top of the layer to the state of a smooth, even wall - such a surface can be finished with a light decorative material, such as wallpaper.
Decorative plaster for walls video
When choosing decorative plaster, it is impossible to say which kind of it is better or worse. It all depends on the personal preference of each and the requirements put forward for the finished result, as well as on the availability of a certain budget, because the price of decorative plaster for walls sometimes differs by an order of magnitude. It is quite easy to apply one mixture, for example, textured and structural, and you can do it yourself, but you will need to involve specialists to apply Venetian plaster. It is necessary to remember this when purchasing a decorative coating.
Decorative plaster is the most demanded material for do-it-yourself wall decoration. Throughout the existence of this material, its style, method and method of application have changed, but the technology has always remained the same.
Due various ways applying decorative plaster, the room can be changed beyond recognition. The interior of the house can be kept in one style or mixed.
A characteristic feature of plaster is the originality and uniqueness of the pattern, so each room will be original and unique.
Decorative plaster can be painted in any color. Therefore, a few years after the repair, you can easily change the color of yours.
One of the advantages of decorating walls with decorative plaster is ease of use. Without professional experience, but following our advice, you can easily do all the work yourself without the help of specialists.
Below we describe the detailed step by step instructions for finishing with decorative plaster with your own hands.
When encountering this material for the first time, the question arises: “How to apply decorative plaster on walls?” There is nothing difficult in this.
First, let's figure out where you can buy decorative plaster. As a rule, it is sold in dry form, but there are also ready-made formulations.
The composition of decorative plaster includes T:
- filler,
- binder material,
- various supplements.
After the purchase necessary tool, you can safely proceed to the decoration of the walls with decorative plaster with your own hands.
Surface pretreatment
Fill a bucket with water and pour in the mixture. Using a drill with a mixing attachment, mix the contents to a creamy consistency. Leave the finished solution for 15 minutes so that it reaches and acquires all the necessary properties. Mix decorative plaster.
Don't mix too much material. Over time, it will begin to dry out and lose its plasticity.
Applying decorative plaster to walls
The final stage of work is painting. You can choose two options: paint the finished plaster, or add the selected color at the stage of preparing the mortar. In the latter case, the plaster is already applied in color.
Various techniques for applying decorative plaster and the subtleties of work differ from each other.
In whatever room you start a renovation, you will inevitably face the need to work with the walls. In this article, we will consider such finishing material for walls, as decorative plaster. Decorating the walls with decorative plaster with your own hands will help not only make your apartment more beautiful, but also hide small defects, if any. Usually, ordinary plaster, putty and wallpaper are used for this. It should be noted right away that the most detailed information about all decorative plasters (composition, application technology and properties) is in the “Manufacturers” section of our website.
Types of decorative plasters for interior decoration
Before choosing a specific material for wall decoration, you need to understand how it generally happens. First of all, decorative plaster for interior work is divided into facade and interior. In the first case, we get a “rougher pattern”, which is clearly not suitable for an apartment. Therefore, we will focus on the interior version.
There is also a division into structural (modeling), textured and Venetian plasters. In the first case, the solution will be evenly applied to the wall in an even layer, and then the desired texture and pattern will be created using various tools and techniques. In the second case, the solution will contain special granules, due to which the texture will be formed. The Venetian is characterized by repeated application of thin layers with sanding and polishing to create an imitation of marble. All three options are described in more detail in the chapter on creating a textured coating.
Tools
The tools used to process the walls vary depending on the chosen decorative mixture and application technique. In most cases, the following tools will suffice (stainless steel should be used):
- Putty knife
- Trowel
- Grater
- Master OK
- Brush
- Roller
Wall preparation is the key to high-quality coverage
Decorative wall plastering is possible only after proper surface preparation. The first step is to clean the wall of all unnecessary. This may be old paint, which should definitely be removed with a spatula or special solvents. It can also be old wallpaper that should be removed completely.

If pieces of wallpaper remain on the wall and do not tear off, then they should be moistened with water. They will sag, after which it will be easy to remove them with a spatula.
When the wall remains bare after removing previous coatings, care should be taken to clean it. At this stage, we remove greasy spots(if any), dirt and fine dusty crumbs. In other words, we remove everything from the wall that can interfere with the adhesion of the mortar to it. If there is on the wall old plaster, which does not hold firmly, then it must also be removed. Remove with a spatula or beat with a hammer. Next, we align the wall, making it even and smooth. For this, putty is used.
Now we have a wall ready for work. To improve the adhesion of the solution to the prepared surface, a primer is applied. The plaster manufacturer always writes on the packaging which primer is best used with this material. Only after that can the finished decorative plaster for the walls be applied. Of course, the primer must dry (usually 8-24 hours).
It is worth paying special attention to what material the wall is made of. To be more precise, it is necessary to take into account the material on which the solution will be directly applied. best options are concrete, drywall, brick and plaster. It is on these surfaces that a decorative solution is most often applied. By the way, depending on the selected surface, the primer is also selected. Sometimes decorative can be successfully applied even to glass, without leaving it thanks to a good primer.
Features when working with drywall and wood
Very often decorative plaster is applied on drywall. The walls are sometimes so crooked that it is impractical to level them, and they are covered with drywall slabs. There is nothing to worry about, because the decor is easily applied to it. The surface is already smooth, which is a big plus. The most important thing in this situation is to choose the right primer, because a lot will depend on it (the adhesiveness of the solution with cardboard leaves much to be desired).
Many believe that wooden walls cannot be covered with mortar. It's not, you just need to find the right approach. Indeed, the solution is not applied to the tree, because it keeps very poorly on it. However, you can fill a wooden wall with shingles, creating a crate (a lattice of strips of wood, with diamond-shaped holes). Such a lattice is covered with a solution, on which decorative plaster is then applied. However, this method is dying out.
 Also for durability wooden wall a metal mesh can be nailed (this option is much simpler and more desirable). Such a mesh holds the solution well. Then a decorative coating is applied to the plastered surface. As you can see, decorative plaster on wood is also possible. However, it is extremely important to insulate both the mesh itself and the dowels with the brackets with which it is attached. If this is not done, then over time they will begin to rust, and rust will protrude on the wall, spoiling its appearance.
Wall decoration with decorative plaster - video tutorial
There are many video materials on the topic of how decorative wall plastering is carried out. I don’t want to overload your attention with dozens of videos about different options coatings, so for a rough understanding of how to work with a wall, we suggest you watch a video about structural plasters.
If this information is not enough for you, then you can watch another video that touches on many different aspects when working with walls.
Creating a textured coating, making the right effort
It's time to learn how to apply decorative plaster on the walls. The texture in most cases is a decisive factor when choosing a particular material. When decorative plaster is used for interior decoration walls, then you need to think about the desired texture. When creating it, a variety of tools can participate.

It is very easy to take a notched trowel, brush or comb. By passing these tools over the "wet" coating, we will create a different pattern. This also includes the use of a hand, a plastic bag or a regular sponge. With all this we carry out or touch the still not dried decor, forming a diverse texture.

Stamps and special rollers can also be used. Such stamps and rollers already have a certain pattern that will be transferred to the wall. You can take the most ordinary roller, cover it with a tourniquet, and then create a texture with it. You can buy a ready-made tool with your favorite pattern. The main thing then is to evenly carry out such a roller along the wall so that the pattern is uniform. With a stamp it is even easier, although longer. Just press it against the wall in the desired places. Wall decoration with decorative plaster is impossible without creating a decorative effect. But it is achieved not only through special tools, but also due to the properties and composition of the solution.

The most obvious example would be bark beetle. The composition of such decorative plaster contains granules, which create the texture. By the way, in this case, the wall should be perfectly flat. Otherwise, the coating will not come out uniform, and somewhere the “bark beetle” will appear, but somewhere not. The fact is that the thickness of the applied layer of such a solution must correspond to the thickness of the grain used in its composition. Otherwise, the drawing will not work.
At the heart of such decorative material are synthetic polymers and mineral fillers. The latter are of particular interest, because they help create the bark beetle texture of the walls. These fillers include crumbs of the following materials:
- Marble
- Granite
- Quartz
By the way, do-it-yourself decorative wall plastering when using this material is the most affordable option for an ordinary person. You need a minimum amount of tool, because you need to apply the solution, and then just grind it with a grater. Yes, and special skills are not required, just rub the solution evenly on the wall.
"Fur coat" on the wall - is it advisable?
I would also like to note the fur coat finish, which is also considered decorative. The technology of decorative wall plastering to create the “fur coat” effect is very simple. The most common plaster (cement-lime) is taken and simply sprayed onto the wall. For example, a broom is dipped into the solution, with which it is transferred to the wall by spraying. To do this, a broom with a solution on it is brought to the wall and beaten with a stick or hand so that the solution flies directly onto the wall. Instead of a broom, a brush can be used to get a finer pattern, if you can call it a pattern.
With this method, it is best to use a mortar gun, with which the application is carried out on the wall.
 In fact, this material has no decorative properties, and a special application technique gives the coating a decorative effect. It is also desirable to color everything in Beautiful colors to add more beauty. But in most cases, the "fur coat" is used for facade decoration. It is also called decorative plaster on uneven walls, because it allows you to level the surface, since a large amount of mortar can be applied to one place.
Working with Venetian plaster
Since we discussed above the possibility of using textured (requires additional tools to create the texture) and structural (the relief is created through the use of various granules and additives in the solution itself) plasters, then to complete the picture, it is worth considering the Venetian.

Can smooth decorative wall plaster be applied without leveling them? In the case of the Venetian, the answer is no. Therefore, in this case, the wall should not only be perfectly flat, but also as smooth as glass. Only then covering the walls with decorative Venetian plaster will give a magnificent effect. The beauty of this material is that it is made from marble flour and appears transparent. The result is the effect of marble walls. It is very difficult to work with it yourself, and the problem is not only that careful preparation of the walls for decorative plaster is required.
Venetian decorative plaster for interior wall decoration is applied in very thin layers, which are usually tinted in different shades. There should be several such layers, usually 5-7. Surface grouting is carried out using fine sandpaper, this is a kind of grinding. It is also mandatory to apply at the end protective layer wax, giving shine to the entire coating. Wall decoration with decorative Venetian plaster is a painstaking process. You can spoil the coating with one wrong move at any stage of its creation.
Cost of work and cost of materials
Wall decoration with decorative plaster has its own costs. Do you want to know how much 1 square meter of wall covered with decorative plaster will cost you? You will not receive an answer to this question. And the point here is not only that the "bark beetle" is worth a penny in comparison with the Venetian. Such a pleasure as decorative wall plastering has too many components, the cost of which fluctuates significantly. Do not think that you will buy a bucket of ready-made solution and that's it.
 Indeed, you need to buy plaster, and travertine, Venetian, sugar, rain and other options cost differently (the manufacturer also plays a role). You will also have to pay for the primer, which costs a lot (each plaster has its own primer). Do not forget that the solution should be tinted or painted, and this is again money. All this is included in the cost of decorative wall plastering.
Maybe you want a special pattern for which you have to buy a stamp or a special roller? By the way, working tools also cost money, whether it's a cheap trowel for throwing mortar or an expensive stencil for creating an additional unique pattern. Expensive decorative plaster for walls can come out. The price is formed from many components, which were written above. Additional requirements will increase the cost.
Think carefully about whether it would be better to hire someone for the job. It will be more expensive than doing it yourself, but also better. Moreover, the employee himself will buy everything, but you won’t have to pay for the tool at all. Of course, if you plan not just to use decorative plaster for the walls of the bathroom, but to walk around the entire apartment, then it makes sense to save money by doing everything yourself. In this case, the purchase of a working tool will be appropriate.
Wall protection finishes
 After the completion of all work, the walls finished with decorative plaster will need to be further processed. We are talking about an additional finish coating, which is varnish, wax or paint. I usually use a protective wax coating for Venetian plaster, but it will work for other coatings. Approximately the same situation with protective varnish.
Wax and varnish are applied with a sponge (bath or coral). A brush or a thread roller may also be suitable for these purposes. Application and rubbing work is completed immediately after obtaining a uniform shade over the entire surface, so as not to spoil our coating on the wall with light differences due to thick layers of the finish coat.
The finished coating is usually colored in cases where the solution was not tinted before application. Used only acrylic paint water based. Application is carried out in a standard way with a brush or paint roller.
How to remove decorative plaster from walls
It is not enough to know everything about applying decorative paint to the walls, because sooner or later you will get tired of it and want something new. It will not be superfluous to find out how this material is removed from the wall. The use of a chisel and hammer may well be considered the most traditional method of solving this problem.
With the help of tools, you need to knock out a small piece of decorative plaster from the wall in order to get to the base on which it was laid. Having gained access to the base, we put the chisel at an angle to the wall and begin to beat with a hammer so as to remove layers of plaster. It will take a long time to work, but effective method. It is clear that decorative plasters for interior wall decoration are different, but the principle of removal is approximately the same.
Instead of a chisel and hammer, you can use a puncher with a spatula nozzle. With such a tool, the work will go faster. However, you will need a hat, earmuffs and a respirator. The fact is that as a result of such work, very loud noise and even more dust will be created. So it's better to protect yourself.
In some cases, it is not necessary to carry out dismantling, but this depends on the previously used decorative material and the quality of its application. If the coating is laid securely and is durable, then it is quite possible to work on top of it with new materials. If there are doubts that the old coating may not withstand, then it is better to remove it.
Many consider decorative wall plaster to be a beautiful, but very expensive finishing material, but in reality this is not so. Naturally, there are very expensive views similar material, but today we will tell you only about the most accessible ones that any person can apply with their own hands.
Structural plaster for walls has several types of texture:
- bark beetle (imitation of spoiled tree bark);
- textured plasters under the stone;
- flock (with silk effect);
- with marble chips;
- Venetian;
- "rain" - imitation of raindrops on glass;
- "rock".
We will talk about the most common for interior decoration and, very importantly, inexpensive types - rain and rock, which are the easiest to do.
Application of decorative plaster "rock"
Rock Textured StuccoThis method of application is the easiest, it is perfect for beginners. To create a structural surface, we will not buy a special mixture, but use the usual finishing putty based on gypsum or cement. Sheetrock putty is best suited for this, as it is sold ready-made, it does not need to be stirred by hand. It is better not to take too soft and loose types of such material (for example, Vetonit).
Note! Decorative plaster for the walls of the kitchen, toilet and bath is only suitable for cement-based. Here it is imperative to apply a thick layer of water-based protective varnish over the paint. In wet areas, like bathrooms and kitchen worktops, make a backsplash out of glass, tiles, or panels.
- Before it is important to prime the walls and it is advisable to apply a layer of putty; this will save you gaps and improve the quality of coverage.
- How to apply putty? We choose a small area on the wall, about 0.5 square meters. m., and we collect putty on the ironing board. It is necessary to spread it evenly with a layer of 2-3 mm. The thicker the layer, the rougher the texture will be.
- After that, having evenly distributed the solution on the wall, you can begin to create a structural pattern. clean the trowel from the material and firmly attach it to the wall on fresh putty. This can be done with either side, but you need to slightly raise the bottom edge of the iron and at the same time make a downward movement. If you just apply it to the surface, it will stick.
- In this way you will get the texture by creating small bumps on the applied mortar. To create a beautiful pattern, movements can be completely different, this is the uniqueness of decorative plaster. The main thing is that when the trowel comes off the mixture, do it smoothly so that there are no marks left. Try a couple of times and you will understand how to do it better. You can apply the structure with herringbone, crosswise, vertical, horizontal, etc. movements. If something doesn't work out, you can make amends and try again.
- It is also important to clean the trowel after each applied area so that excess mortar does not spoil the texture.
- After you have done the first section, proceed to the next, but overlap the previous one so that there are no gaps.
- After application, you need to wait about a day for the walls to dry completely, and then you can proceed to further painting, this is written below.
In the process of work, you may have problems with the sticking of the ironing board, traces of it and, as a result, an uneven pattern. If you can’t achieve the same pattern on the entire wall, then it’s okay - you are doing an imitation rocks. The main thing is not to allow sudden changes, otherwise they will be striking.
Applying plaster with rain
This finishing method is more difficult than the first, but the result is much more effective. An example of such a wall, see the photo.
 An example of decorative plaster with rain in the kitchen
 Most often, the structure of the rain is applied at an angle, but this is not important.
- To apply putty at an angle, mark the walls. Draw slanted lines on them about 3 strokes wide. Lines need to be drawn everywhere at the same angle, it will be difficult to do this at the junctions.
- Next, stick on each line masking tape so that its lower edge lies on the line.
- Decorative plaster with rain should be applied starting from the top corner.
- We spread the putty with a layer of 3 mm on a strip with a width equal to the size of the trowel and a length of about 1 m.
 The process of applying and smoothing decorative plaster
 - To create a droplet structure, the trowel is slightly pressed against the plaster, pulled along the line in a slightly raised state. Repeat these steps until you cover the entire strip.
- At first, the texture will look more like a hedgehog than rain. To fix this, you need to smooth the surface. To do this, clean the trowel from putty, and lightly pressing it to the solution, smooth it in one direction. In this case, it is important to slightly raise one edge of the trowel so that it does not completely interlock. The weaker you press the tool, the more irregularities will remain. Also, the texture depends on the thickness of the layer.
- The next strip should be applied with a slight overlap on the finished one. Repeat the steps above until we cover the entire width of the strip.
- Since you applied the tape about three strokes wide, the last strip will overhang the masking tape a little. This is necessary specifically so that at this junction the layers crawl over each other, which significantly improves the final appearance. In addition, tape helps you keep the desired angle of the picture. When you've finished making one section, simply tear off the tape and continue. You will get a smooth joint that does not need to be smoothed out much.
Advice! If you undertook to do one wall, be sure to finish the job. Because the break will cause a visible difference between the layers, it will not look very pretty.
- When the plaster is dry, sand it down with an abrasive mesh or sandpaper to remove small bumps.
 The result of the work - beautiful wall with stucco structure
 You can see the method of applying plaster with rain in more detail in the video:
Painting decorative plaster
- Be sure to prime the surface before painting. For the application of the second and subsequent layers, a primer is not needed.
- If you paint structural plaster with a solid color, the texture will be lost and the result will not be the best. The greatest effect is achieved when painting with two colors to highlight the texture. To do this, you can use the method of dry brushing or washing. Applying paint with a wash emphasizes the depressions of the relief, and with a dry brush, on the contrary, the protrusions.
- For a rock, any method is perfect, since its texture is quite diverse, but for rain only a wash is good.
- In any case, you will have to apply the original background color, preferably in several layers. To do this, apply the paint with a long-haired roller. But too thick a layer will also look bad, as it can hide the small roughness of the texture you created.
Advice! Please note that paint consumption will be more than on ordinary smooth walls. To paint the background for washing, it is better to choose a good waterproof paint, and for a dry brush, any paint will do.
- To highlight the relief with a dry brush, it is better to use light contrasting shades, and to emphasize the wash, on the contrary, use darker ones.
Dry brush painting
Consider how the dry brush painting technique works. To do this, you need a wide flat brush, a paint bath and pieces of cardboard.
- Pour some paint into the bath and dip the brush into it. Then wipe the tool first on the bath and then on a piece of cardboard to remove excess.
- Now you can apply paint to the plaster with light movements in different directions. Important point here - the brush must be held parallel to the wall so that it barely touches its surface, and with chaotic movements it seems to wipe off the remnants.
The main thing is to avoid sharp color transitions and brush marks. As a result, you should get a wall like in the photo:
 Dry brush example
 Paint wash
Much more difficult is the second method of applying paint with a wash. Its essence is that you apply another, darker layer of paint to the wall. After some time, you wipe it with a wet cloth, not allowing it to dry completely. As a result, the depressions will look darker than the bulges.
The technology itself is very simple, but requires a lot of time and physical costs. But if you make a bright spot somewhere, you can paint over it again and wipe it off.
The photo shows an example where the first background paint layer was white and the wash layer was yellow.
 Dark paint wash example
 To make it easier to wash off the second wash layer, it is better to use a simple non-moisture resistant paint. As a rule, it costs less, so you can even save a little.
Lacquer application
The final and mandatory step is varnishing the paint. This is done for additional protection and a brighter and more saturated color.
- For this purpose, you can use any water-based varnish, such as Alpina or Tikkurila. Be sure to dilute it with water approximately 1:1 so that it penetrates well into the structure.
- Apply varnish with a wide brush in 2 or 3 layers. To avoid smudges on the walls, squeeze the brush against the ribs of the paint bath. Before applying the next layer, you need to wait a bit, the varnish dries quickly.
In the photo you can see the result of structural plaster, which was covered with 2 layers of Tikkurila Paneeli Assa varnish. The approximate consumption of varnish is 2.5 liters per 50 square meters. m. plaster with rain.
 Lacquered plaster
 As you can see, the result is much better. Now you can freely wash such a wall with a rag and not be afraid to damage it. To give the room a finished look, stick ceiling plinth on putty during repair or after painting.
How much does decorative plaster cost
- 3 buckets of Sheetrock putty, each costs 1000 rubles. To save money, you can buy a cheaper type and stir the solution yourself with a mixer.
- 10 liters of Caparol white paint - 4500 rubles.
- 2.5 liters of Finncolor ocher paint - 1000 rubles.
- 1 can of Paneeli Assa varnish - 1200 rubles.
Total: 9700 rubles were spent on decorative plastering of the walls with their own hands, despite the fact that high-quality materials were used, and not the cheapest ones. It does not come out so expensive, but it looks very unusual. This is not wallpapering: not every apartment has such beautiful walls.
Conclusion
As you can see, do-it-yourself textured wall plastering allows you to make repairs without much physical effort, even for a girl. The pattern will be unique on the entire surface, and the finish will be unique.
Subject to the technology described above, such a coating will serve you long years, even in busy areas (like the kitchen and corridor). We have described only some of the ways to create structural surface, but you can use any means to make a unique design.