Outbuildings in the country with their own hands. How to build a barn: choosing a location, materials and layout, installation steps, price comparison
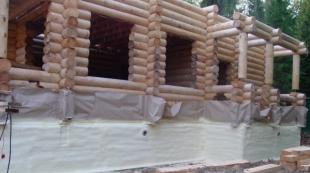
Building a barn suburban area. The first step is to prepare the drawings wooden hozblok to give their own hands. The hozblok may consist of a carpentry workshop, a garage for storing and repairing a car, a woodshed, a shower and a toilet. The barn can be designed as it is convenient for you, up to the organization in it summer kitchen and rest rooms. The project of the barn can be drawn up independently, depending on your needs. At the same time, the construction of a barn in the country does not require much effort or large expenses. A beautiful shed with a canopy will look as good as the main house if you put in the effort!
The hozblok can consist of a carpentry workshop, a garage for storing and repairing a car, a woodshed, a shower and a toilet
When preparing a phased plan, keep in mind that the country barn must meet the following criteria:
- reliability, long service life;
- effective distribution of internal space;
- if there is a bathroom at the design stage, the supply of water supply and sewerage should be taken into account.
Barn construction can be done different ways. One of the most popular is frame construction. The frame is erected from thick boards and timber on a strip or column foundation. Strip foundation for a barn will be unreasonably expensive, but columnar foundation quite suitable.
We build a frame barn with our own hands.
Before you get to work, you need to prepare tools and materials. List of required:
- hammer, screwdriver, cutting machine, hacksaw or chainsaw, mount, shovel, drill with drills, ax;
- nails from 40 to 150 mm long, self-tapping screws 50 and 70 mm;
- timber 100 × 150 or 150 × 150 mm, boards 25 and 50 mm thick, OSB board, thermal insulation, sand, crushed stone, cement, roofing material (metal tiles, flexible tile or other).
A step-by-step guide to building a shed for a summer residence:
The first thing you need to start is choosing a place for construction and marking the foundation. Mark the site in accordance with the project and drive in pegs or reinforcement bars at the corners, pull the rope around the perimeter.
Now you can start building the columnar foundation. The layout of the pillars: they should be located at least 1.5 m from each other. It is necessary to mark the locations of the pillars and remove the top layer of soil with turf with a shovel (about 20 cm deep).

Pillars for the foundation can be made of brick; use ready-made concrete blocks; pour concrete blocks on your own or make formwork and pour the pillars already in place - choose the option that suits you best. The next task is to set the pillars so that they are on the same level. To do this, use a water or laser level. If the block is located below the required level, then a certain amount of sand should be poured under it; if above the level - remove part of the soil.
After the foundation has been built in accordance with the drawing (by the way, do not forget about the gate!) The lower trim is assembled from the timber. In those places where the timber is in contact with the foundation, be sure to put a double layer of roofing material, thereby providing waterproofing. The beam is fastened together with staples or nails of sufficient length. Do not forget to measure the distance between the corners diagonally - you need to ensure that these distances are the same, then the building will turn out to be strictly rectangular.
All wooden elements must be covered with an antiseptic in 1-2 layers. As such protection, you can use the usual drying oil.
Logs for the floor are fixed to the level with the upper edge of the beam with a distance of 60 cm from each other (it is better to use boards 150 × 50 mm for this purpose).
The next stage is the construction of the frame. For this purpose, boards 100 × 50 or 150 × 50 mm are used - it depends on the thickness of the wall that is planned to be built. For a summer utility block, a wall thickness of 100 mm is quite enough, and a garage and a woodshed can not be insulated at all.
Need to calculate the number of racks? based on the fact that the distance between them is 60 cm (along the width of the insulation). The height of the room depends on the length of the racks; on average, racks with a length of 2.5 to 3 m are used.
 The construction of a barn can be done in various ways. One of the most popular is frame construction.
 First, the corner posts are set, aligned with a level or plumb line, and fixed in a vertical position with the help of props and self-tapping screws. After that, the remaining racks for walls and internal partitions are exposed. At this stage, in accordance with the project, openings for windows, doors and gates in the garage are set. Attach struts from scraps of boards to the racks - this will give the structure rigidity.
After these steps, it is worth once again checking the verticality of all racks, correcting them if necessary, after which you can proceed to the upper trim. For it, you can use both a bar and a board 50 × 150 mm.
Now the rafters are mounted. For the hozblok, you can use a shed roof - this will reduce the cost of construction and reduce labor costs. The rafters are recommended to be attached to the upper trim using metal corners and self-tapping screws. Boards 2.5 cm thick are laid on top of the rafters - the distance between them depends on the weight of the material that will be used for the roof. If you plan to make a roof from flexible tiles, then plywood or OSB slab 9-12 mm thick must be laid on the crate of boards.
Do-it-yourself barn construction (video)
Exterior finish
How to make a shed with exterior trim? For exterior finish outbuildings, you can use the following materials:
- lining;
- board 2-2.5 cm thick;
- OSB plate;
- plywood;
- timber imitation;
- siding.
The most inexpensive option for exterior finishes is to use plywood or OSB boards, however, in this case, it will be necessary to paint the walls to protect against moisture or install siding over plywood.
The lining or imitation of timber looks very aesthetically pleasing, besides, natural wood is environmentally friendly. It is desirable to cover the surface of the walls with a protective composition, thanks to which the tree will not rot and retain its original appearance for a long time.
Recently, siding has become very popular. It is relatively inexpensive, non-combustible, serves more than half a century, has modern look and easy to install.

Utility room from pallets
How to build a barn inexpensively? If you wish, you can save a lot of money by building a barn in the country with your own hands from available improvised materials. If it is not planned to build a utility block with amenities, but only a shed with a shed for firewood, a garage and a utility room are needed, then you can build a shed from pallets. Pallets can be found on site industrial enterprises or warehouses or buy in the same place for a low price. Despite the cheapness, this material is no worse than ordinary boards.
However, there are a few things to be aware of when choosing pallets. You should not buy them in the markets or after using them in the chemical or fishing industry - they can not only have an unpleasant smell, but also be hazardous to health.
A do-it-yourself pallet shed is built in accordance with the dimensions of the pallets. That is, the dimensions of the room must be a multiple of the length and width of the pallet. Otherwise step-by-step instruction similar to the construction of a frame barn: a frame is erected and sheathed with pallets. A barn with dimensions of 240 × 480 and a height of 240 cm will require 24 pallets for construction. With an average cost of 1 pallet of 100 rubles. the cost of construction will cost 2400 rubles, which is much cheaper than building a barn from boards.

Hozblok from corrugated board
Modern, durable, inexpensive and outwardly attractive material is corrugated board. Sheets of corrugated board can be mounted on a regular wooden frame. And you can make a frame from a metal profile. It should be borne in mind that this is a cold material, therefore, if necessary, a do-it-yourself shed made of corrugated board can be insulated.
The main nuances of working with corrugated board: self-tapping screws with a drill at the end are used to fasten the sheets to the frame. It is able to drill metal up to 2 mm thick, which should be considered when purchasing a profile. There are special screws for wood; their length must be at least 35 mm.
A sheet of corrugated board can also be used as a roofing material. However, it has a negative point: the material has increased sound conductivity. However, this small minus is unlikely to be significant in the utility room.

Do-it-yourself frame change house (video)
Aerated concrete utility room
Aerated concrete outbuildings are not the most economical option, but someone would prefer to spend more money to get the desired quality.
So, aerated concrete has the following advantages:
- durability;
- good thermal insulation due to the porous structure;
- "breathing" walls;
- low weight of the block - there is no need to pour an expensive foundation;
- blocks work well.
For the construction of aerated concrete, in most cases, a strip foundation is used. The basic rules for working with foam blocks: it is necessary to lay a layer of waterproofing (roofing material) on the foundation; the adhesive layer between the blocks must be at least 3 mm; every 4th row of blocks must be reinforced. As an exterior finish, you can use plaster or siding. A barn built of aerated concrete in mid-latitudes is more recommended to be finished with siding, otherwise moisture will be absorbed into the porous material and slowly destroy it. Gates and roofs can be made of corrugated board - an inexpensive and durable material.
Attention, only TODAY!
In this series of articles, I will tell you how to build a shed in a country house measuring 3 by 6 meters with a shed roof and a columnar foundation without outside help with your own hands.
Do you want to build a barn with your own hands? Believe me, it is not difficult, there would be a desire! An example that many of our readers have already reproduced is a barn built by me personally and with my hands, without the involvement of covenants and even fellow comrades. Below, in these articles (beginning at the very bottom), you will find a detailed step-by-step report, photos and even a 3D model of my barn with dimensions and a general estimate (expenses) for the construction site.
Foundation for the barn. Part 1
In the first part, we will start by choosing a place and building a foundation for the barn. We will build a columnar foundation, since this is the least expensive option for a fairly easy summer cottage building.
Where do we start building a barn?
Of course, with the choice of a place and marking it under the foundation. The place for construction should be close to the house, it is desirable that when working in or near the barn, for example, when sawing firewood, you can see the entrance to the house and the entrance to the site.
This, of course, is a wish, but not an indication, especially for owners of small plots, where there is no particular choice.
Just remember that in this barn you will have to run for firewood for the stove ... and even in the rain.
I was inspired to build a new barn by the future planned construction of a new extension to the house, as well as the demolition of old dilapidated outbuildings that were already falling apart.
It was decided to build a barn 3 by 6 meters with a frame made of timber on a columnar foundation, rather high in the front part, which was due to the shed roof.
Inside, I decided to divide it into two utility blocks - a 3x3 meter workshop and a 3x3 meter woodshed. Where the workshop will be located, two windows will be made. In the future, I plan to put a workbench with a vice and shelves for tools necessary in the country economy there.
And this is the barn I ended up with. I want to immediately note that four winters have already passed since the time of construction (since the time the article was written, I have been constantly making adjustments), the barn stands still and pleases its owners.

Barn in 3D
Click on the picture, wait for it to load and use the left mouse button to rotate the model. Rotate the mouse wheel to zoom in and out. View in full screen - icon in the lower right corner. Exit full screen - Esc key.
To fully view 3D models, you need to download the SkethUp viewer program from the official website (for free) and install it on your computer. You can download this model for viewing by clicking on the logo in the lower left corner of the viewing window.
At the end of the articles about the construction of the barn, I will lay out the entire list of tool materials that were used for construction, as well as an approximate cost estimate, of course, on the day of purchase. For those interested, in the photo gallery section, I posted an archive for download with all the photos of the barn construction process that were not included in the articles in this section.
So let's get started!
Marking the place for the foundation
For accurate marking, we need a 10-meter tape measure, sharpened pegs or steel bars, rope, and an ax or hammer to hammer these pegs. We mark it - we hammer in the pegs, well, approximately, as in the photo. There are no difficulties here. Do not forget to measure the marking diagonals with a tape measure, they must be equal and so that the right angles are right.

We are building a foundation.
Since the soil on my site turned out to be not heaving, but sandy, it was decided to make the foundation for the barn columnar from bricks, since there was enough of it left from the old stove, which was destroyed during the construction of a new one.
To build the foundation, I decided to dig 15 holes for brick posts, every one and a half meters. Here, of course, it was possible to save on work, but then to spend money on timber ...
Will explain:
I included in the project a beam for logs (base) 100 × 100 mm and a floorboard 40 mm thick. If you take a beam of 150 mm, and a floorboard of 50 mm, then, in principle, you can get by with 9 brick columns.
It is up to you to save on work when digging holes for the foundation or money when purchasing lumber.
So, here they are pits, dug approximately 600-700 mm under the columnar brick foundation. In principle, after asking local builders about the depth, I found out that 30-40 cm of depth would be enough. Then, you need to fill in 10-15 centimeters of ASG (Sand-gravel mixture) there and you can lay a brick.

After digging 15 holes for the posts, I of course went to the store for DSP (Cement-Sand Mix) for laying bricks. I bought a couple of bags of 25 kilos, but as it turned out later, it would not be enough ... In total, it took 8 bags.
At the end of the whole story, I will lay out a complete breakdown of the materials used and the approximate cost in money at the time of the construction of the barn in the country.
I put brick posts, here in the photo below:

I put steel pins in the corner and central posts (I cut threaded rods with a diameter of 10 mm with a grinder) for precise installation of vertical bars.

I checked all the columns of the foundation for level and alignment with a cord.

Since I didn’t have a theodolite, I set everything according to the hydraulic level (the site at the construction site went beveled) and added cement mortar to the desired height.
After the completion of the construction of brick columns, their surface was plastered with a mixture for outdoor work. Firstly - for aesthetics, and secondly - to protect the brick from contact with the ground.
It took 2 bags of mixture.
For better waterproofing, I recommend treating the brick columns of the foundation before filling them with sand with a special waterproofing mastic. I didn’t do this, because no one told me at one time, but I assure you that a couple of 2-kilogram cans of mastic and a couple of hours of work will significantly extend the life of the barn foundation.
Mastic is about the same as that used to protect the bottom of the car - black on a bitumen basis, sold in any hardware store.
You will see photos of the plastered columns in the continuation of the story.
Installation of the lower frame of the barn from a bar. Part 2
So, in the first part we built the foundation for the shed, let's move on. Perhaps this part will be the longest in the description, but not the longest in construction.
For comfortable work with timber and boards, we need "goats" or their likeness. Note that the stress is on the first syllable…. We build, well, about the same as in the photo below. I think that every summer resident will find such, especially if your house is heated with wood. Yes, and others probably too, the thing is irreplaceable, if you need to cut something in half ...
If, by a strange coincidence, they are not there, then you should definitely build them - they will come in handy in any way.
How to make easy-to-use and lightweight goats we read in the article “Goats for sawing firewood”.

The construction of the lower base.
First of all, I installed logs or a base made of timber under the entire frame. I made the joints of the beam in half a log. Well, the photo below shows how. To do this, we make neat cuts in half the thickness of the timber, and then we knock out the excess with a wide chisel or a sharpened ax.
Before installation, I treated the beam going under the logs (base) with a colorless protective impregnation OBZ (fire-bio protection) - a mandatory operation if you want your barn to stand happily ever after. It is better, of course, to use fire protection with color, and not colorless, then it is better to see those places that have already been processed.

Here, below is a larger plan of joining the beam in the corners - if anyone does not understand. Naturally, waterproofing in the form of a double piece of roofing material was laid between the beam and the foundation brick column. The central pin with a diameter of 10 mm, respectively, and a hole in the bar is drilled with a diameter of 10 mm. We constantly control all dimensions with a tape measure and slopes with a hydraulic level.

Installation of vertical racks from a bar.
In the beam, which will be installed vertically, we drill 10 mm guide holes for the pins.
To do this, we manually install the timber sawn to size on a pin sticking out of the base so that its edges coincide with the edges of the base and press it a little while slightly turning around the axis. As a result, a characteristic mark is formed at the end of the timber - where we drill a hole for the pin.
This will not necessarily be the center of the beam - there are errors. The main thing is that the timber, after installation on the pin, should stand up as “native” - flush with the base.
The beam, installed vertically on the front of the barn, has a size of 3 meters. A beam located along the back wall is 2.2 meters high. In total, we have a slope of about 30 degrees, which is quite enough to drain rainwater and snow.
I processed the bars installed vertically at the corners of the future barn with an electric planer from 2 inner sides, and bars located in the middle of the barn frame from 3 sides. On all sides of the beam looking inside the barn, he chamfered the corners with an electric planer (rounded the corners). This operation was done only for aesthetics and so as not to catch splinters with an unplaned tree.
The sides that will be sheathed with external boards in the future, left untreated with a planer.
Then he smeared the entire surface and impregnated it with a special fire-retardant composition - Maple color scheme. In addition to the protective properties, such an impregnation also carries an aesthetic load - it pleases the eye.

From further reeling, we fasten the vertical bars with 4.2 × 70 screws and steel corners to the base of the barn.

As a result, we get something like this design. (In the photo below, one vertical bar has not yet been set, it is painted below - you can see it).

Installation of goats and upper frame made of timber. Part 3
We continue to build with our own hands and in this part we start work in the upper tier of the future barn.
We will build the upper perimeter of the frame from a bar.
And for this, if you do not have a crane, you will need to bung up high goats, or as you can also call it, mobile scaffolding.
It will be much more convenient to work on them than, for example, from a conventional ladder, although a ladder will also come in handy for some work in the upper tier.
We manufacture an auxiliary structure - construction goats-forests.
We will collect them from a bar 50 × 50 mm and an inch board.
The whole structure with railings did not fit into the lens. This is how they look assembled:

And I started building them like this:
I fixed it with nails (just don’t hammer it in to the cap - so that it’s convenient to pull it out later) two 50 × 50 beams cut to size to the base of the barn, but not parallel, but with an increase in width to the base, and made cuts under the steps. The size is basically arbitrary, but if anyone needs it, I'll take a real one.

Then I cut and attached the steps. All fasteners were made with self-tapping screws, the structure is more rigid than when using nails and loosens less during operation.
Below in the photo is the first part of my scaffolding - a ladder.

I made the second part of the vertical rack, fastened everything together with the same beam and used an inch board as the floor. When installing the floor, fill the boards with a small gap so that rain water can easily flow down. After assembly, the entire structure was impregnated with a fire-bio protective composition with a beautiful Maple color scheme.
For more details, with dimensions and additional photographs, on how to make such a design, read the article - “Do-it-yourself construction goats”.
In principle, the structure is assembled and tested by its own weight, now you can proceed to the "high-rise" work on the assembly of the upper frame.
We set the level and fix the vertical support bars.
At the beginning, we need to accurately level the vertical bars of the frame of the future barn, which we installed in the last part of the story. To do this, we need several stick-boards acting as slopes (an old picket fence is also suitable) for temporarily fixing the vertical bars in the correct position.
We catch the exact slope in all planes and fix it with a slope stick using a pair of nails. Again, we hammer the nail so that the hat sticks out - it is convenient to pull it out. In the photo it looks like this:

After the oriented-correct fixation of all vertical posts-beams, you can proceed with the installation of the upper part of the shed frame.
This is where the made mobile structure called "goats-forests" or as I affectionately call it "uraza" comes in handy. which in the old Pskov dialect means something big, heavy and not having its own clear name ...))
In the bars cut off and trimmed to size (6 meters each), we make cuts into half a log in the right places, and this is at the ends and in the middle. And put them in place, look at the photo below.
To do this, of course, you will have to climb onto the mounted goats, having previously loaded the installed beam onto their platform. You will have to strain a little, if suddenly there is not enough strength, you should invite an auxiliary force (assistant). I overcame it in one face, though pretty sweaty.

We fasten all the joints of the beam to each other with steel corners using self-tapping screws. Photo below.

Now our design is quite stable, and we can proceed to the final installation of the upper full perimeter.
So, if you remember, the front wall of the shed is 3 meters high, and the back wall is 2.2 meters.

Installation of cross bars.
For easier installation of the transverse side bars in the barn frame, I applied a simple circuit mounts. On the supporting vertical pillars at the top, I marked out the height and installed the steel corners, fixing them with self-tapping screws, you can clearly see in the photo below.
And then, I just laid the cut-to-size timber on these corners.

He pulled them to the corners with self-tapping screws and nailed 200 mm from the end through a vertical bar. Everything, the frame of the barn is finished.

For more comfortable work, in order to be taller, I decided to first lay the floors, and then proceed to complete the work with the upper frame perimeter and the floor and roof of the barn.
Shed floor and truss system. Part 4
The turn has come to build a floor in the barn and mount the truss system under the roof - we continue to work with our own hands. I will need the floor for further high-altitude work, in order to drag my goat-forest construction, which I did in the last part, inside for mounting rafters and roof sheathing, and so as not to step over the floor logs.
Again, there will be somewhere to put something, for example: a tool or a cold bottle of beer-lemonade.
So let's get down to the story, I don't pour water - one specifics.
Building the floor
There are no complications, only accuracy. We measure right size of the floorboard along the lower frame, sawing in the floorboard, where you need areas around the uprights (vertical bars) and lay it on the floor joists along the length, that is, 6 meters.

For laying the floor, I used a board 40 mm thick and laid it along the length of the barn, i.e. did not saw, but only trimmed to a six-meter size. Naturally, I treated all the boards with fire protection before laying. It was transparent, so it is not visible in the photo.
Tip of the day:
Take OBZ (fire bioprotection) with color, so it will be easier to identify those places that are already smeared.

I did not fasten the boards, as is usually done - from above with a nail or a self-tapping screw to the floor lags, but fixed it with a self-tapping screw on the side, hiding the self-tapping screw head. You can see it in the photo below.
Since the board was used with a thickness of not 50 mm, but 40 mm, then between themselves the boards were fixed from below obliquely every 40-50 cm, so that they sag less.

Fixing the boards on the side to the lags and from below between themselves in a secret way is justified simple solution- in the future, level the floor with a planer. The boards are not ideal in thickness and in order for the floor to be more even, I decided after the end of the work, in the place where the workshop will be, level it with an electric planer. It is easier to sweep away debris from such a surface, and the planed floor looks much more aesthetically pleasing.
If you are not confused by the unevenness of the floor after assembly (the barn is not a house, after all), then fix the floorboards, as it will be easier for you.
All finished with the floor.

We prepare and install rafters.
I made rafters for the roof from the same board as the floor - 40 by 100 mm.
To begin with, I made all the measurements along the length, including the overhang of the rafters beyond the borders of the barn frame. I made the departure of the rafters about 300 mm in front and 200 mm in the back. If this size is important to someone, write in the comments below the article, and I will make an accurate measurement.
Having measured out one rafter and made cuttings on it in places of support on the upper rafters, I, using this rafter as a template, prepared all the other rafters in the amount of 12 pieces.
The rafters, as well as the entire top in the future, I decided to treat with fire protection with a different color - pine. This color has a yellowish tint that contrasts with the base color of the barn - maple.
It worked out well in my opinion.

There is one small nuance here - before preparing the rest of the rafters according to the template, first take a measurement along the top of the entire frame of the future barn, if the size of the width of the upper frame of the barn floats (the beam may be slightly curved), then it is better to check its specific place before making each subsequent rafter mounts.

We fix the installed rafters on the side with long self-tapping screws and on top with a 200 mm nail. Here, the goats-forests made earlier help us a lot, on which you can comfortably sit with the tool inside the shed, dragging them to the floor.

The step between the installed rafters turned out to be about 50-60 cm. The photo below shows how the rafters are located, here 1-2 cm to the right and left do not play a big role.

After installing the rafters, we proceed to the installation of the battens under the roof, the installation of waterproofing, and of course, the installation of the roof itself.
As I already wrote in the previous parts, I will provide a full estimate for all the materials used at the end of my story about the construction of a country barn with my own hands.
Installation of the crate and wind protection of the roof of the shed. Part 5
After completion of construction truss system we proceed to the manufacture of the crate for the installation of the roof from ondulin.
For the installation of the crate, I used the same “inch” board (25 × 150 mm), which in the future will also be used for sheathing the walls of the barn frame.
Since I decided to cover the roof with ondulin sheets, and they are quite flexible, and they soften in the sun, the step between the boards of the crate took 150 mm.

The width of the barn is 6 meters, the length of the boards is also 6 meters, so the boards were only trimmed at a right angle from one end and laid on the rafters in a checkerboard pattern to ensure that the perimeter of the barn was carried out 300 mm from the sides. At the rear, the rafter offset was also 300 mm, and the rafter offset at the front was 450 mm. Such a length of the protrusion above the main frame of the shed was justified by the installation of an anti-wind system, the width of which is obtained as a multiple of the width of the board - 150 mm.
If someone did not understand something, below I will explain everything in more detail and everything will become clear.
For the convenience of mounting the crate, I dragged the construction goats I made in the second part of my story inside the barn - it's more convenient and safer than climbing a shaky rafter system.
We fasten the crate of boards with screws or nails to the rafters, 2 pieces for each rafter.

To reinforce the roof in the middle of the barn, in places where the beam passes under the rafters, I vertically installed stands from a 40 × 100 mm board, from which I made the floor. Fastened to the beam and rafters obliquely with self-tapping screws. Circled in red in the photo below.

We finish with the installation of the crate and proceed to the installation of the anti-wind system.
Do not forget to coat all the boards going under the crate with fire protection. I used an OBZ with a color scheme - pine, which contrasts with the main color of the barn - maple ...
Installation of an anti-wind system
As the name implies, this system is designed to protect our roof from strong gusts of wind. Or as they say - so that the roof is not blown away. And from the point of view of aesthetics, the rafters sewn up with boards from below look much nicer.
When viewed from below, it looks in the final version as shown below in the photo.

The bottom line is that we simply sew up the rafters with boards from the bottom and side. As a result, we get a finished and very nice look at the upper tier of the barn.
The width of the board is 150 mm, therefore, the width of the front overhang of the anti-wind system will have a width of three boards, i.e. 450 mm. Two boards will go to the sidewalls and rear of the shed, since the removal of the rafters outside the frame in these places was 300 mm.
We sew up the front part of the wind protection of the barn roof from below with three trimmed boards. We sew them with nails or self-tapping screws from below to the rafters.

The front part of the barn's wind protection is finished. By the same principle, we sew up the rear overhang.
From the sides there is nothing to fasten the boards from below, therefore, it is necessary to fill the cuts of the same inch board with a length of 300 mm on the bottom of the boards of the crate. To them we will attach the lower boards and the side frontal board of anti-wind protection.
We look at the photo below.

On each side, at least 3 pieces of such trimming should be nailed - at the ends and in the middle. So that the board does not bend down in waves and hold on tighter, do not be lazy and install 4 such racks.
We finish with the installation of wind protection of the roof and admire the result.

It remains to sheathe the walls of the barn with a board and lay roofing material on the roof. But that's in the next part.
Sheathing the walls of the barn with a board. Part 6
Having finished preparatory work with a roof, we proceed to stuffing a wall of boards onto the frame of a country barn from a bar. For mounting walls, lining, siding or profiled boards are usually used.
In my case, the lining will not work, as it is too thin and is only suitable as an additional decorative component. The “toad” did not give money for the profiled board :)), siding is generally from a different song, so I decided to upholster the walls of the barn with an ordinary inch board (25 × 150 mm) in the “American” style. This name came from the fact that, before the invention of siding, the first settlers in America upholstered their houses.
The essence of this method is that the boards are stuffed from the bottom up with a slight overlap (2-3 cm), like a Christmas tree. Therefore, in the process of drying wood in such a wall, no gaps are formed between the boards. Which, no doubt, happened if I just stuffed the boards end-to-end, even having processed the butt places with a planer.
Since my shed at the dacha was conceived as two in one - a woodcutter and a small workshop, only the walls of the workshop and the entire frontal part of the shed were upholstered with "American". Where the woodcutter is located, I filled the boards V - figuratively, with a gap of 1-1.5 cm between the boards so that the firewood could ventilate and dry, and for beauty, of course.

I cut off the outer side of the boards with an electric planer. Firstly, to save expensive fire protection, and secondly, so that rainwater does not linger and easily rolls off the surface of the boards.
There is nothing complicated in installation, as they say - pour yes ... in the sense: saw off and hit! :))
To begin with, of course, you should decide where the entrance to the barn will be, the entrance to the workshop inside the barn, and also prepare the windows.
You should start by stuffing the first, lowest board around the entire perimeter of the barn. And then, we nail each subsequent board with an overlap on the bottom one of 2-3 cm.

We fill the boards on the frame of the barn in a circle - first on the front, then on the side and behind. So it will turn out more evenly and accordingly more beautiful. I do not recommend nailing boards first to one wall, then to another, it will definitely turn out higher or lower on one wall than on the other. Use a tape measure and a level to keep the boards level.

Before starting the installation of the walls, it would be nice to determine where the windows will be in the workshop, it is desirable that they face the south. east or west sides, then it will always be light in the barn. In my case, it turned out the east and south sides.
There was no experience in making window frames with my own hands, and I was just too lazy to cut it all out.
In my attic, I found two unused sashes from the window frame and decided that this was just what I needed for the windows in the barn. Of course, they are a bit narrow, but for such a small barn, in my opinion, just right.
Having decided on the location of the windows, from a floorboard (40 × 100 mm), I built two frames for inserting window frames on the east and south sides. The photo below shows the design.

Having fixed the window frames with self-tapping screws, I continued to sheathe the walls of the barn with a board. And just then they brought ondulin to the roof.

In the next part, we will cover the roof of the barn with ondulin and finish with wall cladding.
If you have any questions as you read, feel free to ask in the comments below.
We lay the roof from ondulin. Part 7
Finally, the X hour came, and it was decided to finish, finally, with the roof of the barn, the more frequent rains prompted such a decision, and I started laying sheets of ondulin on the prepared crate. Before this, the shed that I was building stood in this form, as shown below in the photo.

We lay sheets of ondulin on the roof.
The purchase of ondulin as a roofing material for the roof was due to a simple desire to save money and nothing else. If there are extra funds, then I recommend buying a metal tile or profiled sheet, since these materials are not combustible, unlike ondulin, which contains bituminous resins that burn very well.
In the same store, I immediately bought special nails with waterproofing caps, I'm afraid to make a mistake, in my opinion, about 20-25 nails go when mounted on an ondulin sheet. If, for your roof, you take ondulin, then do not forget to take the installation instructions for ondulin sheets there, in the store, it says how many nails should be taken per sheet and how to place them correctly. You can also read about the installation of ondulin here.
In principle, in the photographs below, all this can be seen.
As a waterproofing under the ondulin, I laid a roofing material on the crate, grabbing it to the boards of the crate with stapler staples. It happens with us that the breeze blows so that even the staples will not hold - everything will tear off and fly away ...
I started the installation of ondulin sheets on the left side, when viewed from the back of the barn. According to the mind, of course, it is more convenient to start laying on the right, then you don’t need to slip the next sheet under the previous one, but put it on top, which is undoubtedly more convenient. Well, how did it happen ... I didn’t get enough information.

We lay the first sheet of ondulin from below and very carefully trim it along the perimeter of the roof. This is a very crucial moment, and if you make a little mistake, then by the end of the roof we can get that the whole structure is slanted and moved somewhere to the side.
We pierce the sheets with a nail on top of the ridge and, of course, in those places where the board of the crate passes.

Overhangs in front and behind the sheet from the edge of the roof, I made about 5 and 8 cm, respectively.
This work does not require high qualifications, only attentiveness and accuracy.
Okay, the roof is done, and, thank God. It's time to finish with wall paneling. Photo of the barn after laying the roof below.

We finish with the wall covering.
We cut to size and hammer the last boards and of course do not forget to coat the entire structure with fire and bioprotection (OBZ). To protect wood, and of course for beauty!
In the photo below you can see a piece of linoleum in the left corner of the barn, on which I liked to sit in the evening and watch the sunset - they are beautiful here!
I have long understood that work should bring pleasure, there is no need to drive horses, everything should be done sedately, thoroughly and thoughtfully. Only in this case you will not mess up, sorry for the slang, and you will get incomparable pleasure from the work done and the realization of your significance for yourself and other people.

Well, enough of the lyrics, although, where without it ...)) It's time to finish with the walls. Using all the boards for the walls of the barn and glazing the windows, I got the following result. See photo below.

In the photo, the shed turned out to be some kind of curve)), but this is a bug of the camera that I shot, in fact, everything is smooth and beautiful.
There were not enough boards ... literally 20 pieces to complete the project. To pay for delivery (1500 rubles) because of twenty boards, the “toad” simply strangled, and the time was up - autumn came with rains.
In the future, we will make an addition to the house and there is a plan to build a gazebo with a barbecue, so the material still needs to be ordered - we will wait until next summer.
You need to order two more doors with boxes and finish off the walls of the barn. The last part of my story will take place at the end of the summer of 2013.

The plans — to finish the barn:
- Finish off the front wall on the left with boards and the internal partition between the woodcutter and the workshop.
- Install two doors (entrance and workshop).
- Upholster the corners of the barn and trim on the windows.
In conclusion, a few more photos with views from the inside, for a better understanding of the design of the barn.
Yes..., I treated the floor in the workshop with an electric planer to make it smoother and sweep away the debris like clockwork.


If you want to build something similar in your country house and you need more information, then write to me below in the comments or through the feedback form, and I will post in the PHOTO GALLERIES section a complete photo report of the construction of the barn with my own hands in high resolution for download.
You get all the pleasure from work if you can treat yourself to summer cottage recipes in the evening! We read about delicious treats that you can cook in the country for yourself and your family.
In the next part of the story about the construction of a barn for a dacha with my own hands, I will lay out a complete breakdown of the tools and materials that I needed for this dacha construction. You just need to find all the checks ...))
Materials and tools for the construction of a country barn. Part 8
So, let's make some kind of estimate that will probably help you in building a shed for a summer residence of 3 by 6 meters with a shed roof on your own.
Why did I decide to build a barn with my own hands? Well, firstly, of course, out of economy, and secondly, I myself have more than once come across such “gentlemen-shabashniks” who take an advance payment and then disappear. Before that, of course, they swear that they will do everything quickly and efficiently, but ... having received the money, they disappear without a trace.
Alas, this is the Russian reality and good masters who drink in moderation, who do not need to be driven with a stick, who understand everything themselves, go to work and do everything as it should be so little ...
Well, let's not talk about sad things.
If you want to do well, do it yourself!
Let's follow this saying and make a shed for our summer house with our own hands. Moreover, it is not so difficult and you can get by with the efforts of just one healthy man with arms growing from the right place.
I built and you will build. The assistants included my wife, who helped to smear the lumber with fire and bioprotection, and of course the good weather.
Materials in the table
| Material | Quantity | Price | Sum | Note |
| Brick | Didn't count | — | — | Approximately 6-7 rows of two bricks in each row, for each column. In the case of a shallow foundation, it can be reduced to 4-5 rows. |
| PGS (sand-gravel mixture) | 15-20 buckets | — | — | A large bucket for each hole. |
| PCS (sand-cement mixture) | 10 bags of 25 kg | 95 | 950 | It will take less if you make a shallow foundation. |
| Ruberoid | 3 rolls of 15m | 320 | 960 | Goes to waterproofing the foundation and roof of the barn. |
| Cement plaster | 2 bags of 25 kg | 160 | 320 | For outdoor foundation work. |
| Threaded metal bar 10mm | 2 meters | — | — | For installing pins in foundation posts. |
| Board 25 × 150x6000 Approximately 2.2 m 3 | 100 pieces. | 6 000 rub. per m3 | 12 120 | Board for walls and lathing of the roof of the barn. I gave the number, taking into account the boards that I did not have enough. |
| Board 42 × 105x6000 1.27 m 3 | 46 pcs. | 6 000 rub. per cubic meter | 7 302 | Board "sorokovka" for mounting the floor and rafters. |
| Bar 105 × 105x6000 1.058 m 3 | 16 pcs. | 6 000 rub. per cubic meter | 6 348 | Used to build a barn frame. |
| Bar 53 × 53x600 In linear meters | 60 meters or 10 pcs | 17 per meter | 1 020 | For the construction of mobile construction gantry with railings and stairs. |
| Delivery, unloading | — | — | — | Find out this point at the sawmill. |
| Antiseptic "Biotex" - maple color | 4 things. Bank 10 kg | 1160 | 4 640 | For impregnating the boards of the main structure of the barn. |
| Antiseptic "Biotex" - pine color | 2 pcs. Bank 10 kg | 1160 | 2 320 | For impregnation of roof boards and later corners window frames, for contrast. |
| White Spirit | 2 cans of 5 liters | 350 | 700 | For breeding antiseptic Biotex. |
| Corner 100×100 | 60 pcs. | — | 2 000 | To assemble the frame of a barn from a bar. |
| Corner 40×100 | 26 pcs. | — | For assembling goats. | |
| Self-tapping screws 4.0×40 Yellow or white | 1 pack 200 pcs | 160 | 160 | For fixing corners 40×100. |
| Self-tapping screws 4.2×75 Yellow or white | 2 packs of 250 pcs. | 209 | 418 | For fixing corners 100×100. |
| Self-tapping screws 4.5×100 Black for drywall | 1 pack 250 pcs. | 300 | 300 | For lateral fastening of rafter boards and floor boards to each other. |
| Nails 50mm | 1 kg | 90 | 90 | For fixing an inch board. |
| Nails 90mm | 1 kg | 90 | 90 | For fixing inch boards when laying "American". |
| Nails 150mm | 1 kg | 90 | 90 | |
| Nails 200mm | 1 kg | 90 | 90 | For fixing timber and rafters. |
| Ondulin | 16 sheets | 365 | 5 840 | |
| Nails for ondulin | 100 pieces. | 3 | 300 | Nails with a closing cap. |
| wooden door with frame | 2 pcs. | 800 | 1 600 | Doors to enter the barn and internal to enter the workshop. |
| TOTAL | 47 958 rubles |
|||
* Dashes in the table mean that I did not remember the prices for specific materials or did not find receipts. But these amounts are insignificant and will not greatly affect the overall result.
* Dimensions of lumber, nails and screws are given in millimeters (mm)
* The indicated prices for building materials correspond to the summer of 2011. Some items were bought with discounts on a discount card, etc.
Tools you will need
With such a fairly large-scale construction, you will need a minimum set of tools for working with wood and iron.
- Chain saw, electric or gasoline;
- Drill;
- Electroplaner;
- Cordless screwdriver;
- Angle grinder (grinder) - for cutting bars (optional, if you cut them with a hacksaw);
- Circular saw (parquet) - maybe not needed. I needed for the dissolution of the boards;
- Hacksaw for wood;
- The hammer is big;
- Hammer medium;
- Ax (sharpened);
- The chisel is wide;
- Building corner;
- Level;
Auxiliary tools
- Wide brushes or roller for applying fire protection;
- Drill 200×10 mm;
- Several pencils;
- Construction stapler with staples;
- Construction knife for cutting roofing material;
Perhaps I forgot to specify something. If I remember anything, I'll add it right away. If something is not clear, ask questions in the comments below the article.
Installation of doors to the barn, completion of work. Part 9
As you may remember, I didn't have enough lumber to finish the barn, and the completion had to be delayed. And finally, after 2 seasons, I started the last stage of construction.
The boards I needed were left from the construction of the house, which I will tell about in another section of the site. Only two left to buy wooden doors with boxes and necessary hardware inventory: door hinges(left), handles, as well as fire and biological protection for wood with maple and pine colors.
If you remember, I left the barn in such an unfinished form:

I started work, perhaps, from the most difficult moment - the assembly and installation of door frames. I bought solid wood doors, and as a box, each door was accompanied by a set in the form of three bars with cuts made in them under door leaf. Therefore, I had to take measurements, cut these bars, taking into account the door gaps, and connect them into a box.
Installing the interior door.
I started by installing inner door leading to that part of the barn, which I prepared for a small workshop.
On the one hand, I fixed the assembled box to a vertical wall beam, on the other hand, to fix the box, I put a vertical stand from the trimming of the forty board, since there were quite a lot of such two-meter trimmings in the manufacture of rafters.


Next, I had to tinker a bit with the installation of the hinges. To do this, first I set the lower gap between the door and the frame with the help of slipped corners - it is convenient to adjust the gap by increasing or decreasing it by hammering or pulling out the corner.

Then, having marked the locations of the upper and lower hinges, using a set of chisels, I chose excess wood (about 2-3 mm) so that when installing the hinge, it would sink a little into the box and door leaf.
Having attached the upper and lower hinges to the door with a couple of screws, I put pieces of wood of suitable size under the door leaf and, fitting the hinges to their places, finally fixed the door in the box.

Installing the outer door.
By the same principle, I installed an external door in the barn. Only in this case, as a second vertical support for the door frame, I used a piece of timber and a piece of a magpie board on top. I also fixed them with steel corners and sewn them diagonally on the side with self-tapping screws.

It was necessary to use a beam 100 × 100 due to the convenience of fastening the outer boards of the wall, as well as further door trim, under the vertical board of which we leave a gap in the thickness of the board used (about 25 mm).
Important! I remind you that I processed all the boards from the front (outer) side with an electric planer. At the same time, we save impregnation for wood, as well as increase the resistance of wood to adverse external effects of water.
For the convenience of working with a planer, I slightly modernized the goats for sawing firewood, namely: I screwed two planks to the "horns" of the goats with screws. Now it has become convenient to put a whole board on them and pass with a planer.

I sewed up the inner wall, between the woodcutter and the workshop, with boards end-to-end, having previously processed them with a planer from all sides, paying special attention to the “ribs” to minimize gaps. Of course, they are still formed when the wood dries, well, for aesthetics ...))
So outer wall I had to tinker a little so that the boards did not start to "peck" up or down. I used a level for control, and also took measurements along the sheathed wall through the door for each board from the bottom.

Having finished with the sewing of the outer front wall, I left an area above the door not sewn up for the installation of a small visor there in the future. Below you will see what I mean.

Having finished painting, I began to manufacture and install door trims and a canopy over the door. Well, there is nothing special to explain, everything can be seen in the photo.
The euro pallet is still acting as steps. In the future, I plan to build normal steps at the entrance, close (ennoble) the columnar foundation and make a workbench in the workshop. While in the workshop got accustomed old sofa, who successfully avoided the autoduffé.

Mistakes made during construction, as well as useful tips that will definitely help you when building a barn with your own hands, we will consider in the final 10th part.
Only those who do nothing do not make mistakes.
Rehabilitating yourself with this well-known saying, I suggest you read this final part of the story and learn from the mistakes of others, in this case mine.
Also, I want to give a few more useful tips, which will undoubtedly be useful to you when building your barn in the country.
barn foundation
After two winters, the foundation of the barn, one might say, did not fail and survived with the exception of one column. If you remember, I made a columnar foundation from old bricks left after the collapse of the old stove. over brickwork was imposed cement plaster for outdoor work.
And now, it seems, from an excess of moisture, a couple of unreliable bricks in this masonry began to collapse. The cement plaster fell off, respectively, in the photo below it is clearly visible.

Causes
From the foregoing, I concluded that the foundation columns were not adequately waterproofed. It seems that during the autumn rains and spring snowmelt, water accumulated and lingered around them in the soil and did its destructive work.
If you remember, after making the posts, I filled the pits with the previously excavated sand and soil. So, now I come to the conclusion that the holes should be filled with material that does not accumulate water, such as slag, gravel or crushed stone.
Error correction
I'll probably have to jack up the front beam of the lower frame of the barn next year and partially change this column. You may also have to dig all the posts 30-50 cm deep, cover them with mastic and cover with rubble to prevent such destruction of the brickwork in the future.
And as I noted in the first part, you should cover the posts with a special waterproofing mastic, which you can buy at hardware stores.
You can read more about the basics of building a columnar foundation made of bricks, as well as other options for columnar foundations, here.
Frame, floor and wall cladding
As for the frame of the shed, I did not find any complaints about its design during operation, but I still recommend making the floors from a board 50 mm thick. Forty in principle suits me, but if you want the floor to be unshakable, then it is better to use a 50 × 150 mm floorboard.
When cladding the walls of the barn, I made an unfortunate mistake - I did not use galvanized nails, but simple ones. Here, of course, it's not about saving, saving a penny, just the head did not think about the obvious facts. But I got ugly stains on the tree from rusted nail heads. See photo below.
Moreover, where I used self-tapping screws with a black coating, the so-called drywall screws, there are no rusty streaks.

The conclusion here is unequivocal - use only galvanized nails and self-tapping screws (screws) with a chemical protective coating for outdoor work.
Error correction
If you still used simple nails, then, as an option, it is only possible to apply varnish or paint to the surface of the caps to prevent contact with water and, accordingly, rusting. This is done with a simple small brush.
Fire bioprotection

As fire and bioprotection, I used "BIOTEX - universal" with the color "maple" and "pine" in a 10-liter package. This is not an advertisement, but simply a fact.
Bought this one because it was good value for money. I think that, in principle, any similar composition of bioprotection will do.
This composition, in addition to fire and bioprotective properties, also has its own color (color) for the decorative component, it is not made on a water basis and is diluted with white spirit.
Before use, for better absorption into the wood and some savings in biosecurity, you can add a little white spirit. Such a composition dries in warm sunny weather quite quickly: 0.5-2 hours.
Also, before applying it should be thoroughly stirred, as the entire color scheme settles to the bottom.

I applied it with a wide brush in 2 layers, with an interlayer drying of about 30-40 minutes. This coverage was enough for 2 years, although the manufacturer claims 3 years. On the south side of the barn, the color has faded quite badly. Boards painted with pine color even turned a little gray.
Therefore, when I was finishing building the barn, I once again went through all the walls with biosecurity. At first I thought not to go through the north side, but then I painted it anyway, because. at dawn and sunset in the summer (we have white nights), the sun shines on it with direct rays.
It should be remembered that the sun and water are the main enemies of wood.
It should also be remembered that the planed surface of the tree takes 3 times less impregnation - saving on the face. And if you decide to use "BIOTEX - universal", do not leave the rest for the winter - they will disappear. Either use it all up or take it with you to town.
Tool
I try to buy branded tools, especially for electric and petrol tools.
In my work, I used a Makita chain saw, a circular saw from the same company, a Hitachi screwdriver, but I bought an electric planer from some incomprehensible Chinese manufacturer Matrix. That's what he let me down...
But as you know:
A miser pays twice, a fool pays three times, and a sucker always!

At the completion of the construction of the barn, at some point, the planer began to make obscene sounds, turning into a squeal with strong vibration. The quality of planing became noticeably worse - the surface of the boards ceased to turn out to be perfectly even, some small waves began to appear. You can see them well in the photo below.

Incomplete disassembly of this device did not reveal the reasons, and I simply did not have time to disassemble everything piece by piece, and frankly speaking, desire.
I think that one of the thrust bearings has screwed up. Self repair hardly possible.
Now I'll have to buy a new electric planer, but I know one thing for sure - it will be a branded tool, maybe Makita or Bosh.
The conclusion here is of course simple and accurately expresses the following proverb:
I'm not rich enough to buy cheap things.
That's probably basically all I wanted to say. I hope this part of the story about building a shed for a summer house with your own hands was useful to you. 
https://greendacha.com/stroimdachu/sarai-hozbloki/stroimsaray-part1— link
Brick crumbles after 10 years. It is necessary to take a hand drill with a 120mm nozzle, drill holes to a depth of 120 cm, pour sand + crushed stone 20-25 cm and then pour concrete (3 buckets come out), pre-install the reinforcing cage. Insert a stud into the concrete from above.
The depth must be dug to the freezing depth in your region + 10%, let's say for Moscow it is 120 cm + 15 cm of the substrate.
It's amazing what a person is capable of when he is pressed ...
A shed on a suburban area is vital. Otherwise, you will have to store garden tools and equipment in the house itself. Naturally, this will not contribute to a comfortable stay. A barn is a simple structure of a lightweight type. Making it with your own hands is quite possible for most skilled men.
What is a frame shed for?
An outbuilding in the form of a barn on a suburban area is vital. It is intended for storing garden and garden tools, ranging from a simple shovel or chopper to a walk-behind tractor, a watering pump and other expensive equipment. In addition, it is simply unsafe to store pesticides, fertilizers or a small supply of gasoline in other rooms.
Thanks to the frame shed, it will be possible to store all garden tools
Benefits of frame construction
The main advantage of the frame structure is its quick erection and low labor intensity of construction. The benefits are as follows:
- The possibility of using lumber of the second or third grade.
- Ease of design.
- The ability to quickly move to another place, if provided for by the design of the building. To do this, the support frame is made with a small ledge and a notch at an angle of 45 degrees, forming a kind of skid.
- Fast erection.
If we talk about the shortcomings of structures of this kind, then they arise only in connection with design or execution errors.
A frame shed is built simply and quickly
Preparation for construction, design and calculations
Preparation for the construction of the barn consists of the following activities:
- Location determination. Since this building is intended to store items and materials needed for use in the garden, the barn must be placed on the site adjacent to the front garden. To save space, it is better to build it closer to the boundary. The rules establish that the barn should not be closer than one meter to the neighboring site.
- The dimensions of the building in the plan are best chosen for reasons of rational use of materials. So, the optimal option would be a size of 6x4 meters. At the same time, the length corresponds to the dimensions of the standard lumber length - 6 meters, and the width assumes a two-meter-long departure, which can be used for racks on the low (rear) side of the building. For the front, you can cut the timber in half and take it completely on the racks.
- Thus, the main dimensions of the barn with a shed roof were determined, the angle of inclination of which will be about 14 degrees. This is an ideal building option in terms of the rational use of materials.
- The distance between the racks of the frame should be no more than one and a half meters. At the extreme openings, braces must be installed to counteract wind loads. The size of the beam for them should be the same as the size of the bearing support posts. If a beam of 100x100 millimeters is used, then the jibs can be made from a beam of 50x100. In total, you will need 8 pieces of such parts.
- The upper trim of the frame must be made of a beam of the same size as the lower one, in our case it is 100x100 mm.
- For rafters, you can use a bar 50x150 mm, installed vertically in width.
- Wall cladding from the outside should be made from any waterproof sheet material: plywood, OSB boards, drywall. A common material for walls is unedged board. Tes must be sanded before installation.
Let's deal with the supporting structure. The barn does not need a massive foundation. It can be installed on small concrete blocks, using them in the corners and in the middle of the walls. However, in areas with high wind loads, it is better to use screw anchors. This is a version of the screw pile in miniature. It is enough to install them at a distance of two meters from each other, the total need for such parts will be 8 pieces.
If you use the frame device scheme, you can make a solid barn with your own hands
Preparing the site for the shed
The site for this building is prepared as follows:
- It is necessary to free up space from the fertile layer, which will require the removal of soil to a depth of 30 centimeters. The surface must be carefully leveled and compacted.
- After that, it is necessary to arrange a drainage layer by pouring sand 12-15 centimeters thick into the recess. Fill the rest with gravel of medium fraction, compact the entire surface.
Thus, the likelihood of stagnation of water under the barn, which will easily leave through the drainage, is reduced.
Calculation of the need for materials
The amount of materials needed to build a barn is conveniently calculated in tabular form.
Table: an example of calculating materials for building a barn
| Name | Purpose | Quantity (pcs) | Size (cm) | Normative data (pcs/m3) | Notes |
| Anchor | support structure | 6 | |||
| Pine beam 100x100 Total by type of material: | Bottom strap length Bottom strap width Top harness by lenght Top strap width Rack rear Rack rear Rack front Doorway | 2 2 2 2 4 1 5 1 11 | 600 400 600 400 200 200 300 90s 200 600 | 16,6 | From segments From the segment Total requirement 0.7 cubic meters |
| Beam 100x50 Total by type of material: | Additional crate in the openings jib Window openings 60x20 cm | 24 8 2 2 11 | 150 300 160 600 | 33 | Total requirement 0.33 cubic meters |
| The board is not edged Total by type of material: | Sheathing outer overlap of the rear wall The same for the front wall Same for side walls | 48 48 32 56 | 200 300 300 600 | 28 | Total requirement 2.0 cubic meters |
| Beam 50x150 mm | Translations | 7 | 400 | 22 | Remaining 7 pieces x200 mm Total requirement 0.33 cubic meters |
In addition to the above, you will need a plastic film for a moisture protection device. With a width of three meters, it needs 20 running meters for the outer protective layer and the same for the inner. Depending on the price indicators, it can be replaced with roofing material.
The final covering of the roof is taken from the simplest of financial considerations. Suitable ordinary slate or fiberglass, galvanized or painted corrugated board. When calculating the need, it is necessary to take into account overhangs with a width of 0.3–0.5 meters.
Interior decoration is best made from sheet material. Useful and leftovers from the decoration of the house.
Thermal insulation in an unheated barn room has the opposite meaning. In hot weather, it is important to keep the temperature from overheating in the sun. In such a situation, without thermal insulation, it will be very uncomfortable to be in it. It is important to perform high-quality waterproofing of the walls.
A frame shed can also be built on poles
Barn building tools
For such a simple structure, the need for a tool is small.
Table: barn construction tool
Step-by-step instructions for building a frame barn
To build a barn, you need to perform a series of sequential steps:
What to make the foundation
A strong foundation is not needed to build a barn. Often it is installed simply on brick stands. It directly depends on the nature of the soil at the location. If the subsoil layer consists of clay or heavy loam, this threatens with significant soil movements, as a result of which the structure can be skewed with damage to the walls and jamming of the doors. In such a situation, a rather deep foundation is needed, the supporting part of which will be below the freezing level of the soil.
These conditions are met by the following types of support bases:
- Pile-screw. Screw piles are screwed into the ground to the required depth, their upper ends must be aligned horizontally along the stretched cord. Then, heads are installed on them for attaching the support beam. In addition to the quality of the soil, such a choice can be made when building a barn on a slope.
- Columnar. For the device, you need to dig (or drill) pits below the level of soil freezing. At the bottom, make drainage from sand (12–15 centimeters) and gravel in approximately the same layer, tamp the backfill. Reinforcement is carried out with a frame of steel bars in the amount of 4–6 pieces vertically, fastened with crossbars. The armored rack must be collected on the surface and immersed in the pit. Install the formwork of the desired height on top of the soil. Pouring concrete into the ground. After seven days, the formwork can be removed and work can continue.
It makes no sense to consider other foundation designs. They are heavier and more expensive in execution: tape, grillage and other types of support bases, and they are inappropriate for a building weighing several hundred kilograms.
Photo gallery: types of lightweight foundations for light buildings
 The columnar foundation with a concrete grillage serves as a reliable support
  Lightweight foundation on piles will withstand loads on unfavorable soils
  Pile-screw foundation with a wooden grillage for the installation of a barn does not require excavation
  Strip foundation - a lightweight option for installing a light structure
Frame device
The base for the barn is ready for further installation when the timber trim is installed and fixed on top of the supports. It should represent a regular rectangle, the diagonals of which are equal to each other. The check is made by measuring with a long tape measure or cord.
Frame assembly:
- Installing a lag for the floor. A bar measuring 50x150 mm is used. The distance between the lags should be 75 cm. Each of them cuts into the strapping beam to a depth of 50 mm. A corresponding cut is also made. You need to fasten it with a nail in the middle and two corners to the body of the strapping beam.
- Installation of corner posts. Three meters high racks are installed on the front wall, two meters high on the back. The distance between them is 1.5 meters. Corner posts are placed vertically with plumb control. They need to be fixed with temporary jibs, once again check the verticality and fasten to the harness with two corners and two flat plates each. Fastening is done with self-tapping screws.
- A cord is stretched between the corner posts and the rest are installed at a specified distance along it. Fastening is made by corners and plates.
- Installation of the upper strapping from a bar 100x100 mm. Under the inclined bars, the supports are cut with the required slope.
- Installation of translations for the device of a roof from a bar 50х150 mm. On the support bars, when connecting parts, a tie-in is performed. The translations are fastened with screws or M12 studs with wide washers, two screws per joint.
- Fixing jib. They need to be placed from the top of the corner posts to the bottom trim. The material for them is a bar 50x100 mm. Fastening is done with self-tapping screws.
- Lathing on the walls. It is made from a bar 50x100 mm. Parts are placed in openings formed by racks at a distance of a meter from each other parallel to the strapping. Fastening is carried out using flat plates with self-tapping screws.
As an option, you can consider making a barn frame from profile pipe size 60x60x3 mm. The dimensions of the building are the same, the distance from the base of the lower harness to the top should be two meters.
The profile pipe for the frame will provide long-term operation barn
The work is carried out in the following order:
- Preparation of parts: racks and crates. Metal cutting is done by a grinder. In addition to parts from pipes, you need to prepare metal corners that are installed on each pipe connection. The size of a triangular part made of steel 3 mm thick is 200x200 mm.
- The frame is welded by electric welding with angle control. The front welds are cleaned, the reinforcement is removed.
- Before further assembly, the metal frame is treated with a primer, then covered with paint for metal.
- With a metal base, sheet materials are used for wall cladding: flat slate, fiberglass, OSB boards or moisture-resistant plywood.
- Moisture protection in this embodiment is necessary. The film is pre-fixed with construction tape.
- Translations and logs are made from the same timber as with a wooden frame.
Video: building a metal frame for a barn
Floor and wall cladding
Further work on a wooden or steel frame is carried out in almost the same way:
- Wall covering. It can be made with various sheet materials. For economic reasons, we will opt for an unedged board. Before stuffing the boards on the racks and the crate, it is necessary to install moisture protection from a 200 micron thick polyethylene film or roofing material. You can fix it with a construction stapler on metal brackets.
Unedged boards are perfect for finishing the walls of the barn
- Sheathing the back wall with boards should be done in segments two meters long, that is, three parts from each. Fill the first row of boards, on top of which install the second with overlapping slots. Similarly, sheathing the front wall with boards three meters long, as well as the sides of the barn. Trim the end of the side walls in place after the end of the wall cladding.
- Before laying the roof, install a ceiling covering, which is best made from sheet material. First, arrange an inner crate from a board 25 mm thick, then stretch the moisture protection film, and fasten the front material to it with self-tapping screws.
For the ceiling in the barn, it is better to use sheet material
- Insulate the ceiling with any slab or roll material. A popular solution is to use expanded clay with a fraction of 5–10 millimeters. Pour it between transfers and level it. Install moisture protection on top, then top coat roofs.
- To insulate the walls of the barn, you can lay one layer of insulation from the inside.
- Then, sew on the support strips along the bottom of the lag plane, arrange a crate on them from an edged board 25 mm thick.
- Install moisture protection.
- Insulation of the floor is carried out in the same way as the ceiling.
- Lay a floor covering over the log. First you need to make a draft floor. For it, you can use a cut or unedged board. A finishing coat is placed on top of the finished floor. Under the operating conditions of the barn, it is better to lay the floor with flat slate or cement-bonded particle board.
The draft floor in the barn is made of boards
- The last to perform wall cladding from the inside with any sheet material.
Calculation of the need for insulating materials
Thermal insulation of the floor is made with expanded clay. It is advisable to use a fraction of 5-10 millimeters. For wall insulation, it is better to take rolled or slab materials, using the remains of building a house.
How much expanded clay is needed
The volume of this bulk material is determined by the area of the backfill and the thickness of the layer. The floor area is: 6 x 4 = 24 square meters, the backfill layer, taking into account the layer thickness of 0.1 meters, will be 24 x 0.1 = 2.4 cubic meters. For the ceiling, you will need the following amount: 24 x 1.16 = 28 meters, 2, 4 + 2.8 = 5.2 cubes. Coefficient 1.16 takes into account the angle of inclination of the side walls.
How much slab or roll insulation is needed
The need for this material is determined by the area of the walls:
- The frontal wall has an area of 6 x 2 = 12 sq. m.
- The total surface of the side walls will be: 4 x 2.5 x 2 = 20 sq. m.
- Front wall area: 3 x 8 = 18 sq.m.
Thus, the total area of \u200b\u200binsulation for wall covering will be: 12 + 20 + 18 \u003d 50 square meters.
Photo gallery: finishing work of the barn
 Sheathing shed walls is inexpensive and lasts a long time
  Glass wool reliably keeps the temperature in the barn
  Laying OSB boards on the floor - practical option barn
  Material with low thermal conductivity will save the barn from overheating in summer
  Plywood is a great material for finishing the ceiling in the barn.
Everything wooden details must be treated with fire impregnation and antiseptic. Otherwise, the barn will not live long.
Video: building a shed roof barn on your own
The apparent simplicity of construction should not have a relaxing effect on the owner of the site. One way or another, it is necessary to take into account the characteristics of the soil. If the movement causes the building to skew, it can jam the door or break the window frames. And also the slightest inaccuracy or mistake in the choice of materials for construction will lead to the loss of costs incurred.
Arrangement suburban area like renovating an apartment. The process cannot be terminated, it can only be paused and then resumed. Own estate, like a living organism, always requires close attention from the owner, investment of labor efforts and funds. The question becomes especially acute when it comes to household buildings. I want them to be strong, comfortable, outwardly worthy, but inexpensive.
The union of savings with the result is possible if you build with your own hands. To do this, you need to know how a frame shed with a shed roof is being built - the most affordable option for an inexperienced performer.
It is not without reason that frame technologies are persistently pushing out the usual methods of construction from domestic open spaces. New methods are widely used in the construction of baths, garages, dachas, solid residential buildings. In the construction of sheds frame technology there is no alternative at all, because it is:
- Cheap. Significantly reduces the consumption of materials required for the construction of walls. Thanks to its lightness frame building the basis is the budget columnar foundation.
- Fast. Construction is carried out many times faster than the construction of load-bearing structures made of foam blocks, bricks, timber, logs.
- Easily. Installation of frame elements of a small barn is carried out without special construction equipment.
- Practical. The building assembled from the shields on the frame can be dismantled if necessary, moved and reassembled in another place.
Other than that, it's just convenient. The frame structure easily adapts to the economic needs and taste criteria of the owners. It is possible to add or change the configuration.
The truss systems of pitched roofs are based on the upper trim of the frame structure, which plays the role of a Mauerlat. When installing a shed roof in classic version rafters are laid separately on walls of different heights.
The difference in the height of the supporting walls provides the slope with the slope necessary for the removal of precipitation. However, for a shed roof, this is an optional condition. It is quite possible to build it above a box with walls located on the same level if:
- Build a cantilever frame over one of the walls of the frame box. The frame in such structures acts as a support for the run, on which the rafters rest on top.
- Install truss trusses, shaped like a right triangle. The long boat of the triangle is attached to the harness, the hypotenuse plays the role of a rafter leg.

The choice of shed roof covering is closely related to the slope of its single plane. In most cases, these are gentle structures with a steepness of up to 8º. For their arrangement, bitumen or bitumen-polymer roll material is best suited.
Shed systems with a slope of 10º to 25º are covered with metal profiled sheets or roofing steel without a profile. If it is necessary to maintain the integrity of the architectural ensemble, it is permissible to lay piece material on shed roofs. But it should be clearly remembered that the lower the steepness, the greater the likelihood of stagnation of precipitation and the flow of atmospheric water into the roofing pie. Following the extremely undesirable moisture of the components of the roofing system, premature destruction will inevitably occur.
Building a barn with a shed roof step by step
Analysis of specific examples - The best way learn how to properly build a barn with a solid shed roof. The study of real solutions will help to study the principles of technology, get an idea of how to distribute the stages of work and what to focus on.
The projects proposed by us as a sample will make it possible to build a similar object without any problems or suggest how to make your own development.

Construction of a frame shed on skids
The indisputable advantage of a light frame shed on skids is that it can be moved and installed at any point if desired. garden plot. For example, it can be placed in the summer near the pool or pond for temporary placement. pumping equipment, and with the end of the season, transport closer to the house for storing firewood.
For the purpose of periodic transportation, the structure is installed on skids made of timber. If the idea of mobility does not captivate, the shed, depending on the properties of the underlying soil, rests on a surface reinforced concrete slab or on shallow concrete blocks located at the corners of the building.
We will illustrate the process of building a shed on skids. The owner, who knows only the basic techniques of carpentry, will be able to build such an object with his own hands and equip it with an elementary shed roof. The dimensions in the figures are given in inches, we did not change them so as not to confuse interested readers. Those who wish can translate the data by multiplying the given numbers by a conditional coefficient of 2.54.

For convenience, we divide the construction into the following stages:
- Foundation construction. Structurally, it includes a frame attached to two parallel skid bars. The skids are made of timber 4'×4', the frame is made of timber 2'×4'. The space between the sides of the frame is filled with pieces of timber 2'×4'. The base elements are connected with nails or self-tapping screws. For reliability, it is desirable to duplicate critical places with metal corners. The runners are fixed with 4 screws. All fastening points must be at least 1.2” from the edge of the workpiece to be attached, so that the wooden parts do not split.
- Floor device. We measure the diagonals before attaching a 3/4 ″ plywood sheet to the frame, which plays the role of the future floor. The dimensions of the diagonals must match. If the condition is not met, we identify the flaws and correct them, then we fix the sheet. We do not tighten the fasteners “all the way” so as not to damage the plywood. Along the perimeter of the floor, taking into account the doorway, we lay an additional strapping.
- Building the back wall of the frame. We cut out the details for it from an inch in size, taking into account the formation of the doorway. The top of the vertical elements should be sawn at an angle of 17.5º. Wall racks are fixed with temporary jibs. After checking the installation parameters with a level gauge, the racks are fastened with corners to the base. The top of ordinary racks and short racks above the opening is connected by a board nailed on top - the back of the top trim. It should be at an angle.
- Construction of the front wall. It is carried out by analogy, but taking into account the absence of a doorway. We cut out the racks in size and cut them down in the upper part at an angle of 17.5º. In both cases, it is more convenient to cut down before installation. However, if there is no confidence in the accuracy of cutting and installation, it is better to cut the parts with a small margin. And after installation and fixing, cut down after the fact.
- Building the side walls. They are made in the form of a frame with a central pillar in the middle. The extreme elements of the frame reinforce the corner posts of the frame shed.
- Making rafters. For cutting rafters, an inch trim is used. We apply it to the place of the upcoming installation from the end and mark the lines of cuts. We cut out according to this template from a bar 2ʺ × 4ʺ.
- Installation of rafter legs. We place the rafters exactly above the racks of the front and rear walls. For fastening, we use nails or self-tapping screws.
- sheathing. Produced by wall profiled sheet, grooved or non-grooved board.
- Wind board mount. After sheathing the walls, a 1'×4' board is installed at the top along the perimeter so that the edge of the previous element is closed by the end of the next one. Cutting of parts is carried out with preliminary fittings according to the actual position.
- Lathing installation. We cut moisture-resistant plywood 1/2ʺ taking into account the actual area of \u200b\u200bthe roof along with the board installed around the perimeter. Sheet material is fixed to the rafters.
- Laying waterproofing and coating. On sloping roofs, we lay a continuous waterproofing carpet on top of the crate. Waterproofing strips are laid from the bottom up so that the seams are ultimately directed along the flow of atmospheric water. Waterproofing is laid with an overlap of 10-15cm. A roof is laid on top of it. In the described example, this is a flexible tile, the laying technology of which.


At the end, the doorway is framed with jambs from the board 1ʺ × 4ʺ, door hinges are installed and the door is hung.
The proposed method of building a mobile shed with a shed roof is suitable for the construction of do-it-yourself children's houses, booths for storing equipment, and external components of borehole heads.
In budget options, the base frame can be simply fixed by driving reinforcement into the ground. Metal rods about 50 cm long are either simply hammered through holes drilled in the frame, or hammered near the base, and attached to it with metal plates.

Construction of a stationary change house
Despite the more solid dimensions of the next shed, pour a tape or monolithic foundation doesn't make the slightest sense. Enough concrete blocks laid in three rows. However, this does not mean that the work of digging and preparing the foundation pit can be abolished. It is allowed to refuse them only if a site is allocated for construction, previously leveled and carefully compacted during active operation.
If the barn is to be built on an unprepared site, then you will first have to completely remove the soil and vegetation layer. Then dig a pit, 0.2 m deep below the level of seasonal freezing in a particular region.
We will find the mark in the collection of standards "Construction climatology", not forgetting to compare the readings with the type of soil on the site. The bottom of the pit should be compacted, covered with a gravel-sand cushion for 25-30 cm and poured with a layer of lean cement 10 cm thick.

After the concrete has hardened, we mark the pit for the construction of brick or foam concrete pillars. We will build supports of the type that suits us. During the laying of the columns, we will lay the anchor for the future fastening of the lower trim of the frame.
On top of the pillars we will lay roofing material trimmings to protect the wooden frame from rotting. We will assume that the foundation stage has been successfully completed and we will directly deal with the construction of a barn with a pitched roof.
Work algorithm:
- We check how accurately the supporting pillars are built. We put a board flat on a number of pillars and set the spirit level. Identified errors are corrected by installing board trimmings on the tops of the posts. We carry out control actions by placing the board along long and along short rows.
- We lay the base beam on a leveled columnar foundation. If anchors were not laid during the construction of the pillars, we first try on the timber in place and mark the points for drilling holes for fastening to the pillars.
- On top of the timber, we install the frame of the lower trim and fill it inside with ordinary logs.
- On the logs we lay the floor of thick plywood, boards or OSB boards. The floor elements are laid with gaps of 2-3 mm for linear temperature expansion.
- We mount the front wall according to the dimensions. We fix its position with temporary jibs.
- We assemble and install the back and side walls of the frame. If the cutting was done correctly, then the result of the assembly will be an impeccable frame with walls of the same height. Otherwise, you will have to file or build up. For craftsmen who doubt the impeccability of the work, it is advisable to assemble the walls not with a finished frame, but with separate racks, cut with a small margin in length. According to this method, the top of the uprights is fastened with temporary side strapping. And after the construction of all the walls, the excess is sawn off according to the indications of the upper edge of the strapping.
- On top of the ends of the racks, the upper trim is installed in two rows. If a temporary side board was used for leveling, it should be dismantled. The stationary strapping is laid with overlapping of the joints of the underlying row.
- We assemble a cantilever-running frame, from short racks, the top of which is cut down at the required angle to form a slope. We calculate the angle in advance by drawing the roof profile in the form of a regular right triangle on the diagram.
- We make a pattern of rafter legs from the board by attaching the blank to the side of the installation site. Do not forget that the length of the rafter leg must provide the front and rear cornice overhang.
- We cut the rafters, install them directly above the racks, fix them with metal corners.
- We arrange a continuous crate with a waterproofing carpet along the rafters and lay the roofing:, profiled roofing steel, etc.
Upon completion of the frame, we sheathe the shed with siding or any similar material.

Then we build a door jamb, hang the door, locks on it. We close the cantilever frame from the inside with a mesh. If you are thinking about how best to make a roof with one slope on a frame shed with walls of equal height, information about the construction in the described way will be very useful.

Device slope truss trusses
The use of ready-made roof trusses in the formation of a shed roof is fully justified by the convenience and safety of the work. The main actions for the manufacture of truss modules are carried out in calm conditions on solid ground.
You can buy wooden or metal trusses ready-made, they just need to be hoisted onto the roof and fixed. True, the purchase will increase the construction budget somewhat.
Self-construction of roof trusses will save an impressive amount. In addition, an inexperienced master in carpentry, who decides to do the manufacture with his own hands, will be much more comfortable working on the ground.
It is easier to control the accuracy of dimensions and correct shortcomings than to saw off, build up, connect at a height. Thanks to the comfortable conditions of carpentry work, the quality of the structure increases significantly.

The main advantage of using roof trusses in frame construction is that a closed triangular module does not transfer thrust to the walls, which is highly undesirable for load-bearing structures of this type. The thrust is distributed and extinguished inside the roof truss, without transferring the load to the frame of the building.
However, the method is still not ideal. It is used only in the case of arranging small-sized buildings, because. rafter triangles without additional devices have the right to cover spans only up to 7m, with additions in the form of struts and supports up to 24m.
Rafter trusses are installed on frames with walls of equal height. The principle of construction is elementary. According to pre-designed dimensions, wooden modules are made, the configuration resembling right-angled triangles.
The hypotenuse of a triangle is most often a rafter leg, less often it is a supporting element on top of which a rafter is laid. The long leg performs the function of a floor beam. The short leg plays the role of a rack of a kind of cantilever-running frame, made up of the end parts of the truss trusses.
Before making rafter triangles, it is necessary to make a drawing with calculations. The length of the rafter leg should provide cornice overhangs on both sides. If the truss is made for the subsequent fastening of the rafters on top of the hypotenuse, then the triangle is drawn without taking into account the overhangs. Those. the long leg is equal to the width of the equipped box.

The steepness of a shed roof must be carefully considered. The prevailing number of structures with one slope have a slight slope due to the increased wind load on the vertical part of the roof. However, manufacturers of profiled steel roofing, for example, strongly recommend using material for arranging slopes with a slope of at least 25º.
Increasing the angle of inclination to the sizes recommended by manufacturers sometimes brings results that are not very attractive in terms of aesthetic criteria. In addition, the consumption of materials for the construction of the truss system and laying the coating increases. With a decrease in steepness, the consumption of waterproofing increases due to the need to lay a multilayer solid carpet and reinforce problem areas with additional waterproofing strips.
Videos in a "live" form will explain how you can make a pitched roof with your own hands: video instructions will clearly acquaint you with the process of the device.
An ingenious method of building on a foundation of tires:
Common building technology:
Frame shed on concrete slabs:
The construction of a barn with a shed roof using frame technology is a matter that can be safely taken on by the owner, who has not forgotten how to hold a tool in his hands.
There are not too many technological subtleties, but there are still specifics. Without taking into account the peculiarities of the construction, there can be no impeccable result. Keep this in mind when choosing best way structures, and in the implementation of the plans.
Hozblok for giving is one of the most necessary and multifunctional buildings. The structure can be used not only as a storage place for tools, agricultural implements, garden and auxiliary materials. Here you can organize a comfort zone with amenities where you can relax and take bath or bath procedures after a hard day.
The utility block is a non-residential building, which is designed to store various inventory and necessary things. It is also recommended here to organize a place to relax and an area for cooking and eating, or to equip a room for taking water procedures. You can create a hozblok with a woodcutter, where a supply of raw materials for a fire, fireplace or stove will be stored.

The building may be temporary or permanent. In the first case, the structure is erected from any material at hand, including used materials. The capital structure involves a thorough approach with the arrangement of the foundation, the erection of walls, the laying of the roof and the installation of windows and doors. In this case, you will need to first develop a do-it-yourself project for a household block in the country, the drawings of which will display the progress of construction.
For the construction of a structure, wood, metal or plastic is most often used. Wood is an environmentally friendly, reliable and durable material. However, to protect the building from insects and decay, the boards must be treated with a special impregnation. Plastic constructions are lightweight and cost effective. Metal buildings are mainly used as a garage.
Hozblok can be bought ready-made. From the proposed options, a model is selected that meets the stated requirements and future purpose. It can be mounted independently, or a utility block is ordered for a summer residence with assembly on the site.

Varieties of hozblokov in the country
View of the hozblok for giving (photos clearly display various options execution of the building) is determined depending on its purpose and functionality.
A structure on wheels with a trailer mechanism, so that it can be moved to any place, is a mobile change house. Hozbloki for giving this type are most often found during construction work. They are used as temporary structures for storing various accessories. This design saves time required for the construction of buildings.
In the case of temporary storage facilities, the building can be converted into a hotel house. Here you can organize an open veranda by setting a table with chairs for a comfortable summer tea party.

The shed-type design is designed to store garden tools and harvested crops. It can be made of wood or metal. The first option is less durable, since the material is more susceptible to negative effects. natural factors environment. The metal hozblok for giving is ideal solution for storage of various garden tools.
In the case of global construction work, it is necessary to erect a warehouse facility on the site where it will be possible to store the material, tools and mechanisms involved in the work. This building must have good waterproofing and be equipped with a reliable lock to ensure the safety of the internal content. Near the warehouse, it is recommended to equip a shower and a canopy where you can have a bite to eat and rest.
For vast country lands, many arrange a guard post. It is better to purchase such an object ready-made. The most complex design for a summer residence is a utility block with amenities. The building may include a bathroom, a shower room, a place for cooking and eating, a sleeping corner, a storage room and an open area under a canopy.

Useful advice! It is recommended to equip a kitchenette with a simplified version of the necessary communications, which will ensure the possibility of full cooking.
It is advisable to use a building in the form of a garage not only for a car. Here you can equip the cellar, organizing a place for storing crops and conservation. It is also recommended to allocate an area for storing garden tools indoors. It will be useful in the garage in the country to have a viewing hole.
The size of the hozblok depends on its purpose. Mobile cabins and security post are characterized by small size. But for warehouse buildings, garages and buildings with amenities, you will have to allocate a larger land plot.
Ready hozbloki for giving
The easiest solution for giving would be to buy a ready-made hozblok, which will be enough to assemble according to the instructions and install. Such designs are presented in metal and plastic versions.

The structure of the metal structure includes a frame and a profiled sheet. For Assembly similar design usage welding machine not provided. The constituent elements are attached using special parts. It will take a little more time to assemble than to organize a plastic model. If there is no possibility for self-assembly, you can order a hozblok for a summer residence with assembly.
The metal structure is devoid of a floor part, which requires the arrangement of its installation area. To do this, the site for the hozblok can be poured with concrete or overlaid paving slabs. The metal building is made of galvanized steel. To ensure the protection of the structure from corrosion, the surface of the material is coated with paints and varnishes. This also ensures a long service life. The design does not require special care.
The plastic prefabricated hozblok for giving consists of several separate sections. Due to its low weight, the structure can be easily transported to the installation site. Assembly takes place within three hours without the use of special fasteners and specific tools. All necessary elements are included in the kit. The plastic hozblok is mobile, so if necessary it is easy to move it to a new place.

Important! The design does not require preliminary construction of the foundation.
Plastic structures have floors, windows, doors and are equipped with ventilation. This design does not rust, does not rot and does not require special care. The warranty period of operation is 10 years.
Features of stationary summer cottages
Despite the fact that ready-made options for household blocks are characterized by simplicity and speed of construction, many prefer more solid capital buildings, for the construction of which brick or wood can be used. The first option is a durable and unpretentious material in maintenance. However, the organization of a capital brick building will require a lot of time and effort. A faster and simpler solution is a wooden hozblok made using frame technology.
This technique is widely used in the construction of objects in the suburban area. This is due to the simplicity of the process and the minimum amount of materials required. Therefore, the cost of such a design will be significantly less than the price of a finished model, while it will satisfy all the needs of the owner.

Hozbloks with a toilet, shower and a small room are very popular. They can be used as a warehouse, resting place or lodging for the night. The hozblok with a firewood shed for a summer residence and the organization of lighting will allow you to spend the night in it with early spring and until late autumn. After the construction of the country house is completed, the building can be converted into a bathhouse with a shower. With a slight increase in the area of the roof of the building, you can organize a canopy with an open terrace. It is recommended to furnish the formed territory with a table with chairs, which will make it possible to relax on summer evenings or after taking bath procedures.
How to build a hozblok with your own hands: step by step instructions
Before building a hozblok, detailed planning is carried out with the execution of drawings, the preparation of the required amount of material and a set of tools. The economic block most often has small dimensions. Despite this, the structure allows you to solve a number of problems:
- equip a warehouse for storing garden tools;
- create additional zones in the form of a toilet, shower, rest room with amenities.

Based on the purpose of the building, a detailed construction plan is carried out with the layout of the premises of the required dimensions. Here you should specify all the dimensional indicators of each compartment. In case of difficulties with creating a drawing of a hozblok with your own hands, it is recommended to use the Internet. On specialized sites you can find various real projects hozblok, which can be downloaded for free or purchased at a moderate cost.
The next step is to create a list of building materials based on the drawings. Do-it-yourself hozblok is mainly built from wooden beam. In addition to it, you will need cladding panels, hydro- and heat-insulating, as well as finishing material for walls and roofs. In the case of building a building with a toilet and shower, you should consider the distribution of water supply and sewerage. Concrete blocks, gravel and sand are useful for creating the foundation.
Choosing a place for building a hozblok with your own hands
Before you start building a utility block, you should choose the right place for it in your summer cottage. It depends not only on the features of the layout of the total area, but also on the purpose of the future building.

If it is planned to build a utility block with a shower and toilet, the building should be located at a distance of at least 1 m to the border with the neighboring plot and 8 m to a residential building. In the case of organizing a shed for keeping poultry and domestic animals, the structure is located no closer than 4 m from the border with a neighboring land plot and at a distance of 12 m from the house.
Useful advice! You can save more free territory when building a corner utility block for a summer residence.
If the location of the utility unit does not meet the conditions of the current normative documents, in the case of a transaction for the sale of a plot with buildings, serious difficulties will arise. By individual written agreement, it is possible to coordinate with the neighbors the location of the building closer to the border.
Related article:
Features and benefits of building an attic floor. Development of a project for a summer residence, popular examples of layouts.

The hozblok with a toilet and a shower should be located in a darkened place, not intended for growing horticultural crops, remote from the eating area and residential buildings.

Do-it-yourself construction of a hozblok step by step
After completing all the preparatory steps, you should proceed directly to construction work on the basis of the project hozbloka. Since the building is small in size, it will not exert a significant load on the foundation, so it is mainly made columnar.
Important! The number of columns is selected based on the size of the structure.
It is necessary to prepare the foundation for the construction. To do this, the upper fertile layer is removed along the perimeter of the future structure. The place is covered with a layer of sand and compacted. Pits are prepared under the pillars, on the bottom of which sand or gravel is poured. Concrete blocks are placed in the holes, which are covered with waterproofing material on top. Then a grillage is assembled from wooden beams. The elements are interconnected with half-wood grooves and fixed with special wood screws.
Important! Before installing the grillage on the foundation, the wooden frame should be treated with two layers of antiseptic.

Do-it-yourself construction of a hozblok frame for a summer residence
Based on the drawings, a do-it-yourself wooden utility block for a summer residence is erected from beams with a section of 100x100 mm and 100x150 mm.
Useful advice! To facilitate roofing work, a frame wooden beam of different heights should be mounted.
The same end walls are immediately assembled on the basis of a do-it-yourself drawing of a household block in the country, the dimensions of which can be different. The corner posts are installed first and last with the narrow side towards the end. Each subsequent element is mounted at a distance of 0.6-0.8 m. All vertical posts are attached to the grillage by means of corners. To obtain a rigid and strong structure, struts should be made, which are fixed to the uprights and frame using bolted connections.
Next, the front frame is mounted, for which the corner posts are already installed. The middle elements are located at a distance of 1-1.5 m from the corner and 0.8-1 m from each other. The distance between the racks and their number may vary due to the presence of doorways and windows. For the latter, horizontal crossbars are also mounted. At the end, the rear facade is erected in a similar way.

The next step is the implementation of the strapping, which is laid at a height of 2 m from the grillage. Pieces of wooden beams are fastened along the perimeter between all racks vertically.
Next is assembly roof structure, which is best done on the ground, and then fixed to the frame racks in finished form. The rafters are arranged in increments of about 0.8 m. The elements of the crate do not have to be fastened tightly to each other. This is determined by the type of roofing material. If it has a small weight, then the distance may be greater. If the roof is heavy, the rafters are laid tighter.
Before installation on the roof frame, it is necessary to fix its cornices and hem the overhangs with a 30 mm edged board. The design is fixed with self-tapping screws. Then the floor is performed using a special board.
Framing and interior trim
After the frame of a wooden hozblok for a summer residence has been erected, it should be completed outer skin. For this, lining, drywall or OSB boards for outdoor use are suitable. Next, the roofing pie is installed, which consists of a vapor barrier, insulation, waterproofing layers, battens, counter battens and roofing (most often it is slate).

If a utility block is planned with a veranda under a canopy, polycarbonate is used. Then windows and doors are installed. For the construction of partitions inside the building, which corresponds to the drawing of a do-it-yourself household block, a wooden beam with a half-tree connection is used.
In the case of wall and floor insulation, expanded clay can be used, mineral wool, extruded polystyrene foam, moisture resistant drywall, OSB boards, polyethylene. The final stage of the construction of the hozblok - interior decoration premises. The walls in the hozblok are most often painted. For this, alkyd paints or tinting impregnations are used. The floor is tiled.
Hozblok for a summer residence with a toilet and a shower
The presence of a shower and toilet at their summer cottage is a simple necessity. For a comfortable stay, it is enough to install Summer shower. The building can combine several rooms at the same time: a shower room, a bathroom and a storage compartment. Here you should organize an additional rest room. The size of the hozblok for giving with a shower and a toilet is determined by the availability of free space on the site. The economic block is mainly made of wood. However, plastic or metal can be used.

The construction of a utility block with a toilet and a shower consists of the following stages:
- digging a pit measuring 100x150 cm, 1.5-2 m deep;
- strengthening the walls of the cesspool with bricks and cement mortar;
- backfilling the bottom of the pit with a layer of sand and gravel;
- concreting a recess to obtain a sealed bowl;
- installation of a column foundation;
- installation of a drain pipe under the shower room;
- the construction of the walls of the building from a wooden beam (depending on the construction project);
- installation of window and door openings;
- roofing;
- laying the floor using wooden planks with their subsequent staining;
- insulation of the walls of the room with foam or fiberglass, which is attached to glue (or using a stapler);
- clapboard interior decoration.
For the shower to function, a water connection must be made. Use as a source of water centralized system or a water-measuring tank, which can be installed on the roof or near the building on a special metal frame.

Useful advice! If there is a centralized water supply for the shower, a boiler can be installed on the site.
The presence of an outbuilding in the country contributes to proper organization space and solving a number of problems. Here you can not only organize storage facilities, but also create a comfortable bathroom with a shower. Today, such buildings are presented in the form of ready-made utility blocks for turnkey summer cottages. If desired, and if you have certain building skills, the construction can be done independently, taking into account the purpose and structural features of the structure.