Wooden kitchens with their own hands. Do-it-yourself kitchen set made of wood: manufacturing nuances Do-it-yourself kitchen set made of natural wood
Your repost will change the Internet :)
Work on the manufacture of cabinets and the full cycle of their finishing took me about 2 months. He worked without assistants - for pleasure. I just had the opportunity to work during my vacation, which I took advantage of. Within a month, the main part of the kitchen was assembled, sanded, varnished and installed in place. Now looking back at the path I have traveled, I think that I would not take up such an adventure again. I was even offered to make the same kitchen to order twice! But I can’t go through this execution again. Still hard to be alone.
The only reason I took this job was the lack of the necessary amount of money to buy finished furniture from wood. It is painfully expensive and it is a pity to pay many thousands of rubles for work that I can do myself. I used to assemble furniture with my own hands, but these were separate cabinets, tables and small furniture, so I still had some experience.
Work progress
1. Choice of kitchen furniture project. After scouring the internet to find a kitchen that fits my size, I chose several options. In my case, the right kitchen in the form of the letter "G" was required. Projects are a dime a dozen. The project selected and finalized by me was drawn, then the work was carried out on this paper.
Dimensions of the kitchen room: 3.5x3.6 m. Ceiling height minus the floor and suspended ceilings- 2.5 m. Finishing of the kitchen apron is made with "coffee with milk" mosaic. Finishing of the tabletop is made of porcelain stoneware to match the color Ivory, the ends are trimmed with an end textured insert of the same color. it turned out 2.95x1.85 m. The height of the table (lower tier) is 85 cm, the distance between the lower and upper tiers is 80 cm. The height of the upper tier is 72 cm.

2. Calculation for the amount of material required. Well, here is pure mathematics: according to the dimensions of the kitchen cabinets determined by us in advance, we calculate the total quadrature of the material necessary for purchase. We add up the areas of all elements of the frame and facades and get total area in m2. Do not forget about the back wall: I have it from laminated fiberboard to match the color. Handles and other fittings are also counted by the number of cabinet doors. First you need to decide where and how the doors will open - after that, purchase the necessary hinges.
3. Selection of the required frame material for kitchen cabinets. In general, there are not so many options: glued furniture panels made of real wood (pine, for example) or pressed furniture laminated or pasted over with chipboard (as in this home-made corner kitchen). My choice fell on pine furniture board. Smells just great. While I was processing them, I just enjoyed the smell of pine. True, there is a lot of resin in it. You can choose to your liking, which is more pleasant to the touch or texture. I wanted to have the texture of real wood and its very presence in my kitchen. Again, I thought that real wood is preferable to pressed with glue and polymers. Surely there are furniture panels made of solid wood - but I can’t afford it, because this option was not even considered.4. Procurement of materials and tools. Just buy from a shop where it's cheaper. If you take glued pine furniture boards, then take grade E - "Extra". It has no knots and very few flaws, it costs 1.5 times more than the variety with knots. But after processing it looks like a real pine - beautiful.

5. Sawing sheets according to the calculated dimensions. To cut the purchased shields, I used a hand-held circular saw with a blade with a large number of teeth 36-48 to ensure a clean cut. For rough sawing, a 24-tooth blade is also suitable, but it will “tear” pine. Since I decided to save money on the kitchen by doing it myself, then my sawing should also be economical. After the preliminary cut, you need to mark each received part of the frame, otherwise you can get lost in them later - there will be a lot of parts!
I marked them by pasting masking tape with a note to which cabinet this part belongs. I will note one more important detail to which at first I paid little attention: accuracy of cutting parts to the millimeter. After assembling the frame of the first cabinet, I realized that I made an inaccuracy of only 2 millimeters and the cabinet turned out to be a little skewed. I had to sand to correct the flaws. And grinding, in turn, further reduces the size of the final frame of the entire cabinet as a whole.
When cutting, it is very important to leave a gap for grinding 2-3 mm in reserve. I repeat - this is important!
6. Pre-assembly of kitchen cabinets, fitting. After sawing and rough grinding, we proceed to the first assembly and fitting of cabinet parts. We assemble the frames, grind, eliminate errors and flaws, if chips are obtained, we fix them with putty for wood under desired color. You need to twist all the cabinets securely, as for installation, fix all the flaws, cut out the back walls, fit and grind all their ends. Collected all cabinets dowels and euro screws (confirmation) under a Phillips screwdriver using a screwdriver.
7. Dismantling of cabinets and their polishing. After preliminary preparation and polishing, we disassemble all the furniture and polish / grind "clean". We don’t touch the ends and the junctions of the parts - we, in theory, have already prepared them in the previous paragraph.
8. Lacquering of all parts. Lacquering takes almost a third of the total work time due to long drying and layer-by-layer grinding, which also takes a lot of time and effort. I did this:
- covered the entire surface of the frames and facades with a stain using a roller - this is much faster;
- sanded with a sponge for manual grinding number 100 and 120 - just a little bit so that the texture of the tree appeared;
- covered with the first layer of varnish - dried - after zeroing, polished the first layer of varnish, wiped with a damp cloth;
- covered with a second layer of varnish - dried and sanded again, wiped again;
- the third layer of varnish - drying and final grinding and polishing of all front surfaces.

9. Drying, assembly and installation of cabinets in their places in the kitchen. At this stage, the final version of the kitchen was already visible. Lacquer, stain and polishing did their job - beauty. Installation in place in the room was carried out in 3 hours, I really wanted to quickly install everything in its place. First, I hung the upper cabinets on pre-installed rails. After that, I assembled and installed the main, lower cabinets without installing facades.
10. Making a countertop. The tabletop is a separate "song". I would also like to make my own. Poryskav in the internet found several options and settled on countertop with plywood base covered with caramogranite tiles. Legs for cabinets should be chosen really good and strong so that they can support the entire structure along with the contents of the cabinets.
11. Installation of elements and mechanisms for closing / opening on the doors and shelves of cabinets. Responsible item. It is important to choose the right hinges and casters to meet all the needs of your kitchen, so that the angles of rotation and exit / exit / crawl out of doors and kitchen shelves are provided. On each product, whether it is a loop or rollers, the dimensions that must be observed and maintained during its installation are indicated. Following these instructions, it will not be difficult to install them in place. Of course, for their installation, you will need special tools, such as a forstner drill. The thing is inexpensive so you can buy.
It is important to observe symmetry when installing hinges and rollers so that the door or shelf does not warp when closing / opening.
12. Production of kitchen facades with milling of the ends and a pattern on the front side. I also made the fronts by hand. At first I wanted to order, but after learning the price and looking at the samples, I decided that I myself could do at least no worse. Again had to buy manual frezer. I took not the cheapest, but the penultimate one in price. The work will be one-time and there is no point in taking an expensive milling cutter, I don’t need it. The order of work on the manufacture of facades is similar to that indicated in paragraphs 3-8. The coating with stain and varnish is similar to the frame. That's just the difference in drawing a pattern on the front surfaces of the facades with a cutter.
Well, I bought a milling cutter, I also have hands. I practiced on scraps and proceeded to the main parts. I started with small doors. For them, their own template was made according to which a pattern was transferred by a cutter repeating the arch in the passage of the kitchen and the room. Then came the turn of the large doors of the facades. For them, their own template was made, larger, of the same configuration. On the ends, I processed the facades with an edge cutter, the drawing was transferred with a groove cutter. The cutters are expensive, I took 500 rubles apiece, I bought two of them: one edge and one slot. I will add that milling work must be done outdoors, in the open air: there is a lot of dust and chips. It is also possible in the apartment, but the vacuum cleaner will have to be cleaned often :)
13. Installation of glass parts, shelves and trays for drying dishes in cabinets, sinks. After assembling and installing all parts of the kitchen in their places, you can install the filling. The glass parts were screwed using special glass fasteners. I bought pallets and dryers ready-made to fit my size - the installation is the simplest, with screws.

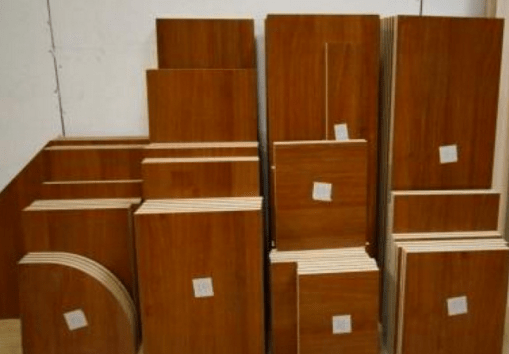
Top tier cabinet pre-assembly process

All kitchen cabinets are assembled and ready for final sanding and staining and varnishing.

The future general appearance and dimensions of the kitchen are looming ... a crucial stage lies ahead - staining and varnishing.

According to the established guides, I first hung corner cupboard, followed by the right side of the upper tier, the installation of the guide is designed to get the cabinet to the beginning of the mosaic.

The manufacture of the countertop took place in a residential apartment, so I had to experience some inconvenience. There is no sink, you can’t use the table, in short, darkness, but the tiles are laid and everything is ready for grouting.

The grout is done, now the sink and baseboards are waiting for their turn, the place under hob and carefully treated the sink with bioprotective impregnation so that fungi and mold do not grow.

Fitting shields for future facades. In this form, they temporarily hung for a week until there was free time for their processing; at the same time, they just dried up well.

Here are the facades after staining and the first layer of varnish, without polishing and grinding yet.

The second coat of varnish and the second polishing with grinding.

The facades are put in place, the glass inserts are not ready yet.

Under the upper tier, an LED strip was laid for additional illumination of the desktop, a very good and practical thing, as it turned out: it shines decently and gives additional beauty, especially at night it illuminates beautifully when the main, overhead light is turned off, the backlight turned out to be soft, does not hurt the eye, illuminates evenly.

This is how it turned out in the end with glass inserts, LED lighting, additional overhangs of cabinets and an installed hob.

This is how my kitchen turned out.

Afterword
- Issue price: all materials for the manufacture of the kitchen were pulled for 73 thousand rubles, tools, inventory and consumables - for 10.5 thousand rubles, the result - 83.5 thousand rubles, gasoline for the delivery of materials and trips to different stores - probably thousands 3.
- The deadline for completing the main work alone took from August 21 to September 30, additionally the installation of facades, their fine-tuning, the installation of glass inserts and roller guide shelves with cabinet filling took time even before November 5.
- Installing the countertop took a week in total time.
Modern life makes demands on housing, among which there is not only beauty, but also functionality. Everyone knows that multifunctional appliances have a high cost, as well as an aesthetically furnished kitchen. Modern kitchen set good quality will cost a fortune. Despite the fact that for each person the concept of "inexpensive" has different limits, a family with an average income will not be able to afford such a purchase. For this reason, many families try to make their own kitchen furniture. From this article you will learn how to assemble a kitchen set with your own hands and what you need for this.

Features and Benefits
To make your own furniture, it is not necessary to have the education of a carpenter or joiner. All you need is the desire and the availability of free time, as well as tools. When creating furniture with your own hands, you will receive the following benefits:
- individual project of exclusive quality;
- financial savings;
- new experience;
- enjoyment of manual work;
- Of no small importance is the fact that a kitchen created according to certain brands will fit perfectly into the interior of your kitchen.

There are several ways in which you can carry out your plans. For example, you can contact a specialized company where you will be provided with cutting and edging services, or you can buy ready-made components. The last option is the easiest. However, in this case, your headset will have standard sizes. There is a third option, which lies in the full-fledged manufacture of furniture for the kitchen on your own.

How to DIY
You can make a homemade table for the kitchen using available materials. Initially, you need to decide on the dimensions, and, as in any other work, prepare a sketch. You can draw a sketch from scratch yourself or use a ready-made option. You can take the drawing as a basis or draw the necessary details.


With your own hands, you can create not only a kitchen set, but also a transforming table, high chair to the kitchen, or furniture for giving. You can read more about the instructions for making furniture below.


materials
First of all, you should decide on the material from which you will make furniture. AT modern world many solutions, and each product has its own features and benefits.


As a rule, wood is the basis of any furniture. Many use in their chipboard work European production, because it has the best performance compared to Russian products. If you prefer MDF, remember that it requires further painting.

MDF is more expensive Chipboard and better quality. From such material, you can create decorative elements, it is also convenient for molding. In some cases, MDF is superior to natural wood in terms of density, so it is in demand on the Russian market.


If you are a supporter of natural and healthy materials, you can make a kitchen set from wood. Remember that such furniture will be sensitive to changes in temperature and humidity. Each blank will need to be treated with a special impregnation and antiseptic.


Tabletops are made of chipboard, MDF and natural wood. The main load falls on this part, so many experts advise using natural or artificial stone in their work.


Some elements, such as the bottom of the drawers, can be made from plywood, as well as the side parts.


To date, furniture boards have gained popularity. They are a piece of wood, made in the form of a shield. A similar shield is glued together from several parts using special glue. Several tree species can act as a material:
- Birch;
- pine;
- larch;
- aspen;
- cedar.


Kitchen set from a furniture board is more convenient, because there is wide selection sizes.

OSB boards suitable as a decor, for example, for covering an apron area, or for creating an original shelf. They are also used to make openwork cabinets and bookshelves in other rooms.


Drywall can also be used to make furniture for the kitchen. The advantages of this material include low cost and availability, along with ease of use. GKL sheets can accept any fastening, even glue. You only need to calculate the load. Each product should be decorated with finishing materials, because in its original form the GKL is not attractive.

Brick kitchen furniture deserves special attention. This style is called "murovanny". He is not very popular, but he still has fans. Brick furniture looks impressive in the room and gives it solidity. Best of all, such material will look at big kitchen, since it will be difficult to place full-fledged lockers in a small space.


Required Tools
For self-manufacturing furniture, you will need to prepare the following tools:
- electric drill;
- electric jigsaw;
- screwdriver

Do not forget about furniture hinges, confirmants, self-tapping screws, dowels, drills, pencil and tape measure.

Preparing all the necessary components will help you quickly cope with the task and not be distracted by shopping trips.

Step-by-step instruction
With the help of this instruction, you can assemble the kitchen set yourself and prevent possible errors that may arise in the course of work:
- The first step is to take measurements and create a sketch. Make accurate measurements of the room and record them on paper. Draw the room on a scale that is convenient for you so that the finished kitchen set fits into it with maximum benefit.

- Decide where the sink with stove will be located. If the current location of the furniture does not suit you, indicate on the drawing the place where you will transfer them. The issue of the location of the stove should be thought out to the smallest detail, because the size of the kitchen furniture depends on it. Consider the dimensions of the refrigerator and its location.


- Now it is necessary to enter into the resulting free space kitchen furniture. Consider not only the bottom row, but also the upper cabinets, the hood.

- If you have the opportunity, you can order the required components for the kitchen, taking into account the selected dimensions. When calculating the parameters, pay special attention to the size of the drawers. The size of the decorative facade will depend on these dimensions. Solving the issue with the location of the shelves will help you determine the required amount.
- Remember to record all measurements in your sketch and decide what type of material will be best for your kitchen.


Restoration
Most people will agree that only the most patient person can restore old furniture, since this process is comparable to real art. Not every person will like to work with a headset, gradually restoring the previous look of products.


To make a decent product out of old furniture, you will need to carry out the following activities to create a new design:
- carefully disassemble the product;
- cleaning and rinsing;
- eliminate defects in the varnish surface;
- work with wood defects;
- carry out repairs and strengthen fastenings;
- wood should be painted and primed;
- decorate appearance furniture with the help of "aging", varnishing, painting and polishing.

most challenging task is the restoration of the table, or rather the alteration of its legs. To do this, you will need to remove the old veneer, restore its former shape with the help of liquid wood.


Assembling the finished headset
Sections of components must be edged in advance. They are pre-sanded with sandpaper. After that, the edge tape is applied to the saw cut and glued with a hot iron or building hair dryer.

If you use a regular iron, then when gluing it is necessary to attach a piece of thin material to the edge.
Trim the edges of the edge when it cools down. Such a technique can give furniture attractiveness and keep it from swelling in high humidity.
The next step is marking and drilling holes for mounting and shelf holders. Do not rush to work with a drill, because a mistake will lead to a through hole.

The cabinets are assembled like a box. Vertical side walls should be attached to the lower horizontal surface. The lid is screwed on last.

Roller guides must be installed using the building level. They should be horizontal and parallel to each other. Otherwise, the boxes cannot be placed in the allotted place.

Installation of the legs is made on a fully assembled and inverted cabinet. It is required to put the front part last, after which they are hinged to the side wall.

To update the interior, you can use simple decor techniques:
- thematic stickers on the wall and ceramic tiles;
- ornament using a stencil;
- different panels and plates;
- painted furniture and walls.

Such decorative elements can give furniture or individual elements a bright accent. Interesting stickers are sold in various stores or you can cut them yourself from self-adhesive film. A decorated platform above the table, on the apron area or above the work surface, will add style to the kitchen interior.

In small rooms, decorations with small and elegant elements should be selected, and for large or empty walls, large details should be purchased.


Screen painting looks very stylish on kitchen furniture. You can make a pattern out of thick cardboard or plastic and make an original ornament. Artistic painting will look very stylish.


The following items will look great in the interior of the kitchen:
- various plates;
- cutlery;
- wine corks;
- sea shells and pebbles;
- paper and silicone molds, as well as pasta.


If your kitchen furniture is different from the beautiful and fashionable interiors, do not be upset. With help creative ideas, which you can implement with your own hands, a standard headset will turn into a real work of art.

How to decorate furniture:
- staining;
- decoupage;
- non-standard fittings;
- plastic decorative overlays with thread imitation;
- film.

Interior modern kitchen wooden
Natural wood furniture, also made by hand, has a lot of advantages. Among them, environmental friendliness is in the first place, which is important in our age of artificial materials. Such a headset looks more solid than an analogue from MDF or chipboard. And the right choice of wood and its appropriate processing will allow the furniture to last. long years. Of course, natural material is not a cheap pleasure, but the price of a do-it-yourself kitchen made of wood will be an order of magnitude lower than the factory version. In addition, only facades can be made of wood, and for the rest of the parts, take chipboard and plywood.

Wooden sideboard for the kitchen
Types of wood for kitchen furniture
The choice of wood for the headset plays an important role. And although more than 40 types of wood are known that are used in the furniture industry, not all are suitable for cabinet furniture. Soft woods, such as spruce, pine, cherry, are more suitable for facades and decoration. Solid types of wood: beech, oak, yew, walnut, are more difficult to process, but are designed for heavy loads.

Table of colors and textures of various trees
When choosing the right type of wood, it is worth considering its features. Among the most common varieties are the following:
- Oak. Perfect option for the kitchen with its microclimate: changing temperature and high humidity. Oak wood is not subject to rotting, durable and will last for decades.
- Beech. It has a hardness similar to oak and has a beautiful pattern. It is used for the manufacture of kitchen sets less often, but requires treatment with water-repellent substances.
- Pine. Such material does not have the highest strength, but is ideal in processing. Perfectly will be suitable for production of shelves, facades, small sections.

Natural oak kitchen set
Having decided on the type of wood, check the quality of the purchased material. Surfaces of boards should not have knots, cracks and layers. And annual rings should be present densely and evenly.
The tabletop can be ordered from artificial stone or others modern materials. If you plan to use the same tree, then it is worth carefully treating it with water-repellent compounds. Examples of such options can be seen in the photo.


Do-it-yourself wooden U-shaped kitchen
Wooden kitchen design and measurements
The first responsible step is design and measurements. For self-production of a wooden kitchen set, a sequence of certain actions is required.

Scheme kitchen table for self-production
First you need to decide on the shape of the kitchen furniture, whether it will be in one line or have a U-shaped or L-shaped shape. If the kitchen is spacious enough, you can make an island or a multifunctional table in the center of the room. Next, we draw a plan for the future kitchen, where we must indicate the dimensions of the walls, width and height. Here we also display communication schemes: switches, sockets, wiring location, gas, water and sewer pipes. We plan our design - allocate space for sections for products and kitchen utensils, arrange gas stove and sink and refrigerator. From correct installation of all elements depends on the convenience during the use of the premises.

Drawing of the future kitchen set
Know! kitchen appliances, sink, hob are located close to the relevant communications. It will be much more practical than building up pipes and moving household appliances.

DIY wooden kitchen
After the location of all kitchen objects and their purpose is determined, it is necessary to draw up detailed drawing, where you need to specify all sizes. The following parameters are taken into account here:
- The height of the lower and upper tiers of cabinets;
- Distance between tiers;
- The dimensions of each cabinet, cabinet;
- Location of switches and sockets.
Based on the drawn up drawing, they calculate the amount of material, additional glass or mirror inserts, the necessary fittings (brackets, hinges, handles, etc.).

Assembling kitchen furniture with your own hands
Required Tools
Making a kitchen out of wood with your own hands is not an easy task. Well, if you already have the skills to work with such material. In the absence of such, to begin with, it is worth trying to make something simple, for example, a shelf.

Furniture making tool
At home master usually there is a set of necessary tools. For the manufacture of furniture may require:
- Building level for leveling surfaces;
- Pencil, tape measure, square for accurate measurements;
- Electric jigsaw or hacksaw for self-cutting materials;
- Drill with drills for making holes;
- Screwdriver or screwdrivers for fasteners;
- Sandpaper or grinder for cleaning surfaces.

Instruments necessary manufactures do-it-yourself wooden kitchens
Each home master can add to the list at his discretion.
Important! If you are not sure that you can cut the materials evenly and clearly, you should contact the professionals. In addition, they will make the necessary holes for the handles.
Assembly of individual elements of the kitchen set
After everything is ready necessary tools, the necessary fittings have been purchased, all parts of the future furniture have been sawn, all the wooden components must be carefully sanded, polished and treated with an antiseptic, coated with several layers of varnish.

Assembling a wooden kitchen with your own hands
The assembly process starts with the lower level cabinets. Installation is carried out according to a single scheme:
- A box is assembled from the bottom, top and side parts. Shelves are mounted if they are intended to be stationary. For simple drawers, guides are attached. More complex soft extension systems have their own detailed instructions by installation.
- Drawers are assembled. A plywood blank is screwed on the back side. From the bottom side, the legs are marked and mounted with screws.
- Last of all, doors are hung on the sides, on which handles are attached. Now it remains to fill the locker with removable elements: different grids, pallets, boxes.
- Thus, the cabinets of the lower row of the kitchen set are assembled. Then we move on to the top-level elements.

Solid wood bottom drawers for the kitchen
Mounting
After all the modules are assembled, proceed to the installation of the entire headset. It is assembled in a clean, renovated room, with pre-prepared walls and leveled floors.

The process of assembling a wooden kitchen table with your own hands
First install the cabinets of the lower level. They are mounted in a single line along the building level, and then connected to each other using screeds.

Assembling wooden cabinets for the lower level with your own hands
They are fixed in pre-made holes and tightened. A worktop canvas is laid on the aligned cabinets, in which holes are cut out for washing and other equipment.

Installation of lower kitchen drawers wooden
Now proceed to install the top row of cabinets. They are hung on the wall at a height convenient for the growth of the owner. In order for the cabinet to be securely fastened, use canopies with a rail or in the form of slats.

Installation of upper cabinets
Calculate the distance between the two tiers of cabinets. In standard kitchens, it is approximately 65 cm. But you can do everything individually, given the height of the owners of the house. The kitchen apron is assembled before the furniture set is installed. After all the elements of the kitchen are installed in their places and fixed, it remains to do the installation of electrical appliances, hob, sinks, extracts.

Wooden kitchen with open shelves
Kitchen sets from a home master, made according to high-quality drawings, from good materials and with the help of a competent and solid assembly, they are not inferior in their appearance and functionality to factory counterparts. What can happen if you make a wooden kitchen set with your own hands can be seen in the presented photos.
An eco-friendly solution for your kitchen, aesthetics and elegance of your interior, and rapprochement with nature - all this is ideally combined in a kitchen made of wood. You can choose the types of wood that suit you and order the kitchen to your liking on the website http://look-wood.ru


https://youtu.be/f_n50Pq_9Sc
Photo gallery (51 photos)
Modern life makes demands on housing, among which there is not only beauty, but also functionality. Everyone knows that multifunctional appliances have a high cost, as well as an aesthetically furnished kitchen. A modern kitchen set of good quality will cost a round sum. Despite the fact that for each person the concept of "inexpensive" has different limits, a family with an average income will not be able to afford such a purchase. For this reason, many families try to make their own kitchen furniture.
Why is a solid wood set valued so highly:
- Ecologically pure material. Wood has been used in construction, decoration and furniture making for millennia and even into the 21st century when many synthetic counterparts are available. Wooden furniture does not emit harmful substances and does not cause allergies.
- Appearance. Wooden kitchen set looks attractive, stylish, cozy. The natural neutral color scheme of wood allows it to be used in almost any style.

- Long service life. Well-chosen wood with the right treatment will last for decades. If the furniture is made soundly, it may well retain its appearance for several generations. The wooden kitchen brings a touch of luxury to the interior, and handmade adds personality and charm.
Wood is a versatile material for creating a special atmosphere in the house. But first, select its breed depending on the color and qualities.

Experts in this field give the following characteristics of each of the most popular woods:
- Larch is a durable, beautiful material with a healing effect. However, not every piece of furniture can be made from this breed, to benefit the body, because. varnished for protection. From a larch table additional benefit will not, but you can make any figure.
- Pine is one of the most common tree species used in construction. The material is soft and supple, but can quickly lose its original appearance, so it is recommended to cover it with several layers of varnish.
- Walnut is a great choice for lovers of aesthetics. In addition to the fact that walnut products are very durable, openwork patterns can be cut out of them, decorating tables, chairs, cabinets and other furniture. Products from it are quite heavy.
- Oak is a popular breed among builders and designers. Oak wood has collected aesthetics, practicality: beauty, strength, low exposure to aggressive conditions environment, reliability.
- Ash - has excellent performance properties. Its products are of high quality and durable. Its universal texture is suitable for both classics and high-tech interiors.
After choosing the option you like best, you can start making drawings for future furniture.

Preparatory stage
- First of all, the kitchen, of course, needs to be calculated and, based on the data obtained, buy bars on the construction market right size and in sufficient quantity.
- Boards are also better to take processed. This will reduce the time of work at times and will not require high skill from the master. It will be enough not to make a mistake when cutting the material into blanks.
- And of course, all the tools and materials accompanying the process should also be stocked in advance. From self-tapping screws of the right size, to hinges for hanging and handles for facades. If your own skill is not enough, the facades can be ordered to a carpenter, who will fit the boards on the frame of the doors properly, without gaps, and will be able to make sure that they are not too heavy.
And yes, for a wooden kitchen it is best to take dry material. So that it would not be excruciatingly painful when the appearance of your new kitchen, made with soul, was not distorted to disgrace.

main stage
First of all, we create a solid frame for the future kitchen chest of drawers or desktop block. Partitions and doors are assembled from well-finished boards. It is impossible to spare time to prepare the material for future furniture. It is better to carefully sand and putty the boards than to frown later from the unaesthetic appearance of kitchen furniture. And the tree must be strong and well dried, so that the structure will soon “not lead”.

We prepare the frame for hanging the facades. Doing decorative panels desktop. They will be in plain sight, so careful attention is given.

The assembly technology of the shelf above the table is the same. It is better to choose hinges for hanging shelves so that a rather heavy structure does not crash together with what will be put in them during operation.

If it's about country house with wooden walls, then the shelves can be tightly nailed to the wall. Although this is somewhat unprofessional.

Modern materials allow you to firmly glue the tiles to the surface of the desktop. This option of covering the table top of the working area allows you to create a single color ensemble with kitchen apron. And this, together with the wooden facades of the working block and shelves, can be beaten in the style of true Provence.

For example, take a tile in gentle tones, or with a delicate floral pattern, use a plain tile with pastoral fragments or roosters, which are so loved in Provence. We install the sink in the prepared nest and do not forget to treat the adjacent edges with silicone. To avoid moisture getting under the sink and mold formation.
We process all surfaces with stain, and after it dries, with sandpaper. Now both components of the kitchen cabinet are visually combined into a single whole and our kitchen cabinet has become almost completely “Provencal”.

If you make a wooden kitchen with your own hands close to the Provence style, then it is still better to make it lighter. But here the master himself will decide what color his creation will be, whether he will paint it at all or keep the texture of the tree in its natural form.

First you need to prepare all the tools you need to work with wood. Here is their list:
- Roulette and pencil
- Sandpaper,
- jigsaw,
- Drill,
- Dowels and glue
- Planer and jointer,
- Clamps.
First of all, we will make a countertop.
We assemble the countertop
To make it, you will need edged boards. Their number and size depend on the size of the countertop you need - for a family of 3-4 people, a kitchen table of 60x100 centimeters is enough, so we get 4 boards of 30-50x150 millimeters. The ideal type of wood is oak, but in the absence of sufficient experience in carpentry, it is better to purchase boards from coniferous species, because they are easier to process. Next, we work according to the following scheme:
- The boards purchased at the sawmill must be aligned in length, for which we mark them and cut them at a strictly perpendicular angle.
- It is important to position the material correctly. Alternate among themselves those boards whose rings expand downwards, with those in which they expand upwards. This will minimize the size of the gap that will appear after the boards dry.
- Next, it is necessary to process the ends of the boards with a jointer, having achieved their perfect fit to each other.
- You can connect the structure different ways: from simple nails or self-tapping screws to glue and furniture dowels. The latter method is the most reliable and durable, it also provides the best connection rigidity.
- To do this, markings are made at the ends of the processed boards every 10-15 centimeters.
- According to the resulting markings, holes with a diameter of 8 millimeters are drilled with a drill, intended for dowels.
- The dowels are glued and driven into the drilled seats, connecting the boards to each other.
- Now you need to wait for the glue to dry completely, after which its excess is removed with sandpaper.
- The final stage remains: processing the ends with a planer, and then with sandpaper. Corners need to be rounded.

As a result, you should get a beautiful wooden tabletop. It remains to provide her with legs, and there, you see, not far off and a full-fledged wooden kitchen with your own hands.
Making legs
Legs for a kitchen table made of wood can be absolutely any shape that you can cut from the board with an electric jigsaw. They can be made from the same edged board, which is the countertop. The main thing, do not forget: the height from the floor to the working surface of the table should be 75-80 centimeters. After one leg is ready, do the following:
- We attach the resulting leg to another board and circle the template with a pencil. We cut out three more similar copies. If possible, with the help of a router, the legs are easily decorated with a beautiful pattern.
- The legs are set diagonally, after which they should be connected with jumpers with angles cut at 45 degrees. Jumpers are cut from a board or a bar.
- The resulting rectangle is fastened with glue. It is not necessary to use dowels, but in this case, the table base should be pulled off with clamps and kept in this form for a day.
- Next, the base is applied to the tabletop: places for dowels are marked, with which the table is fastened according to the technology described above.

The table remains to be stained and varnished in several layers, after it dries, it will be ready for use.
Now you know how to make a kitchen with your own hands from wood. Starting with a simple table, over time, you can learn how to make even complex cabinet kitchen furniture yourself!
Each zealous owner, creating comfort in his home, strives to ensure that all the elements of the situation fit harmoniously into his interior, have maximum comfort and functionality and at the same time do not cost a fortune. A great way out is to create individual pieces of furniture yourself. This is how you can get the right option that satisfies all the aspirations of the household and allows you to seriously save. Taking into account that the kitchen is a place where the whole family spends a lot of time, every little thing is important here and making a kitchen set with your own hands is what you need. Particularly relevant homemade furniture for a small kitchen, because the standard options will not suit you.
Of course, for novice craftsmen, creating a home-made kitchen set is a very serious task, but quite solvable. To do this, however, you need to have minimal carpentry skills and really have a great desire.

In order to make this furniture without spending a lot of effort and nerves, and most importantly money, you will first need to create a design project and detailed drawings of the kitchen set. Drawings of kitchen furniture should include absolutely all sizes and take into account literally every detail.
Be sure to indicate where the stove or hob, refrigerator, sink, Dishwasher and other kitchen electronics. Firstly, the location of these items depends on communications, and secondly, when placing these elements, some rules must be taken into account. So, the refrigerator cannot stand next to the stove, there must be a cabinet between them, for an electric stove, as a rule, there is already an outlet, and the sink cannot be adjacent to either the stove or the refrigerator.

It is also necessary to take into account the dimensions of the facade elements of the headset. No matter how determined you are to do everything with your own hands, it is still preferable to order a kitchen facade. Only a real master can create a beautiful home-made furniture facade, and that's another story. We want to talk about the construction of the frame of a kitchen set with our own hands, and this, it should be noted, is perhaps the most important thing in creating multifunctional handmade kitchen furniture.

The question of how to make drawings and diagrams yourself will help to resolve modern programs that carry out the design of cabinet furniture, for example PRO100.
So, the drawing of the headset has been worked out, the facades have been selected and ordered, let's proceed to the manufacture of kitchen furniture.
Necessary materials and tools
In order to assemble furniture for the kitchen with your own hands, you will need the following tools:
- jigsaw (if the material is cut independently);
- screwdriver (you can’t do without it);
- drill;
- level;
- a hammer;
- roulette.

Approximate list necessary materials and fittings looks like this:
- laminated MDF or chipboard for the manufacture of cabinet side panels (material width 16 mm);
- Fiberboard for the back walls of drawers (width - 5 mm);
- material for the manufacture of countertops (chipboard with a width of 32 mm);
- sink (budget and durable option - a sink with a "beach" made of stainless steel);
- drying for dishes;
- shelf holders;
- rail for mounting upper cabinets and universal fasteners for them;
- cabinet handles;
- Euro ties, self-tapping screws;
- hinges for doors (regular or with closers);
- guides for drawers;
- legs for lower cabinets;
- and much more that is necessary specifically for your kitchen and what counters of hardware stores abound with.

Preparatory work
Before starting the assembly, it is necessary to prepare all the details of the headset. To do this, you need to cut them out of chipboard (or another material of your choice) with an electric jigsaw, sand the saw cuts with sandpaper, then use an iron to fix the melamine edge tape on each saw cut to protect the cavity of the plate from moisture and mold.
Important! When cutting the material, it is necessary to take into account the width of the saw (about 4 mm), and it is also desirable to base the plate. In other words, cut off 10-15 mm from the edges of the material. This is done in order to cut off uneven edges that could be damaged during transportation.
To take into account all dimensions and not make a mistake, it is recommended to draw a map of the cut of the slab. There are also special programs for its creation. If the scheme that you made yourself does not inspire confidence, then you can order it in the same place where you are going to buy the material. Such a scheme will help to avoid inaccuracies in cutting and take into account the width of the saw cut, which means it will save your nerves and money.

Usually sales companies building materials also carry out sawing and edging of workpieces from laminated chipboard. Note that the edge made of PVC or plastic, made at the factory, is significantly superior in terms of strength and durability to the one that can be made at home. Think about whether it is worth saving here.
Assembly of headset elements
The process of making furniture for your kitchen ends with the assembly of individual elements and the installation of the headset in its intended place.
When a set of finished parts is prepared in accordance with the dimensions, lay them out separately in the cabinets and in the order in which you intend to assemble them or in the places where the finished cabinets will be located, this will create order and help avoid confusion.

Assemble each cabinet in the following order:
- Attach the rails if the cabinet has drawers. Be sure to use the level, otherwise the result will be disastrous, and you simply will not open the locker.
- Drill holes for the shelf supports if the cabinet has shelves.
- Drill holes for fastening the walls to each other.
- Attach the vertical side panels to the bottom of the cabinet.
- Install the top part if it is separate, otherwise the cover is attached at the end.
- Attach the bottom cabinet legs.
After all individual cabinets are assembled, they can be mounted in place.
Mounting
If the apartment has been renovated, then everything construction works must be completed before installation of the finished headset. If repairs have not been made, prepare the surfaces of the walls and floor of the kitchen for fixing furniture. If necessary, tile the area between the upper and lower cabinets of the headset. Can be used for an apron and laminated MDF.
Start mounting your headset from the bottom cabinets. Starting from the last, set them by level. This is important for installing countertops.
Fasten the cabinets to each other with euro ties.

Fix the common fiberboard back wall after all the cabinets are connected together.
Worktop with pre-cut holes for sink and hob or hob attach with screws to the cabinets. Slices of holes for sinks and plates must be closed with building sealant. Do not spare him, he will protect the wood from moisture.
After that, proceed to the installation of the upper elements. The standard distance between the surface of the lower tables and the bottom of the upper ones is 650 cm. Add to this value the height of the upper cabinets and minus 10 mm for fastening. You will get the height of the mounting rail for installing the upper cabinets.
However, these are only standards, you can revise them, taking into account the individual characteristics of the room and the wishes of the household.

For fastening the upper cabinets to the rear walls, strengthen the universal canopies. Place the upper cabinets in place.
The last thing to do is attach the doors. Here you will need an assistant, because the doors are attached in the open position. Fix the hinge first on the door, and then fix it on the side of the cabinet. If it was not possible to agree with an assistant, you will have to sweat, but this is also doable.
Install built-in kitchen electronics. It's not enough to be a carpenter, you also need to be an electrician.
At the end, install accessories: dryers, roof rails, etc.
As you can see, making kitchen furniture with your own hands is not so difficult. The main thing is to put your soul and a little effort into its production. But the result will please you for a long time, and the money saved can be spent on arranging other rooms.
DIY wooden kitchen
We looked at how to make a kitchen set from chipboard or similar materials. But this is not the only option. For country house many people prefer to make a kitchen with their own hands from wood.

Wooden kitchen set will fit perfectly into a country interior. Natural materials are simply created for an atmosphere of unity with nature and relaxation from the bustle of the city.
A do-it-yourself solid wood kitchen involves the use of such diverse materials as oak, pine, cedar, poplar, cherry, acacia, walnut, beech, maple. Fascinating, isn't it? Just imagine the color palette and unlimited design possibilities. Here you can select and budget materials and more expensive options.
For example, a pine kitchen is a fairly inexpensive option, but it also has a lot of disadvantages. So, a set made of pine with your own hands is not as durable as the same one made of chipboard. Pine is a soft material, dents and traces of mechanical damage will often remain on it. In addition, pine wood does not have a pronounced pattern.

Important! Any natural material is always more whimsical in comparison with MDF or modern chipboard. It suffers more from moisture and does not tolerate direct sunlight (some breeds may change color during operation). Speaking about the environmental friendliness of the headset as a whole, it must be pointed out that only facades will be made of natural material, and the frame will be made of more familiar and resistant laminated chipboard.
If you still want to create furniture using natural materials, pay attention to wooden panels. They can be made from pine, birch or oak. Such material is not characterized by the disadvantages of solid wood. It does not suffer from damage and is resistant to excess moisture. So the kitchen furniture panels do-it-yourself is a great option, not only save your finances, but also get an environmentally friendly and lasting result.
Another one of budget options for country house a kitchen set made of plywood can act. To build one, you need to carefully approach the selection of material. The created blanks will need to be treated first with a stain, and then with two layers of varnish. In this case, all sections of the material should be covered with sealant.

Do-it-yourself wooden kitchen is truly the work of a professional and a man who knows how to appreciate the charms of life. Do you need a detailed drawing of your dream kitchen set and suitable material. Whatever version of the material you choose for your kitchen, the main thing is that it suits your tastes and preferences, and you can create an excellent kitchen cabinet even from boards.
Assembling a kitchen set for teapots
Video instruction part 1.
Video instruction part 2.
Video instruction part 3.