How to make a wooden clothes hanger. How to make an elegant floor hanger for everyday clothes with your own hands
The hallway in a sense is the face of the whole apartment. I would like to feel coziness and comfort from the very entrance, so sometimes it makes no sense to clutter it up with massive cabinets. In this article, we will tell you how to make a wall hanger with your own hands from wood and other materials, show drawings, photos and videos on how to create a clothes hanger in the hallway.
Some Features
The wall hanger can be placed not only in the hallway, but also in the bathroom and in the kitchen, so you can make it design decision, which will add zest to the interior of the room. The main requirements that can be presented to this element are:
- simplicity;
- ease;
- simplicity;
- strength;
- availability of materials;
- compactness.
According to the method of installation, it can be:
- wall;
- ceiling;
- mobile.

In the first option, it makes sense to manufacture an angular structure. If you install the hanger on the floor, you can place more weight on it. The options can be combined, creating, for example, a wall-mounted hanger resting on the floor.
Floor construction is not commonly used in bathrooms and kitchens. This is impractical: such a hanger takes up a lot of usable space.
According to the method of hanging clothes, hangers are distinguished:
- with hooks;
- with a bar under the shoulders.

In the first case, the entire product will take up much less space, but you can hang any clothes on the hangers without fear that it will wrinkle, stretch and lose its presentable appearance.
materials

For the manufacture of hangers, wood and metal are most often used. Someone may decide to order a finished forged structure if it fits into the overall picture. Hooks can be attached to:
- glue;
- self-tapping screws;
- magnets;
- suckers.
If you plan to hang outerwear that is winter time is especially difficult, then the most the best option will use self-tapping screws. The rest are perfect for the bathroom or kitchen, where towels, bathrobes or potholders are usually placed.
The simplest

This option is used most often and it has a lot of variations that can be combined and combined. In order to make such a design, we need:
- the material from which the hanger will be made;
- hacksaw or jigsaw;
- fixing material;
- roulette;
- corner;
- level;
- pencil or marker.

by the most simple solution there will be a bar with hooks. To make it, we need a wooden plank (it should be free of cracks and chips, as well as well dried), instead of it, you can use part of a chipboard or MDF sheet. Its length is chosen according to your needs, and the width should be sufficient to place hooks on it. wooden base can be varnished or stained, the plates do not need this, because. They are already laminated. After that, several holes are drilled in the wall (their number will depend on the total length).
The distance between them should be such that an indent of 5 cm is obtained from the edges of the board. In order for the holes to be in the same plane, a building level is used. Dowels are inserted into the holes, and the base is screwed to them using self-tapping screws. Hooks are already attached to the bar itself. If you choose a good fastening material, then this design is able to withstand heavy outerwear.

With regard to hooks, you can dream up. Instead of buying them, you can use, for example, old spanners. First, they are cleaned and polished. After that, they bend. Two holes are drilled in them, and the keys are screwed to the bar. Forks can also be used for this purpose. You just need to take steel, because. aluminum is very brittle. The teeth themselves can be given an interesting shape.
Knots from trees are also suitable: you need such a knot to be located on a small branch. To fix it to the base, you can grind off the plane of the branch a little with a grinder, after which the hook is simply screwed with self-tapping screws. It is not necessary to place them in the same row. You can make them at different levels. If draw stave, then the hooks will serve as notes. A rectangular plank is not a requirement. On a round one, hooks can be hung like numbers on a clock, and arrows can be drawn in the middle. In addition, the base can be made in the shape of a heart, a cloud, a sun, etc.

It is important that the wall under such a hanger be finished, but not whitewashed. This is necessary so that things do not get dirty.
We complicate

So that things do not get dirty against the wall, you can slightly improve the whole structure. It is necessary to take two strips of the same size. Their length should correspond to the width of the planned structure. They are fixed in a horizontal position parallel to one another (one above, the other below). Next, we fix a few more vertical slats between them (we do this with self-tapping screws, the length of the fastening material should be twice the thickness of the slats in order to pull them together well.).
In width, they can be like the previous two or a little thinner, in length - 1‒1.3 m. If this is a hanger in the hallway, then it’s good to attach a shelf for hats and caps on top. To do this, you need a board 25 cm wide (you can take several elements of smaller width and fasten them together with two jumpers). It can be fixed to general design using metal corners or wooden jibs.
There is one more interesting option. For its manufacture, you will need a bar with dimensions of 5 × 5 cm. You need 7 of them. 30 cm each. To begin with, the boards are cleaned with a grinder. Sharp corners can be smoothed out. After that, cover them with several layers of varnish. Then they will need to be fixed to the wall with a puncher and self-tapping screws. You need to arrange them in the form of two letters P, which are connected at the bottom by a jumper.
We make two holes in each plank using a feather drill 15 – 20 mm. Next, we cut out cylindrical dowels with a diameter for our hole. We clean and paint the color of the hanger. We coat them with PVA glue and drown them, let them dry well.

Most likely, you will like a hanger in the form of a tree. To make it, we need a sheet of MDF, chipboard or plywood. Using a marker, draw the outlines of the plant. Next, we cut out the resulting figure with a jigsaw. The ends are processed and painted over or covered with an edge (in the case of chipboard). With the help of self-tapping screws, the product is attached to the wall, and hooks are already hung on the branches. Here you can apply real knots, as in one of the previous options.
Ceiling and trempels

Hooks are not always the way out. Often you need to make things fun on trempels. In order to ensure this, it is necessary to provide a horizontal bar. In this role, you can use, for example, a wooden plank 50 × 50 mm. Sharp sides are best rounded with grinder, then the hangers will be able to move freely and it will be easy to remove them. If the bar is long, then it is necessary to provide a horizontal jumper. Such a bar can be attached to the hangers with a shelf, which was mentioned above. Instead of a wooden holder, you can use a special furniture chrome tube. It is fixed with flanges.
You can not use the wall for fastening at all. To do this, we need a chrome tube. We cut off two pipes 90 cm long. We fix two flanges to the ceiling (we choose the distance between them as needed). We insert and fix these pipe sections in them. Next, we take another tube, its size will be such that it fits between two hanging pipes. We mount the horizontal tube to the vertical ones using the corners. It turned out a minimalist hanger for trempels.
This article is designed to give direction to your imagination, not to provide all possible options. We are sure that everyone has things at home that can be used in an interesting way.
Video
See what hanger can be made from just a few boards:
A photo


Ideas for making clothes hangers with your own hands: photos and drawings of hangers for the hallway. A variety of options for making homemade clothes hangers.
You can make a clothes hanger with your own hands practically from improvised materials that are lying around at home idle. Craftsmen do not cease to amaze with their ingenuity, here is a clear example of this, a home-made clothes hanger from ordinary forks.
A similar version of a hanger made of metal spoons.
Pallet clothes hanger.
Here is a clothes hanger from a pallet, and again the old pallet was used. A wooden pallet is sawn into two parts from each half of the pallet, you can make a hanger, just paint the workpiece and attach hooks to the boards with screws.
Another option for a pallet hanger, here a whole wooden pallet, it is sanded with sandpaper, the boards are painted in different colors and attach hooks.
Wooden clothes hanger.
Such a hanger is more suitable for a summer house or a bathhouse; wooden knots fixed in a wooden structure are used as hooks here.
Hanger made of metal profile and bars.
The design consists of several bars and metal profiles fastened together.
Wooden hanger with your own hands.
Used here wide board with an imitation of a piece of old wood, coat hooks are made of bars and secured with screws screwed into the back of the board.
The wood is burned with a blowtorch, which achieves the original texture of the product, the final stage is coating the hanger with a transparent varnish.
In this version, there was no carving work.
And in this design, instead of hooks for clothes, door handles which can also be painted.
An interesting option for hangers from boards.
Original homemade hanger in the form of a tree.
For manufacturing, thick plywood is used, the contour of the tree pattern is drawn and cut with an electric jigsaw. The design is painted and attached to the wall with dowels.
Hangers for children's clothes.
The details of the hanger are cut out of plywood with a jigsaw and painted with bright colors, so you can make a hanger in the form of animal figures.
Do-it-yourself outdoor clothes hanger.
The simplest version of a floor clothes hanger made of pipes, for manufacturing you will need a thin aluminum pipe 2–2.5 m long. The pipe must be bent, as shown in the figure, and the clothes hanger is ready.
Wall hanger made of pipes.
And this hanger consists of a picture on the wall, clothes hooks are attached with dowels directly to the wall.

Such hangers can be used not only for outerwear in the hallway, but also as mini-wardrobes in the room. It all depends on which type and design you choose. Clothes rack hangers are functional, easily moved from place to place, and free the backs of chairs from unnecessary clothes there.
This article contains some interesting and simple ways do floor hanger for clothes with their own hands. They don't take much time or effort.
Choose your favorite option and go ahead to change the interior!

Necessary materials:
- Two copper pipes long 3 m and 2 cm thick, each of them will need to be cut into such parts (this can be done at a hardware store where you will buy everything):
- 1.5 m long- the height of the hanger (this height should be enough for both jackets and coats, but you can take more or less if you wish);
- 1 m long- the size of the pipe on which you will directly hang things (you can also take it longer or shorter, calculate how many things you want to put there);
- two tubes about 20-25 cm long- we will make hanger legs from them.
That is, it turns out 2 copper tubes of 1.5 m, 2 of 1 m, 4 of 20-25 cm.

- 4 copper elbows (tubes bent at an angle of 90 degrees) for attaching pipes to each other, select according to the diameter for the pipes (approximately 2 cm);
- 2 T-connectors;
- 2 caps for pipes;
- Glue (epoxy glue or ask the seller in the store which of what is available is suitable);
 Step-by-step instruction:
Step 1: Measurements
Measure the space on the floor where the hanger will be, make sure it will fit. If you take the indicated dimensions, you will end up with 150 cm x 100 cm x 45 cm.
TIP: Adjust the dimensions if necessary.
Step 2: Assemble the legs of the hanger
We begin to fold the floor hanger itself from the legs, make a support and a rack. To do this, take the first pair of tubes of 20 cm each and fasten them between a T-connector, and then we do the same with the second pair.
Step 3: Attach the protective caps
To prevent dust and dirt from getting into the middle of the pipes, which will serve as legs, you need to close the holes. On each of the two legs folded in the previous step, attach a pipe cap at one end.
Step 4: Foundation
- On tubes with caps on the other side, attach a corner in this way: when the corner is on the floor, the T-connector located in the middle of the leg should be pointing up.
- Take one of the meter-long pipes and insert it into the corners, now the base of the hanger is ready.
ATTENTION: To securely fix the structure, you can use glue (at least in all joints), but then the hanger cannot be disassembled and folded again (when moving, for example).
Step 5: Side Racks
Insert a one and a half meter pipe into each of the T-shaped connectors, thus forming the side racks.
Step 6: Finishing touch
- Attach a corner to each of the newly installed racks (they should be directed at each other), and insert a meter pipe into them.
- You can also attach felt pads to protect the floor. The floor hanger is ready!

Note: Since this design is easily disassembled (if you did not use glue), you can change its length, for example, depending on the time of year: in winter there are more things - longer pipes were installed, in summer they are shorter.
Hanger made of PVC pipes (budget option)
The method of making this floor hanger is similar to the previous one: the pipes are folded like a designer to form a hanger. But here we do not use copper pipes, and PVC, so it will be much cheaper. And, of course, one more new idea design.

Necessary materials:
- PVC pipe with a length of 2 m and a diameter of 2.5 cm, it must be cut into the following parts: 12 cm (6 pieces), 80 cm (1 piece), 20 cm (2 pieces) and 10 cm (1 piece).
- PVC pipe 50 cm long and 2 cm in diameter, cut it into 3 pieces of 15 cm.
- 4 bends-corners with a diameter of 2.5 cm.
- 3 bends-corner with a diameter of 2 cm.
- 6 T-connectors with a diameter of 2.5 cm.
- Adhesive for PVC.
- Aerosol paint.
- 4 PVC adapters from 2.5 cm to 1.25 cm.
- 3 PVC adapters from 2.5 cm to 2 cm.
- Felt pads to protect the floor (optional).
Step-by-step instruction:
Step 1: Cut the tubes into desired sizes
First of all, we have to cut PVC pipes for rack mounting. You can do this yourself at home with a PVC cutter or ask at a hardware store.
After cutting the pipes into pieces, their edges can be sanded so as not to be scratched when assembling the hanger.
Step 2: Sort the materials
Now we have all the necessary parts and for convenience it is better to sort them, then the assembly process will be faster and more orderly. Arrange the materials in piles, depending on their purpose.
- For the hanger stand you will need: 4 elbows, 4 adapters from 2.5 cm to 1.25 cm, 3 T-pieces and 6 tubes 12 cm long (diameter 2.5 cm).
- For each arm hanger: T-connector, PVC adapter from 2.5 cm to 2 cm, 15 cm PVC pipes with a diameter of 2 cm and a corner with a diameter of 2 cm (you can still put a cap for pipes on it).
- For rack: one PVC tube 80 cm long, two 20 cm each, one 10 cm and a cap.
Step 3: Assemble the hanger
- stand

Fasten each two tubes with a T-piece. Insert one of the three resulting structures between the other two, as shown in the photo. Put the corners on the edges of the other two, turning them down so that a hanger stands on them.
- Arms

Put together the T-piece, adapter, tube and cap as shown in the photo.
- rack
Insert a tube 80 cm long into the T-connector into the stand, attach one of the arms of the hanger to it, then attach a tube 20 cm long, another arm of the hanger, again the same tube and arm, a tube 10 cm long and put the cap on top with the last stroke .

To keep the structure better, it can be fastened with a special adhesive for PVC. Be careful with the arms of the hanger to stick them turned in the right direction - corners up.
Step 4: Painting
The design of the hanger is ready, but it still does not look very aesthetically pleasing. Carefully and evenly apply the spray paint in the color of your choice, do not stain the room.
TIP: to make the hanger more stable, sand can be poured into the pipes from which the stand is made. After such a little trick, the hanger will not fall and turn over.
Hanger made of pipes with several levels
Another hanger of this type, only with extended functionality: here you can not only hang clothes, but also put shoes. Compact and comfortable wardrobe.

Necessary materials:
- PVC tubes with a diameter of 20-25 mm:
- 4 long 100cm
- 2 long 65cm
- 4 long 48cm
- 6 long 20cm
- 8 long 5cm
- 10 T-connectors
- 6 elbows
- Plate for bottom shelf

We fold it completely in the same way as the two hangers described above.

Wooden floor hanger in 10 minutes

Necessary materials:
- Wooden sticks (4 pieces) 180 cm long and 2 cm in diameter.
- Rope: This will be used to tie wooden sticks together (you can also use leather cords, wire, or some other decorative material, the main thing is that it firmly and reliably fixes the structure).
- Spray paint: we used golden color to paint lower part hanger legs (you can also use a different shade or color).
- Paint: we used four various colors paint, one on each leg of the hanger (but of course you can use the same color for all legs).
- Masking tape: When using spray paint, this will help keep the paint off.

Step-by-step instruction:
Step 1: Paint the supports
- Paint the legs in the chosen colors, let the paint dry.
- Paste masking tape where you want the spray paint to end, and carefully apply the paint to the legs. It is better to do this on the street, or cover the floor with newspapers so as not to stain anything. Peel off the masking tape.

Step 2: Shape the Hanger
Connect the wooden supports together with a rope, and then gradually push them apart. You should get something similar to the basis of a wigwam, the legs should be spaced wide enough so that the hanger is stable and easy to use.

Such a hanger takes up a lot of space, so it is best to put it in the corner.
Interesting ideas and photos
Tree hangers
It can be a neatly sanded tree trunk or branch, or a folded wooden structure. The main thing is that there should be one support and branches from it - hanger handles. An original and useful addition to the hallway. 

Hangers-constructors
The number of elements and design may vary, but what all these floor hangers have in common is that they can be quickly folded, and just as quickly disassembled (if no glue was used). Sometimes more expensive and noble materials are used, such as copper, sometimes wood or PVC, in any case it turns out beautifully and extraordinary.


A huge number of offers of floor clothes hangers suggests: what if you do it yourself? At home, a suit hanger, hangers for outerwear and children's clothes, which are covered with a dust cover, are relevant and practical furniture. Such furniture fits perfectly into the interior, it can be easily moved around the room and apartment.
Clothes on such a hanger wrinkle less than in the closet. It is sometimes called a dressing room, for the fact that it allows you to partially unload the furniture wardrobe, and the costumes will be in sight. It is also convenient to place children's things on such a design. Cover for a hanger, necessary as protection against dust.
The main difficulty in making with your own hands lies in the processing of surfaces and compliance with dimensions. The conjugation of parts should be maximum, which is not always possible to achieve. by hand. Therefore, in the manufacture of a floor clothes hanger, a combined method should be used: some of the parts and operations will have to be ordered by professionals.
Model selection
According to surveys and sales numbers, the most convenient model of a floor-mounted coat hanger for a suit with a cover is the hanger of the following design:

Dimensions can be changed as you wish. On the upper radius board on the back side, it is desirable to strengthen the hook for children's coat hangers. This will expand the range of applications for the hanger. Do not greatly reduce the thickness, as under load, deflections of parts are possible. Increasing the size within reasonable limits will make the hanger more stable.

You can choose any material: beech, ash, cedar, birch or pine. The latter is the most accessible. It is easier to process and finish. When choosing a material, its moisture content is especially important, since raw wood parts change their geometric shape when dried. Simply put, the part can be twisted or curled up like a propeller. After the model is selected, it is necessary to start preparing materials.
Material selection and preparation
For making at home, it is best to choose pine blanks. They are the most commercially available and easy to handle. Suitable for children's, wardrobe hangers. Do not electrify when covered with a synthetic cover. Their advantages in comparison with other types of wood:

Parts manufacturing
 This is the main operation on which the quality of the finished product depends. As can be seen from the drawing, you should prepare or buy wooden bars and pine boards. They should not have knots larger than 5 mm. The wood must be dry. Curvature of bars and boards is not allowed. When buying, be sure to take into account those changes that have been made taking into account the specifics and binding to the place. A few tips:
- The bars should be with a small margin for processing. When buying, it is better to take two blanks for one part, taking into account possible marriage during work;
- Correct geometric shape. This is checked visually. Curved products are immediately visible;
- The length is taken with a margin of at least 3 cm. Carefully sawing off 5 mm at home with an electric jigsaw will not work;
- Round bars with a diameter of 18 mm will have to be looked for. If there is no such size, then these parts will have to be ordered;
- it is desirable to treat finished parts with antiseptic agents before varnishing;
- the cover can be made of fabric or other material.
For manufacturing, a minimum set of manual and mechanized tools is required:

Required materials for the manufacture of a dressing room or children's clothes rack:
- high-quality pine bars;
- self-tapping screws for wood;
- wood drills;
- varnish for pine wood and stain;
- hand carpentry tools;
- case.
Modern power tools are equipped with nozzles for suction of sawdust and dust from the working area using a vacuum cleaner. At home, this option is very useful.
We now have a set of blanks available. Prepare them in accordance with the dimensions according to the drawing. Symmetrical details compare. They must be the same. Cut to size, sand flat surfaces with a grinder. Curvilinear to process with sandpaper. This is the most labor-intensive part of making a suit floor rack hanger. When sawing, it may be found that the wood is damp in the thickness of the massif. In this case, it will be difficult to sand the surfaces. Such parts must be dried at room temperature before finishing. Depending on the degree of humidity, the drying process may take several days.
Assembling a dressing room floor suit hanger
 This is the final step in the process of making a floor-standing clothes hanger. All parts are made according to the drawing and the conformity of the dimensions is checked, since they are all already indicated on the manufactured parts. You should pay attention to the quality of fasteners. That is, the choice of screws and self-tapping screws. General recommendations choice of screws:
- The length should not exceed two thicknesses of the fastened parts. Otherwise, the screw will break through the surface of the second part and everything will be ruined. On pine parts, you do not need to drill a hole in the second fastened part;
- Choose the color of the screws in accordance with the color of the material coating;
- Self-tapping screws must be used for woodworking. The use of self-tapping screws for metal will significantly reduce the strength of the connection.
An important procedure is marking for drilling holes for fasteners. It is absolutely mandatory to use the hole location designation. You need to mark the place of drilling in such a way that the drill does not go awry. In this case, the strength of the connection of parts will be insufficient.
The diameter of the hole to be drilled for the mounting screws should be half the diameter of the screws themselves. The lack of holes can lead to splitting of wood in the process of screwing the self-tapping screw and the work will be spoiled.
Tips for tightening self-tapping screws with a screwdriver:
- Do not screw the screw all the way in. The screwdriver has a lot of torque and can turn the screw through the material.
- The final tightening of the fasteners should be done manually with a screwdriver so as not to turn the screw in the hole, since in this case the connection will lose strength.
When the floor hanger is assembled, it is sometimes necessary to varnish the joints with self-tapping screws. Screw heads should be level with the surface. These places should be passed with sandpaper and varnished along with a self-tapping screw head.
Features of children's floor clothes hangers
In addition to size, children's floor hangers are no different from adults. Part thickness for children's version may be reduced. Accordingly, the weight will be less, which will enable the child to move his own children's hanger. The dimensions of the children's floor hanger should be selected taking into account the size of the child's clothes. Designs for girls and boys may vary. It is advisable to provide in the design for the possibility of hanging hangers with clothes on a hanger, followed by covering with a cover. To do this, you can adapt two metal hooks on which hangers will hang. You can place the hooks on the back side of the structure or on the sides.
Other options for floor hangers for suits and clothes
Figured dressing room suit floor clothes hanger
 This option looks original, but when made at home, some difficulties may arise with the manufacture of curved parts. It is difficult to maintain symmetry when working with a jigsaw. Both parts must be cut out by combining and fastening the two workpieces. The total thickness should not exceed the cutting depth parameter of the jigsaw. Modern household models are designed for a cutting depth of up to 70 mm, and this is quite enough. But this model is not suitable for shirts and blouses. That is, the possibilities of use are limited.
Mobile dressing rack on wheels
 Another interesting model on wheels. The top of the design is crowned with regular hangers, which is very convenient for placing a jacket, shirts and blouses. And the pants are convenient to hang on the crossbars. Wheels are a good design find, since it is more convenient to roll a loaded hanger than to carry it. A cover made of film or fabric will conveniently cover the hanger.
This model is produced by IKEA in Russia as a suit and wardrobe floor hanger.
It's easy to make one with your own hands. Requires special fasteners. As you can see in the picture, the uprights must be attached to the base with metal screws. During manufacture, it will be necessary to carefully and accurately drill holes for the screws in uprights. This is the only difficulty. Everything else is very easy to manufacture and assemble. The disadvantage is the need to disassemble the structure during transportation. You will have to unscrew the long bolts from the uprights.
Dismountable suit hanger rack floor in rustic style
 This hanger is more suitable for a hallway or corridor. You can put shoes under it. In the manufacture of their own hands, this model is a significant difficulty. It is required to make holes of large diameter in the crossed round racks. In general, it is very difficult to drill holes in round parts with a household tool. Better not to try. To get around this unpleasant technological nuance, you can take non-circular square racks. Using a special drill, it is quite possible to make holes of the desired diameter in square bars. It is recommended to take a metal crossbar. The wood will bend.
An invariable element of the interior is a hanger. We come across this object when we enter the room from the street. Today, many varieties of such products are produced. They are built into the closet, hung on the wall, placed on the floor. Clothes hangers easy to move to the right place, floor products can be an independent piece of furniture.
If there was no structure for storing outerwear, people would put coats and jackets on a shelf, having previously folded things. Clothing would take on an unpresentable look, so this element is difficult to overestimate. Interesting design and convenience makes these items popular. Such products are purchased for the hallway, veranda, put in the bedroom and bathroom. As hangers, structures in the form of a tree, letters of the alphabet, interesting figures, etc. are used. Hangers complement the interior, it takes on a finished look.
Advantages
Entering the room, a person immediately takes off his outer clothing. Removed things are hung in a closet, on wall hooks, floor models are used for these purposes. You have access to the desired item of clothing placed on it. When clothes are placed in the closet, you have to spend time looking for the right thing. You don’t have to look for a coat on a floor hanger, it is in plain sight. The wardrobe takes up more space than the floor structure. Not all hallways have a place to install it, so the floor product becomes the preferred option. 
The advantages of such interior items:
- Mobility is an important plus, as the hanger is easy to move at any time to another place.
- Wall products are attached to the wall, and the coating is damaged. When dismantling, you will have to do surface repairs. This will not happen with the floor version. If you have changed the situation in the room and the hanger is no longer needed, it can be easily removed to the utility room.
- Rich the lineup makes it possible to choose an item for any style of interior.
- Spaciousness. On the hanger you can place a lot of things in a circle, which is convenient if you have guests.
On such a device, clothes weigh freely, some models are equipped with coat hangers, on which wardrobe items are placed. If your clothes get wet and need to be dried, hang them carefully and move them to a heat source.
materials
Depending on the material of manufacture, hangers are as follows:
- The metal construction has an impressive weight and excellent stability. These products are made of chrome-plated aluminum, painted in different colors. It is roomy, will allow you to place a lot of things, indispensable if you have guests. Simple devices are painted in a variety of colors.
- Forged products will become a unique decoration of the veranda or hallway. They are durable, comfortable and practical. Such a product will enliven the interior, bring chic to it.
- Wooden models look great in the hallway. They are made from different types of trees. From this material, strong and durable products are obtained. Wooden structure pertinent in classic interior and in a trendy loft. It will complement the interior in country style. This option is suitable for a hallway decorated with natural materials.
- Plastic models are light, inexpensive, but with a lot of things on them, they can fall.
 Select suitable option for office, home, cafe. There are many original models for solving interior problems on sale. Unique products are created by designers to order, in which case they fit perfectly into the decor of the home.
Variety of models
A huge selection of such items allows you to choose a good option for a specific design. There are many types of floor hangers.
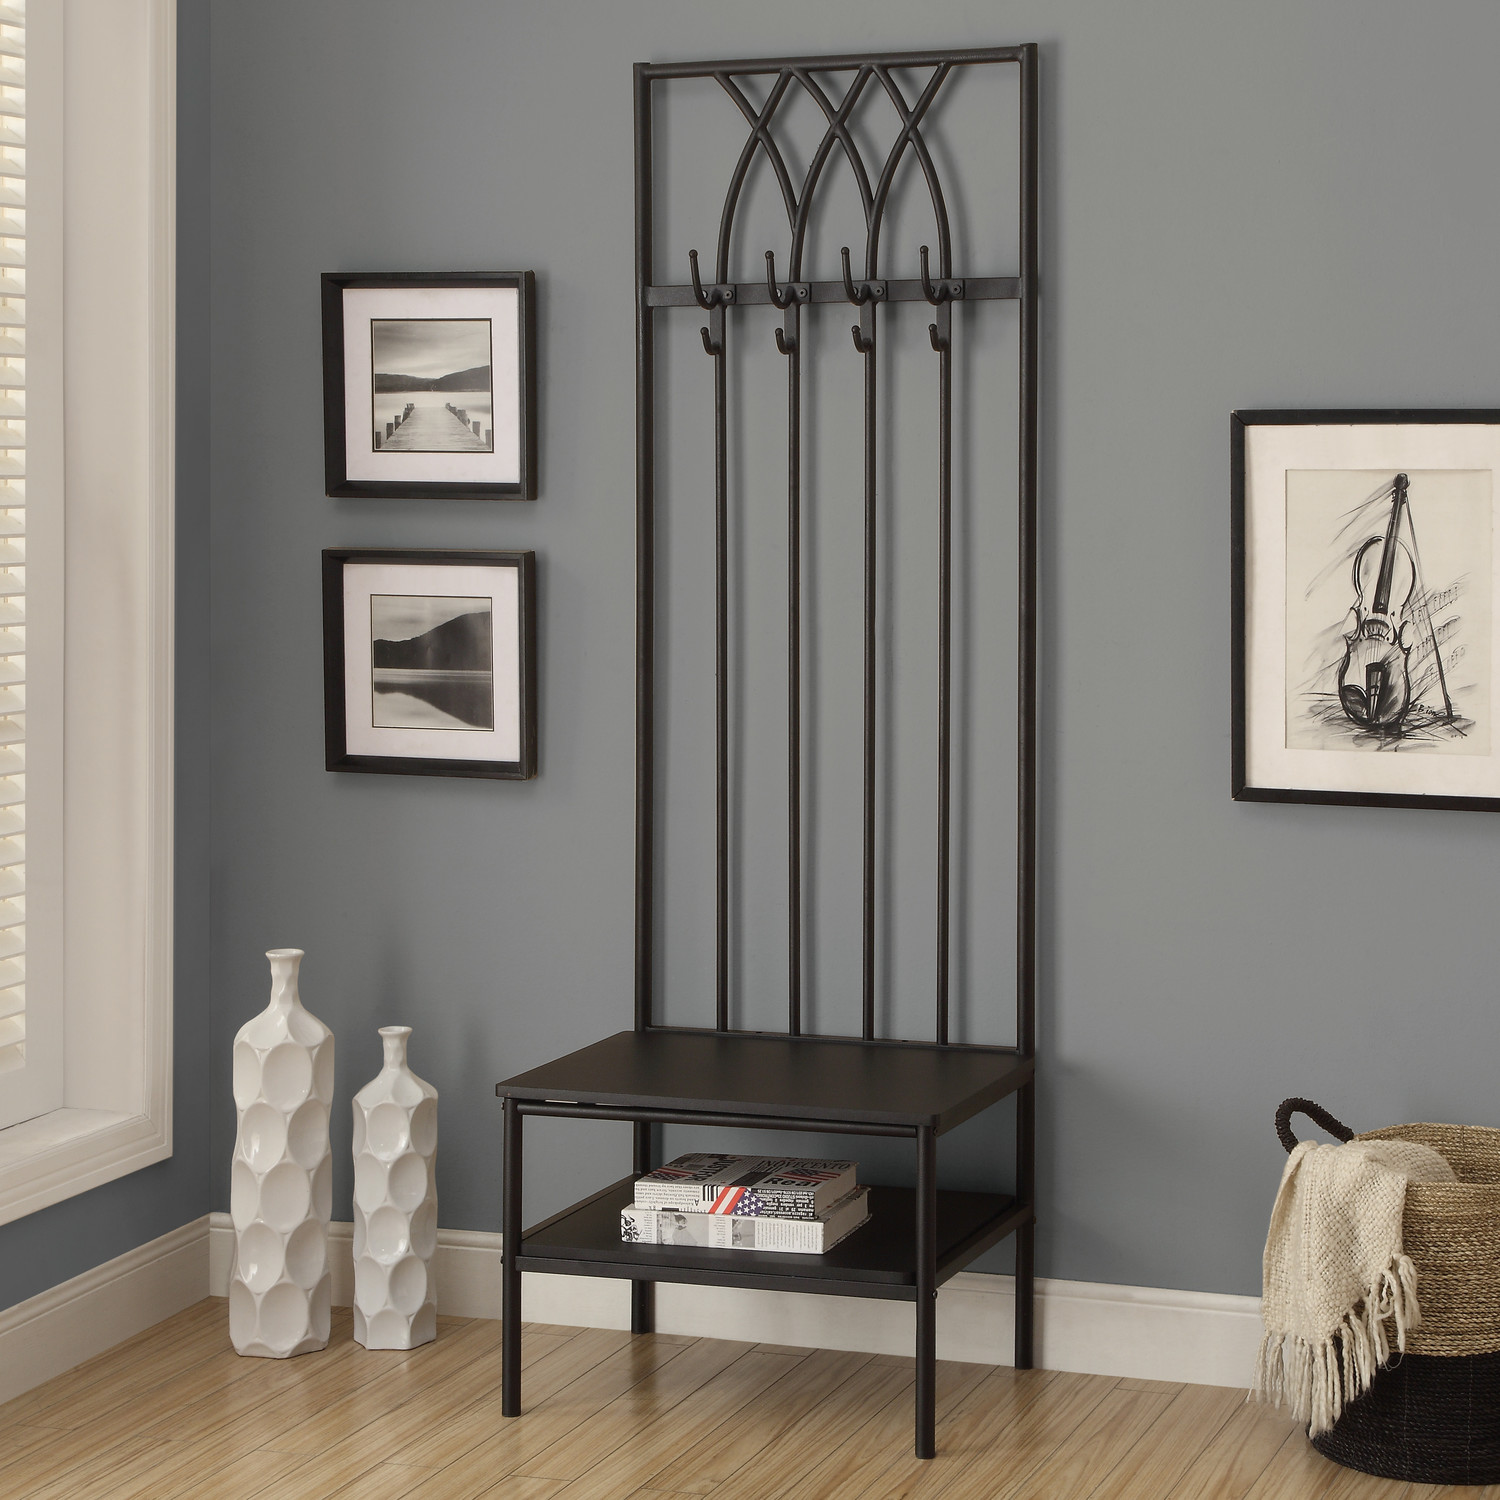
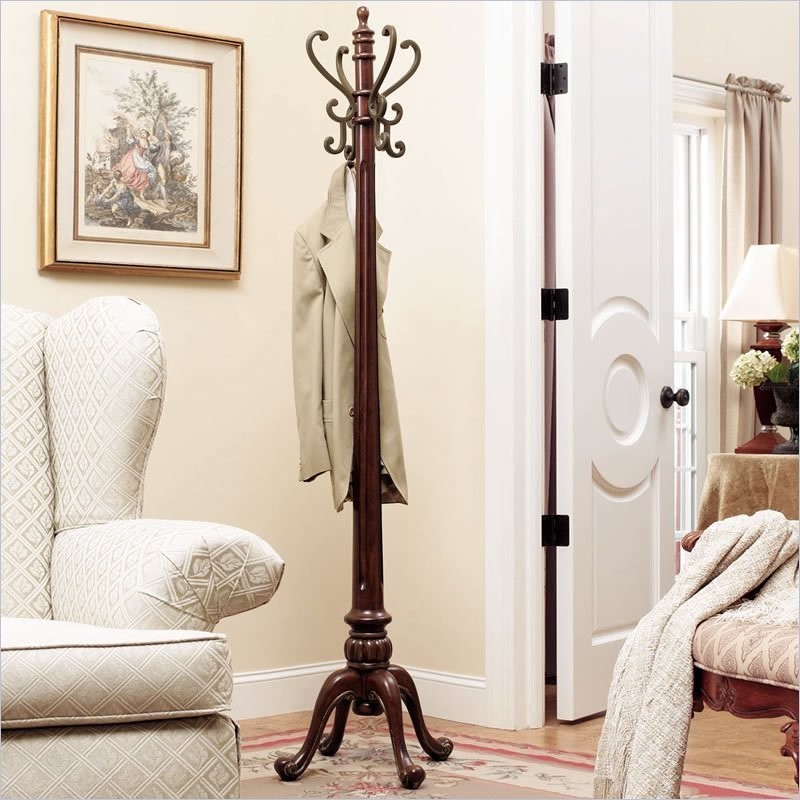
Tripod hanger is a tripod with hooks, they are often equipped with additional hooks for bags, a horizontal hoop for umbrellas. The bottom is made like a tripod or with flat base. This convenient design will solve the problem with a lot of things in the hallway. It is convenient to hang jackets, coats and other things on it. 
Model in the form of a chair with a high back will allow you to change shoes by sitting on it. It has a shelf for shoes, a strap with hooks for clothes. This is a convenient option, especially if the apartment has old man or small children. There are folding models that can be hung in a closet. This original and functional item will be the highlight of the hallway interior. 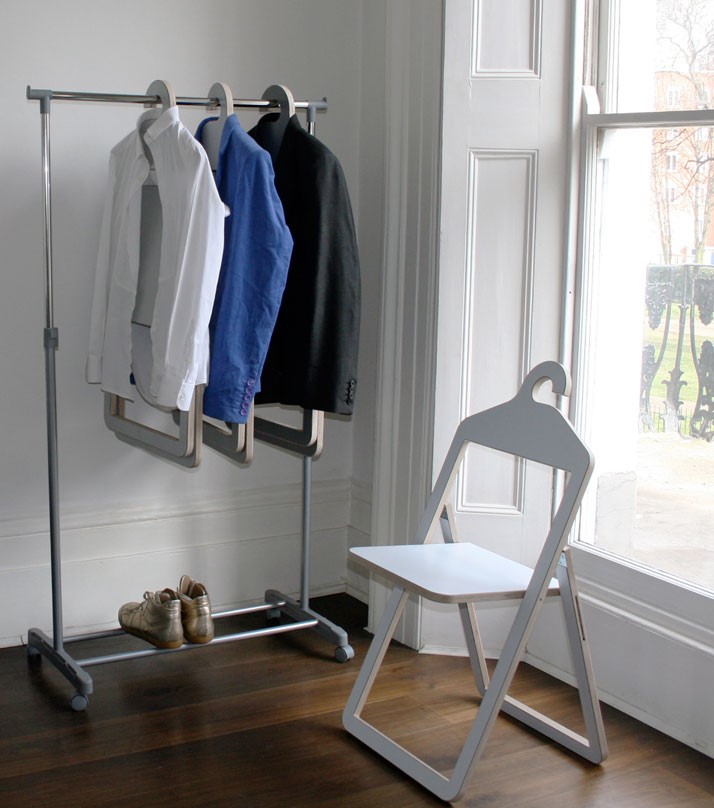
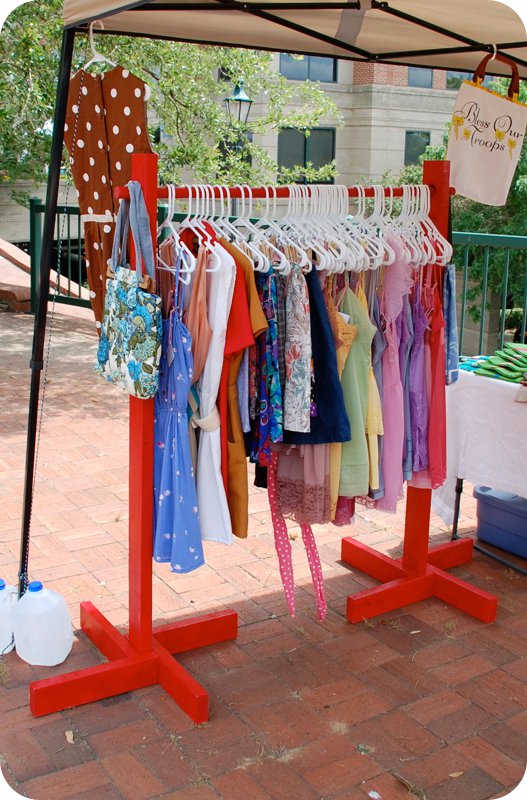
Hanger-rack has a U-shape. The crossbar is completed with hooks or is intended for placing clothes on a coat hanger. This product is placed in the dressing room. Your things will not be wrinkled, they will have an impeccable appearance. A good option is a model with an umbrella stand, shelves or special holders for hats. 
Hanger-basket has a base made in the form of a basket. It stores umbrellas, slippers, and other things. It is indispensable in your home, but takes up more space than the previous version. 
suit model Convenient for storing trousers and jackets. It is also suitable for a dressing room. A floor hanger will help keep the suit in tidy condition. It will be a great addition to the office, and your jacket will always be in perfect condition. Such an item is necessary not only for men's suits and ties. Women's things can also be hung on the product: a cardigan, a shawl, a coat. 
Non-standard models of hangers
They combine functionality and beauty. Unusual products became fashionable back in the 70s of the last century in Italy. Scandinavian designers once came up with tree-shaped hangers that look great in interiors. If there is a desire and space, then you can place several of these decorative trees at the entrance. Today, in the interiors there are hangers in the form of flowers, abstract products, etc. Mobile objects are in fashion. Products on wheels are used in offices, as they are easy to move. But they can be a great addition to your home decor. 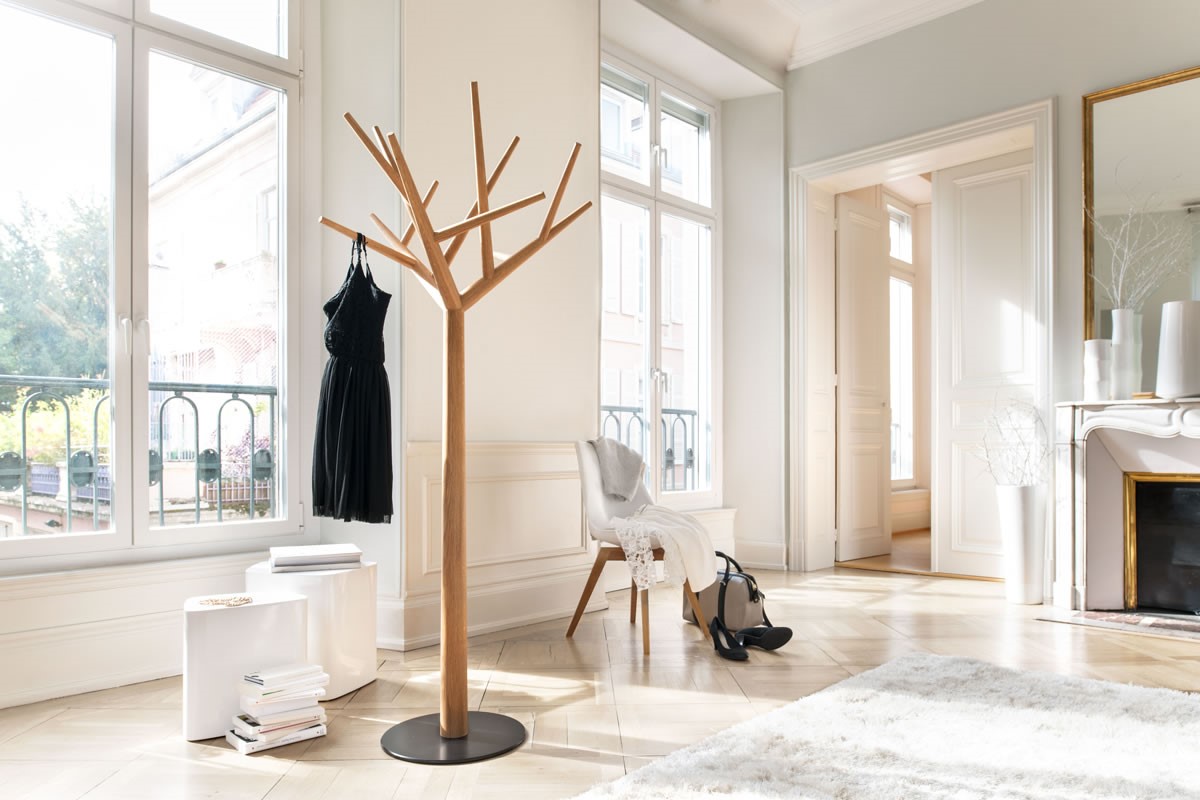
Products with special system adjustments allow you to change the height. The system from a standard hanger will make a convenient design for children. This is especially true when many children are invited to the house for a celebration. Geometric designs in chromed metal, original models in the form of art objects are available to everyone. Having acquired a bright design, focus on it. Owners of spacious apartments and country houses can safely choose a fancy model that will become an original piece of furniture.
Choosing a clothes hanger
It is difficult to do without a hanger, in an apartment, country house, the office needs it. It depends on her appearance hallway. The hanger should be in harmony with the interior and accommodate all the necessary clothes. For an apartment, it is better to stay on a compact outdoor product. Floor hangers often have dubious stability, so when choosing, you need to consider what things it will be used for. There are many interesting items on sale, from which it is easy to choose a high-quality, stable and safe model. 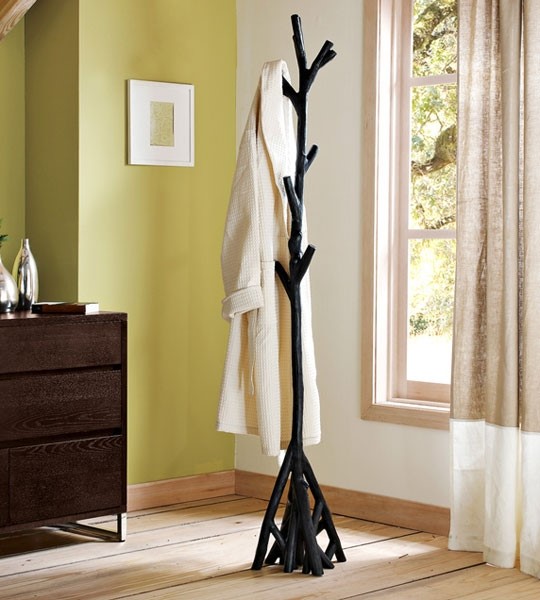
The choice of hanger depends on the design of the room, you can buy a product made of precious wood of different shades or choose a simpler option. Hangers have hooks that are made of wood, metal, plastic. Products with metal hooks are stronger, they will serve properly for a long time. You should think about where exactly the object will stand.
Advice! It is necessary to take into account the size of the room where the item is planned to be placed, as well as the number of residents in the apartment or house. If one or two people live in a dwelling, then any compact option will suit you. In an apartment where a large friendly family lives, they acquire floor version on which the clothes of all households can easily fit.
More massive models are selected in the hallway, and the lightweight version is suitable for the bedroom, bathroom.
Do-it-yourself floor hanger
Build such a piece of furniture from an old floor lamp. To do this, the lampshade and wire are removed, the hooks are attached to the tripod. If on personal plot or a tree grows in the country that has not been bearing fruit for a long time, then use it for a hanger. The plant is cut, the branches are removed. The bark is removed, if left, it will begin to fall off over time, and things will cling to its irregularities. After cleaning the wood, you need to go over it with sandpaper. Then the structure is attached to the base. 
The item for storing clothes should not have sharp parts, so as not to damage the floor, things. It must have stability, aesthetic appearance, reliability. Stability is provided by the base, which is made in the form of a circle, crosses. The center of gravity is as low as possible. To do this, use heavy bars, metal parts. Installation of the product on three points of support is necessary for the stability of the structure. The bottom of the hanger is upholstered with a material that is softer floor covering. This will prevent leaving marks on the floor. To give the product functionality, hooks are attached to it.
Important! The center of gravity of clothing placed on the product should not go beyond its cross. Otherwise, the product will not be stable and will fall.
The final stage is to give the structure a finished look. Close the lower component of the product with cloth, wood, plastic. The structure is covered with a layer of paint or varnish.
Basic interior items form the style of the room, make it attractive. From the little things one gets the impression of the room and the owner. Interior items are able to emphasize the individuality of the home, tell about the character of the owner.
43 photos of floor clothes hangers: