Homemade from a screwdriver with your own hands. What can be done from a screwdriver with your own hands Making a garden shredder
If you are loving parents, then you will definitely be interested. Well, if you haven’t “bought” a child for yourself yet, then the experience and recommendations on how to make an electric car for your child, having put your hands to it yourself, obviously won’t hurt.
VIDEO: Clear and easy instructions on how to make a children's electric car with traction from a screwdriver
Every child needs to develop and enjoy life from its first days. So a son appeared in our family, the joy of mom and dad. The boy from a young age turned out to be a lover of cars different type than was very similar to his father.
While he was small, a stroller suited him, then a sled in the winter, a children's bicycle. And as soon as we went for a walk in the park, the son saw children's cars - electric cars, Mercedes, Range Rover, BMW. Of course, the child wanted to ride and squealed with delight. It was our mistake ... The son whined all the way home that he wanted the same typewriter. After a lot of market research and discussions about the cost of such charms, the family council decided that dad would remember his design experience (he did it in childhood) and together with his son he would make such a car himself. The fun begins...

The father consulted with his friend, a model modeling teacher from the automotive engineering circle. They re-read a lot of information, looked at the diagrams of a children's electric car on the Internet, and used the knowledge of the teacher himself. And so a drawing of the car was drawn up, a design was invented and a list of what to buy and find was made. It turned out that it is not an easy task to build a children's electric car with your own hands, because the car must drive for a long time, have perfect maneuverability, be small in size in order to take up little space in the apartment.
It was interesting for my son and dad to choose parts, frames, wheels, and feel and evaluate all this.  Finally, the father spent more time with the child. They sat until late in the evening and chose schemes for children's electric cars in order to find their own. When it was already time to sleep, they looked for some missing screws, cogs, bearings. In general, the work was in full swing, and this is how it was approximately ...
The frame, which serves as the basis for everything, was found in the garage, sawed off, cut off and welded, and once I wanted to make a rack out of this in order to put things in order on the balcony. The wheels were removed from my grandmother's two handcarts, she could not refuse her grandson. The gas pedal, cables, ribbons, springs were found in the same place - in the deposits of the garage.
I just had to buy more: bearings, screws, steering gear, radio components, sensors, brakes.
The steering wheel was chosen in the online store. Emphasis was placed on the fact that it was small and athletic. For the safety of the child, high-quality brakes were chosen, because they are the main ones in such a mechanism. 
So, we had a frame ready, wheels were screwed onto it, we even wanted to ride on this one. The bottom was cut out of a piece of plywood to fit the shape of the car, and not some kind of trailer. Welded the swivel mechanism, put the steering column. Pulleys were fixed on the rear wheels, cables were pulled and hooked to the motor. Now the device has become more like a typewriter.
But all this did not work without an electric motor and a control panel. It is not an easy task to find a good and powerful battery and charger for it. But the men coped with this task perfectly well. Why do I say so? Because the car “flies” for two hours stably without an additional charge. They chose for a long time and scrupulously, re-reading and recalculating all the pros and cons of power, charge time.
 The engine is located behind the seat, securely attached with clamps and bolts. The seat was taken from the swing, which had already become too small for the child. It yellow color, as a result of which they decided to paint the car green to match. Next, behind the motor, they put the battery in special niches, by analogy with a car. All the wiring was neatly tied with clamps so that nothing would fall out and fall apart or disconnect when driving.
At the final stage, it remains to paint the car, fasten the horn and mirror, and, of course, test it. The men sanded the plywood, coated it with a primer and painted it in a beautiful green color. They put foot restraints so that they do not roll down when cornering. They also came up with the idea of putting a bumper protection on the front of the car, since a child can, having accelerated, drive into the bushes and into the fence. Special emphasis should be placed on safety, because the baby will rush about without feeling fear.
And then came the day of testing. Dad fully charged the battery the day before. We left for  playground for beginners. My son couldn't wait to check in. The race ended on the second lap, as the wheels were flimsy for the weight of our little one. I had to go straight to the car market and choose good wheels for children's cars. It turned out not cheap, but dad will do everything for his son.
We arrived at the garage, redid the mounts for new wheels, fixed them and tried to control the remote control. Hooray! The car drove off. The day flew by, we decided to postpone the tests with my son until the morning. The child came home upset, but was looking forward to tomorrow. The tests were moved to the territory of the dacha, there and Fresh air, and off-road full.
As soon as we got out of the car, we immediately got an electric car. The son sat down and with a satisfied face, like a racer, began to drive along the road. There was so much happiness and enthusiasm that everything works, and no one has such a machine. Parents are happy, and grandparents were surprised at such handmade.
After 20 minutes of racing, the child was a little tired, and dad decided to continue testing. on one's own. He seemed to be as happy as a child. Since my husband is an experienced driver, we immediately identified the flaws. You need to improve the brakes to stop faster. But for starters, this equipment was approved. The main thing is to have a desire and passion for the process! Go ahead and you, create a scheme for a children's electric car and go ahead.
Everyone is familiar with a screwdriver. This is a hand-held power tool designed for twisting and unwinding a variety of fasteners. This is the main direction of its application, but not the only one. With the help of a screwdriver, you can create a great many useful and necessary things.
Screwdriver as a generator
A screwdriver can be used as a generator. It is very easy to do this. It is necessary to remove the battery, connect the wires to the terminals using alligator clips and connect them to the consumer. Be sure to first check the polarity with a multimeter. You need to insert and clamp the hex wrench into the cartridge to assemble the furniture. By rotating the spindle, a current will be generated that will go to the consumer. True, it is worth noting that the voltage generated by this electric machine is only enough to charge a mobile phone or operate a small LED lamp.
Using wind energy with a screwdriver
According to this principle, wind turbines are built from a screwdriver, but the generated current is so small that the game is not worth the candle. Its installation is more effective in areas of high wind load, although the result does not justify itself there.
Carpentry equipment
A few more interesting suggestions on how to make equipment for home carpentry based on a conventional screwdriver.
Wood lathe
In the manufacture of wood products, it is difficult to do without lathe. It can be built with your own hands. For the bed is ideally suited even wooden workbench. A screwdriver can be used as a headstock and rotation drive. In a wooden bed made of a bar in the shape of a screwdriver, you need to lay the tool and fix it with a clamp. The bar can be fixed with a clamp, and with constant use of the machine, fastened with self-tapping screws. A tooth mandrel must be inserted into the chuck. tailstock it is made of two bars with an adjusting screw, which is sharpened under a cone. It is installed opposite the fixed screwdriver so that the axis of the tool coincides with the axis of the tailstock adjusting screw. The design of the back stop is fixed with a clamp. If you plan to process large parts, then the fastening should be more reliable. A handguard can also be made from a bar by attaching it to a workbench with a clamp. A primitive lathe for the home workshop is ready.
Table drilling machine
Another equally important piece of equipment is the drill. It can also be made from a screwdriver. To do this, you will need a used screwdriver. It is necessary to take an engine with a gearbox and a cartridge from it. Now you need to make two clamps from textolite, which will perform the function of fixing the drilling head of the machine. To achieve maximum alignment of all holes on the clamps, it is better to process them together, in one set. Then it will be possible to avoid distortions.
Sleeves with internal thread are used as limiting posts. They must be the same size, corresponding to the distance between the clamps. After that, another clamp is made from textolite and two bosses from caprolon. They are drilled off-center, getting two eccentric bushings. The clamp is installed on the bar and the backlash is selected with the help of eccentrics. After that, a wooden lever is installed on a spring so that the drilling head returns to its original position. To supply power, you must use a transformer with a power of more than 150 watts and an output voltage like that of the screwdriver used. After that, you need to put a diode bridge and a capacitor, install the drilling head on the bed.
Manual milling cutter from a screwdriver: step by step instructions
It can be converted into a manual router. For this, you do not need to purchase expensive materials. Everything you need can be found in the workshop or garage almost under your feet. To equip a manual milling cutter from a screwdriver, you will need pieces of thick plywood or chipboard, a tool clamp, fasteners in the form of bolts and self-tapping screws, a plumbing tool and a feather drill for wood. In the latter case, you can use a drill bit.
Assembling a homemade router is quite easy. For this you need: 
- From pieces of the selected material, cut out the base, a vertical stand, on which a screwdriver will be fixed with a clamp, an emphasis and a scarf to stiffen the structure. The dimensions of the parts are chosen arbitrarily, in relation to the dimensions of the power tool.
- Drill a Ø 40 mm hole in the base using a drill bit for free access of the cutting tool to the processing area.
- Make a clamp according to the diameter of the hand tool.
- On the vertical rack using a clamp, fix the screwdriver so that its cartridge is a few millimeters from the base.
- Install stiffener.
- Fix the screwdriver on a vertical stand with an emphasis.
- Install the cutter in the tool chuck.
Screwdriver cutter is ready for use. Such a machine cannot become a full-fledged replacement manual router due to low power and low spindle speed, but will solve the issue of milling small parts in a home workshop.
Circular Saw
In addition, for your carpentry workshop, you can make a circular from a screwdriver. To do this, you need to make a work surface using a chipboard sheet or thick plywood. In the countertop, you need to make a cut to exit circular saw. The screwdriver must be securely fastened to the underside of the work surface using metal or wooden clamps. In the same way, it is necessary to mount the shaft. It is important that the saw blade extends no more than a third of its diameter above the working surface of the table.
Modernization of children's vehicles
And of course, all the best goes to the children. On the basis of a screwdriver, you can upgrade many children's vehicles. For example, convert a children's pedal car into an electric car.
electric car
To make an electric car you will need:
- Steel frame profile pipe. It can be made by hand.
- Wheels can be used from a garden trolley with rubber running.
- The body can be taken from an old pedal car or come up with some creative solution. For example, to solder from plastic pipes.
- As an electric drive, it is necessary to use two motors from screwdrivers and a gearbox from the same power tool. Separate housings are made for them, in which the output shaft is mounted on 201 bearings.
- Battery. You can use a regular car 6ST60.
After all the components are prepared, it remains to assemble the electric car. This process is simple and within the power of every man who has even a superficial idea of \u200b\u200bplumbing.
Electric scooter and electric bike
Another use of a screwdriver in creating Vehicle can be called an electric scooter or an electric bike. The principle of such modernization is based on the installation of a chain transmission between the wheel sprocket and the sprocket of an electric motor with a screwdriver gearbox. This device is powered by the battery of the hand tool. Such a solution does not require large expenditures. As a result of the improvement, a vehicle is obtained with a speed of 5 to 15 km/h.
Electric snowmobile
Using a screwdriver, you can make not only vehicles on wheels, but also a real snowmobile. For this you need to use an electric car, having carried out a number of appropriate upgrades. It is necessary to improve the frame of the electric vehicle to install the drive wheel on it. Instead of driven wheels, you need to install skis, replace the plastic steering wheel of the car with a metal bicycle steering wheel. The drive of the drive wheel is carried out through a chain transmission from a screwdriver.
The assembly of such a miracle technique will not take much time, and most importantly, money. All costs will pay off with the joy of the child, for whom the electric vehicle will be a real gift.
Cool ideas and tricks for using a screwdriver in the household
In addition to the mechanisms listed above, a screwdriver can also be used to implement other ideas in the household. This hand-held power tool will help you automate the opening of the entrance gate, make a winch for a car or scissors for cutting metal. If you attach a nozzle for cutting tin to it, you can turn an ordinary rubber boat into a motor boat, modernize the process of drilling holes in ice fishing. In addition, everyone knows that a screwdriver is used as a drive to a mixer, meat grinder or juicer.
After reading the article, the reader has gained knowledge about the non-traditional use of a screwdriver. Now he can apply this hand tool to create carpentry workshop equipment, improve children's vehicles and other useful things in household use.
It is rare to find a child who would not want to have their own car. This is especially true for electric cars, which not only boys, but also girls ride with delight. Indeed, in this case, the baby does not need to pedal, and he will have less temptation to climb in the mud.
You can make a simple electric car with your own hands by attaching a screwdriver to an ordinary pedal car, which can be powered from a motorcycle battery. However, there are many drawbacks in such a design scheme, since fragile plastic has an unpleasant habit of falling apart from long-term operation.
In addition, the standard gearbox housing in this case simply does not have enough resources for any long-term operation, so in any case you will have to deal with the modernization and "finishing" of existing solutions.
Characteristics of the simplest car
As we have already mentioned, the body is best taken from a conventional pedal-powered machine. If this is not possible, you can try to build something similar out of plastic or even plywood. Making an electric car with your own hands, you need to get a couple of engines from ordinary screwdrivers. Reducers must be taken from there, but for them it is necessary to make home-made steel cases. The output shafts are set on 201 bearings.
As in the prototype, the landing in this car is lateral. The motors are powered by conventional car battery type 6ST60. Small plastic wheels can be taken from garden carts or something similar. For the frame is taken steel pipe with a diameter within 16mm.
Suspension

The best way to make a pendant spring type. Brake system - electric, direct short-circuit and through a resistor (for smooth braking).
You can put a horn, headlights and mirrors on the car. In a word, make a beautiful electric car with your own hands! Be sure to make drawings in advance, as this will allow you to better imagine the design. All general information we will give in this article, but no one will forbid you to connect your creative vein to the process.
With a maximum speed of 8 km/h, this design has a power reserve of at least 30 km! The machine turns out to be double, without batteries it weighs approximately 15 kg. Car dimensions - LxWxH (mm) - 880x560x570.
Characteristics of electrical equipment
When you begin to make an electric car with your own hands, it is on this point that you need to pay special attention. The fact is that the reliability of the machine and the safety of your child depend on the characteristics of this equipment. Of course, first of all, you should make sure that all contacts are securely isolated.

Many people think that the brake system can be done by simply putting the "On / Off" button on the panel. from a screwdriver. Of course, in this case, the control of the machine becomes as simple as possible. Just keep in mind that sudden braking can lead to very unpleasant consequences. So the brakes need to be done through a resistor.
How to add speed?
Also keep in mind that the smooth start of a standard screwdriver (when using it in a typewriter) quickly becomes unusable. The machine starts to start jerkily.
Match the two-stage throttle and brake buttons by adding resistance. Don't worry about high battery losses: the first speed is used for quite a short time, so nothing bad will happen.
We make the body of the "all-terrain vehicle"
We will immediately determine that the body is best taken from an already finished machine, since in the end your creation will look more aesthetically pleasing. Before you make an electric car with your own hands, we advise you to wander through the sites of online stores. Enterprising Chinese have been selling anything for a long time, and therefore it will not be difficult to find a suitable body.
Attachment points - in the place where the "donor" had pedals. To mount the rear on the frame, it is necessary to make protrusions that will serve as additional stiffeners. For the battery, it is necessary to make a basket from a welded profile.

It is preferable to make one part of the body folding, fixing it on hinges that are suitable in size. In this case, it will be easy for you to remove the battery for its maintenance. If a suitable pipe is not available, the frame can easily be made from old steel-framed chairs. Spare parts from high-quality prams are ideal for suspension.
As for the quality of materials...
By making an electric car with your own hands (we are discussing a diagram of the simplest option) from parts of a stroller, at the same time you will provide yourself with all the necessary spare parts, which are sold in many specialized stores. Note that for this purpose it is necessary to select parts from high-quality European strollers, and not their Chinese and Polish imitations. Cheap models use the cheapest plastic and very poor metal.
Such a design does not even withstand use for its intended purpose, and even more so in a car it will fall apart.

Moreover, they already have ready-made fasteners, and therefore it is possible to do without welding (far from everyone has it). It is better to make massive bumpers, as it is easier to carry the machine for them. When making a suspension from the remains of a stroller, inspect the guide springs: if they are too stunted, then it is better to reinforce them with steel strips.
Making a transmission
We have already agreed that we will take those from a screwdriver as engines. The gearbox itself from the device remains unchanged, but the body must be machined from steel on a lathe. The motors will transmit torque through a chain drive. Fortunately, there will be no problems with this: in any store for cyclists you will find any kind of sprockets in the required configurations.
It's hard to talk about diameter. Take a smaller sprocket - the speed will be higher, but the wear of gearboxes, which are simply not designed for such loads, will also be much stronger. Its excessively large diameter will lead to unreasonably high losses of electricity, since most of the time the mechanism will rotate in vain.

If there is such a desire, drums for mechanical brakes can be attached to the wheels. They can also be found in bicycle shops, but if you want and have a lathe, they are easily made at home. In general, when assembling a high-quality home-made electric car with your own hands, be sure to take care of access to turning equipment, because without this you simply cannot make many details.
Bearings
But instead of standard bearings from bogies, it is necessary to supply 200 and 201 bearings with inner diameters of 10 and 12 mm. For installation, adapter cases are used, in the rear inner parts of which threads are made for drums. Halves of the cases can be connected with a tie, fastening it

Of course, if you have a normal one, then it is better to do without such tricks, making all the details from solid steel blanks. So it will turn out much stronger, and reliability similar design not like the example above. And to make an electric car with your own hands for children, you need to make it as reliable as possible!
Since we use electric brakes, the entire transmission is not particularly complex. Parking brakes are not required. Keep in mind that the child must use the car strictly under your supervision!
Making the running gear
The most difficult from a technical point of view is the steering knuckle assembly. It is better to take it from a "donor" pedal car, putting rubber wheel rotation stops.

This will prevent excessively sharp turns and rollover of the car at high speed. Yes, this is also possible, since a children's electric car (it's not so difficult to make it with your own hands) in any case will turn out with a displaced center of gravity.
For body swing limiters, ordinary rope pulls are taken to prevent the body from leaving the frame on potholes and potholes. We mount the front axle on the swing arms. Since the weight of the machine is small, it does not make sense to put some kind of complex transverse rods. It is better to strengthen the suspension springs, which in this case can easily withstand even two babies.
Instead of rocker arms, which are hard to find, two 1.5mm thick stainless steel strips can be used longitudinally attached to the frame. However, it is worth remembering that you cannot take an ordinary steel strip: its front parts will have an excessively strong load, which will inevitably lead to deformation and destruction of the material.

To avoid such a phenomenon, the thickness of the front third of the strips must be increased by about 2/3, having welded to it a suitable one in terms of parameters. In a word, before making an electric car with your own hands, purchase all the necessary “scrap metal” in advance.
More about steering
The steering assembly is made on the basis of the most primitive lever design. Looking at the controls of any toy pedal car, you can easily do something like this yourself. it is better to take ready-made ones by buying them at a car store.
Fasteners are similar to those used in doors cars. Steering knuckles (which we mentioned) can be taken ready-made, but if necessary, they are not so difficult to cut out of a 2 mm thick steel sheet.

The levers are one with them. The front part is bent in the form of a channel, welding a machined hollow axle to its front part. The kingpin is easy to carve from a standard "furniture" bolt. For a tube with a diameter of 8 mm is taken. Hinges can be found in a furniture store. Their strength will be quite enough.
Make a royal gift to your child by giving him an electric car. It is not difficult to assemble it with your own hands, but the baby will experience immeasurable joy from this!
A screwdriver is widely used in various fields of activity for working with fasteners. different kind: self-tapping screws, screws, bolts with nuts, furniture confirmations, screws and others. Also, with the help of this power tool, holes will be rolled into different materials, for example, in various metals, in lumber, in concrete. Wherein functionality of the operated model are determined by the value of its power and torque, the presence of a shock function.
From a screwdriver, you can make at home a variety of equipment and tools for domestic use. In addition to the power tool itself, in many cases, additional parts and materials will be required for rework. But homemade devices will still cost less than factory counterparts, allowing you to automate and make manual labor more efficient.
The entire range of screwdrivers is divided into network and battery models. Both types of products work due to electrical energy, which drives an electric motor. Only the electric motor itself for network devices is designed for an alternating voltage of 220 V, and for battery equipment for a constant voltage of various sizes, for example, 12 V, 14.4 V. These design features together with the technical characteristics, they largely determine which homemade products from a screwdriver can be assembled.
Electricity is one of the main types of energy used by mankind. Powered by electricity Appliances, industrial equipment, machine tools, power tools. The work is carried out at the same time by electric motors of various designs and power, which are powered by alternating or direct currents. For this reason, the following technical devices can be assembled on the basis of a screwdriver or from its individual parts:
- garden shredder of grass and branches;
- trimmer (electric scythe);
- camping manual generator;
- engraver (mini-drill, dremel, drill);
- wind generator;
- lawn mower;
- grinder;
- mini-machines: drilling, grinding, thicknessing, turning, sawing, sharpening;
- tool for knitting reinforcement;
- gate opening drive;
- vehicles for children: ATV, bicycle, scooter;
- a small ice drill, a hole drill, a construction or kitchen mixer.
The powerful impact type model can also be converted into a concrete rammer with a special attachment.
The implementation of each option takes different time and requires additional (insignificant) costs, or does without them at all.
Assembling a manual camping electric generator and a homemade wind generator
It will not be difficult to make a home-made generator from battery models of the tool, which will produce electricity when the attached handle is rotated by hand. Such a device is useful in field conditions. To make a dynamo, you do not need to radically modify the product. Everything you need to create a camping generator is already in the design of the device, only minor improvements will be needed.
With the help of the created equipment, it will be possible to charge 6 or 12 V batteries.
Suitable for power tools with operating voltage from 18V and above. Modification is carried out in the following way:
- disassemble the electric screwdriver;
- carefully solder the electronic board;
- put instead of batteries suitable in terms of parameters (dimensions, technical specifications) diode bridge inside the battery case;

- make a comfortable handle with a handle;
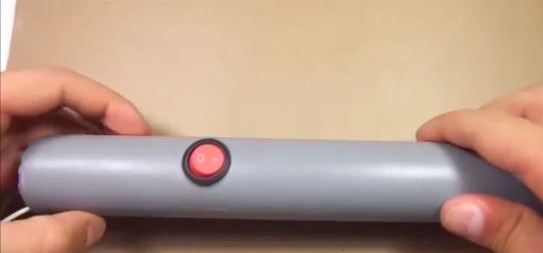
- the end without a handle is fixed in the cartridge.
The final design after the done manipulations will look something like in the photo below.

The diode bridge is necessary so that the handle of the generator can be turned in any direction. Instead of a handle, you can insert a nozzle with blades. Then you get a simple wind generator.
Wind power generator, are also made in a different way, in the form of a weather vane. In this case, the following is done with the battery device:
- disassemble the screwdriver;
- take out the electric motor by disconnecting its contacts;
- remove the cartridge with the gearbox (rotary part);

- the shaft of the electric motor is inserted into the cartridge, clamping it;
- a round metal plate about 1 mm thick is bolted to the gear of the gearbox, which will serve as the basis for fixing the blades made, for example, from plastic pipes;
- a clamp with a clamp is put on the shaft between the cartridge and the gear;

- cut out a rectangular base from plywood or thin metal;
- using a clamp with a clamp, an engine with a cartridge is attached to it, having drilled holes for fastening in the right places;

- make a casing to protect the wind generator (from precipitation, dust and other unforeseen influences), for example, from under a coffee can;
- insert the base with the engine and cartridge inside, fixing the elements with glue, and the cover with sealant;

- make blades by attaching them to the round plate of the unit;
- make a weather vane;
- an assembled generator is mounted on one of its ends;

- connect the wiring to the motor outputs;
- check the output voltage with a multimeter by rotating the blades by hand.
There are many options for wind generators. Even the entire screwdriver is attached to the support, providing it with a nozzle with blades.
Alteration of a screwdriver into a grinder
If angular Sander broken or it is completely absent, then it can be temporarily replaced with a cordless or mains electric screwdriver. At the same time, there are various options rework. The easiest way is to use ready-made or homemade nozzles or adapters. An example of an adapter is shown in the photo below. One of its ends is fixed in the cartridge, and a disk clings to the other.

Another option that allows you to convert a drill driver into a grinder is to use a special type of nozzle, equipped with a gearbox. When implementing the method, the power tool is dismantled, its gearbox is dismantled, and a nozzle is installed instead. After the transformations, you get a tool similar in appearance to an angle grinder.

It should be taken into account that such special nozzle expensive, and modification work requires a lot of time.
Homemade nozzles are made from studs suitable diameter, nuts and washers. They are used even with cordless electric screwdrivers.

The efficiency of homemade products is much lower than that of factory grinders. This is due to the large difference in the speed of rotation of the nozzles: about 3000 rpm for a screwdriver versus about 11,000 rpm for an angle grinder. A small amount of power, together with a low speed, significantly limit the functionality of the device made.
Made devices should be used only in emergency situations. because of reverse possibilities on the tool being reworked, it is necessary to monitor the direction of rotation of the disk so as not to be injured.
Converting a screwdriver into a trimmer or lawn mower
To make an electric scythe with your own hands, you will need the following parts and materials:
- a piece plastic pipe about 2 m long;
- soldering iron with soldering kit;
- fasteners: self-tapping screws, bolts with nuts;
- 45 degree plastic corner;
- pipe cap;
- 12 V motor from an electric screwdriver and a battery from it;
- the wire;
- adapter from 40 to 50 mm for plastic pipes;
- power button;
- plastic bucket;
- contact clips (crocodiles) - 2 pcs;
- blades from stationery knives.
The work uses a pipe and a corner to it with a diameter of 40 mm.
The conversion process is carried out as follows:
- having disassembled the electric screwdriver, they take out the motor;
- attach it to the plug, having previously marked and drilled landing holes in it;

- attach the electric motor with 2 screws;

- solder the leads to the motor;

- install an electric motor, pushing its wiring in the pipe;

- mark the location of the future switch with a marker on the tube;

- drill a hole;

- connect to the wiring switch, mount it;
- contact clamps are attached to the ends of the outgoing wires for quick connection to the battery;

- a battery holder is made from an adapter;

- connect the drive, connect the adapter to the tube;

- make knives from blades;

- using a conventional terminal clamp, the nozzle is connected to the motor shaft;

- a protective cover is made from a plastic bucket;

- glue the part to the pipe;

- check the functionality of the structure.

The created device will allow you to mow only the grass cover with soft stems. There are many different options for lawn mowers based on network models of drill drivers. The photos below show two homemade.


First, a base is created from metal, plywood or other materials, to which the wheels are then attached, as well as the control knob. Clamps or to the rack fix the electric screwdriver. Inserted into cartridge cutting head. To protect the legs from flying grass, a casing is attached to the back of the base. Power is made through a button or directly from the network.
To assemble a sufficiently functional lawn mower, you need to take a drill driver from 0.5 kW with a power.
A cordless or corded model of an electric screwdriver can be turned into an engraver, which is also called a dremel, a drill, a mini drill, a straight grinder. It's easy enough for this buy a nozzle in the store and grind any bit under it.

A homemade cartridge will allow you to use a variety of equipment designed for dremels.

The following video demonstrates the process of creating an engraver with a flexible shaft.
Making a garden shredder
A garden shredder for grass and thin twigs (less than 1 cm thick) can be made on the basis of a corded drill/driver.
Create an aggregate like this:
- choose a suitable container, for example, zinc decoction;
- in the center of the bottom, a hole is drilled for the shaft, on which a knife or several blades will be fixed;
- make wood or metal carcass to install the container or put it on the edge of the table;
- a drill-driver is attached to the frame or bottom of the boil-out, which is equipped with knives;
- mount the on / off button;
- make a slot in the side of the container - cut out a rectangle in front of the bottom 10 by 20 cm;
- a sleeve is made of tin for ejection of crushed plants;
- attach it to the container;
- check the performance of the unit.

Knives are easiest to make from hacksaw blades. You need to install them sharpening down. In this case, you can make several options for blades for different herbs. If you make a nozzle in the form of knives for a drill-driver, then you can simply chop the grass in a bucket or other suitable container.

Screwdriver machines
Craftsmen made many different-purpose machines from a screwdriver. They are quite capable of handling everyday tasks.
If you need to work professionally, then more serious equipment is indispensable.
One of the options for how to remake a drill driver in drilling machine shown in the video below.
The way to create the simplest lathe shown in the video below.
Also, on the basis of a drill-driver, it is possible to assemble the simplest milling and grinding machines which is shown in the following videos.
Other non-standard ways to use the tool
Non-standard use of a screwdriver is not limited to the options considered. The video below shows how to use this power tool as a ATV drive and for opening doors (gates), for drilling ice, as a mixer. The video also contains other non-traditional options.
Using a case with a battery, you can make a good flashlight. The whole assembly process LED lamp shows the video below.
How to adapt a screwdriver motor to make electric bike shown in the videos below.
Another option for a motorized bike contains a video below.
With a hook inserted into the screwdriver chuck, you can knit armature during the construction of various facilities. The following video demonstrates how this is done.
By connecting the tool to the auger of a manual meat grinder, you can automate the process of twisting vegetables and meat.
It should be borne in mind that homemade products of this kind are often very limited in load. But if they do not get practical use, then entertainment is guaranteed.
This unconventional use of a screwdriver is not limited. Craftsmen constantly put forward new ideas, while their practical implementation takes place. Other specialists adapt home-made devices to their own needs, while receiving various modifications of home-made equipment. You can also come up with something on your own, showing technical knowledge and imagination, giving free rein to imagination and creativity. The main thing to remember: when starting to manufacture various devices, it is necessary to take into account that the created mechanisms are safe.


