How to disinfect the ground for indoor flowers? How to prepare a sterile substrate for plants Steaming the ground for seedlings in the oven.
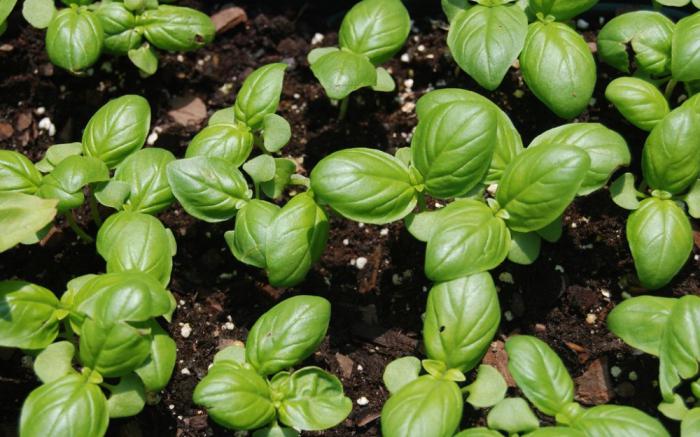
FROM early spring gardeners and summer residents begin their hectic activities associated with sowing and germinating seedlings. It is not so easy to get healthy and strong shoots that easily adapt in the open field and will please you in the future. good harvest. The main condition for their growth, and therefore the basis of the future harvest, is a properly selected or self-prepared land.
Soil for seedlings: we prepare with our own hands
Some novice vegetable growers do not think about how to properly prepare the soil for growing seedlings, but simply take the land from the garden and sow seeds in it. What is their disappointment when the long-awaited shoots do not appear or grow slowly. And by the time of the transfer to open ground they are still fragile and weak. Such plants will most likely not survive the stress associated with planting in beds and will die within a few days.
Before you start taking action, you need to responsibly approach the question of how to prepare the land for seedlings with your own hands.
With the correct use of biological preparations, they not only destroy the pathogenic flora, but also accelerate the growth of seedlings.
Chemical disinfection of soil
Chemical disinfection of the soil for seedlings is best used only in exceptional cases. As with biologics, it is important to follow the instructions here. Some of these drugs not only destroy pathogenic flora, pathogenic bacteria and fungi, but also inhibit plant growth.
Potassium permanganate is considered the most harmless, but also ineffective method of chemical disinfection. It eventually turns into potash fertilizer.
When disinfecting the soil for seedlings with mechanical or by chemical means, we deprive it not only of pathogenic flora, but also of beneficial bacteria. They can be restored by adding to the soil ("Risotorfin", "Azotobacterin", "Phosphorobacterin"). Some gardeners use ordinary yeast for this purpose.
Purchased soil mix. How to improve the quality of finished land
It is worth noting that all of the above procedures for preparing and disinfecting the land for seedlings are not suitable for "lazy" gardeners. Self-preparation of the substrate takes time and effort. It is much easier and faster to buy a ready-made composition for sowing seedlings. Those who choose this option should be aware of the existing pitfalls.
Unfortunately, manufacturers do not always conscientiously write true information on the packaging. It happens that, choosing a package with the best composition, you get poor peat-based soil. When planting seeds in such a composition, there is a high risk of being disappointed with the result. Seedlings will either not sprout at all, or even if shoots appear, they are unlikely to meet expectations. Therefore, you should not be overly economical in this matter, but choose products from well-known companies.
Even if you have such a poor-quality peat-based mixture, try to fix the situation yourself. To do this, you need to mix it with garden soil, previously disinfected. How to disinfect the land for seedlings, we considered earlier in our article. Next, be sure to check the resulting substrate for acidity, and if it is above the norm, we correct this problem. Reduced by adding chalk or Since such a soil mixture lacks its own nutrients, additional mineral fertilizers must be applied.
It is necessary to approach the issue of preparing the land for seedlings very seriously and scrupulously. Experienced gardeners know that the correct composition of the soil is 80% of success in growing seedlings.
We have all heard and read many times that before sowing seeds for seedlings, the soil must be disinfected, and this can be done in several ways. One of them is calcination in.
How to ignite the earth in the oven?
In this matter, you need to choose the right temperature and processing time, since you can overdo it and, in addition to fungi and pests, destroy all beneficial microorganisms, making the soil dead and barren.
So, at what temperature and how much to ignite the earth in the oven: the optimum temperature is 70-90ºС, the time is about half an hour. After that, the soil should be given time to resume the normal balance of beneficial microflora and only then used for planting.
It is also important to know how to ignite the earth in the seedling oven: for this, you first need to sift it, moisten it a little, then pour it on a metal sheet with a layer of about 5 cm and immerse it in a preheated oven.
Soil baking is a slightly modified version of calcination. In this case, the soil is placed in a baking sleeve and then sent to the oven. At the same time, moisture is retained in the soil and the effect of steaming with boiling water additionally appears, since the moisture in the soil heats up to 90-100ºС and, acting on it, additionally cleans and disinfects.
Do I need to calcine the ground for seedlings?
Soil disinfection is almost a key moment in growing seedlings. The health of future seedlings and adult plants directly depends on competent disinfection of the soil. Properly carried out calcination kills pathogenic bacteria, dangerous nematodes, insect eggs and pupae, fungal spores. In addition, this is how we fight in advance with the “black leg” - a dangerous enemy of seedlings.
As you can see, you should not neglect this stage, so that in the future you will not treat with regret and not throw away the lovingly grown seedlings.
Spring is coming, hooray! Who would have thought that it is already the middle of February, which means that the time is already very close when it will be necessary to plant seedlings. First of all, most gardeners plant peppers, tomatoes and eggplants. (I'm not talking about those who got confused with - it could be sown since mid-January). So, the land for seedlings needs to be prepared so that in the process of being waterlogged for a long time, harmful and dangerous microorganisms do not develop in this land.
Harmful and dangerous microorganisms mean mold, fungi and various viral diseases, with which seedlings can get sick, being in unprepared or poor-quality soil. I think many people buy ready-made substrate in bags in the store for seedlings. Such a pleasure is not very expensive and you can afford it to reduce the loss of brain nerve cells :). But if the culture that you are going to grow is tight, and it will take 30-40 days to germinate in a wet state, even purchased soil will have to take care of the cleanliness and health of the soil.
Well, if you have prepared a bag of land from the seedling site since autumn, it's time to start disinfecting it! To begin with, I will say that perfect place storage of this soil - a balcony or garage (unheated). Per winter time frost will kill most harmful organisms in a bag of soil, so the matter will be small.
In general, there are many ways to disinfect the soil. All of them are aimed at removing any living microorganisms in the soil at all, and the soil will be enriched with useful ones rather quickly. There are three main areas of tillage for seedlings:
- Chemical (with the help of chemical elements that kill all living "population" of the soil)
- Biological (soil settlement with beneficial microorganisms that will lead to the extermination of harmful ones)
- Physical (warming up, calcining, etc.)
These methods can be combined to enhance the effect, but purely chemical disinfection is now little used - more and more you will find only biological disinfectants in stores.
Methods of chemical and biological soil treatment under seedlings are simple - you just need to follow the instructions to “spill” the soil or spray it if there are obvious signs of life on the surface. But about the physical methods, you can tell in more detail:
1. Calcining the soil in the oven
This is the most ruthless and most dangerous way :) Its essence is as follows - you need to take an iron pan or a deep baking sheet, pour soil into it, after sifting it from organic components (sticks, twigs, etc.) and put it in the oven with a temperature of 200-300 degrees for 2 hours. Why did I call this method “dangerous”? I'll tell you =)
I poured earth into an enameled saucepan (well, it was the only one we had without plastic handles), put it in an already preheated oven (as if I were baking Easter cakes), I sit and wait. Then I smell something beginning to stink - well, I think now, as usual, new dishes stink a little and stop. Yep, it wasn't there! The stench (the smell of caustic burning) intensified every minute, despite open windows and included extractor. I decided to take a look at what I have cooked in the pan. I opened the stove, and naturally smoke poured out (which was not visible through the window at first), and in the saucepan, in addition to the strange color of the earth, several coals were smoldering. Probably these coals (which were probably chips before the arrival of the Inquisition), but I didn’t think to sift the earth.
In general, this “smell” was in the kitchen, and throughout the apartment for another two weeks. For the saucepan, which abruptly changed color to black and burnt, my wife also told me what a “well done” I am.
Therefore, for myself, I refrain from this method in the future.
2. Steaming the soil for seedlings
We take a large pot or bucket, put a colander on it. Pour in enough water so that it does not reach the bottom edge of the colander. We cover the inside of the colander with gauze, we fill the soil on top. Got a steamer! ;-) This is how you need to boil the soil for 40-50 minutes.
3. Washing and scalding the soil with boiling water- the least effective method, it is used more for its own reassurance. The disadvantages of this method are that if you pour a lot of boiling water, then you can “wash out” all the trace elements from the soil and you will get something like sand. Of course, seedlings can also be grown in this, but ... And if the soil is just scalded with boiling water, the effect will be small.
After steaming or warming up, as I said, you can “populate” the soil with beneficial microorganisms using some kind of biological stimulant. Since I am not familiar with any of the manufacturers of biological stimulants, I will not mention any companies and names of drugs, ask in stores ;-) In fact, they are all the same.
4. Heating the soil in the microwave
This is the most modern way and the fastest - it takes only 4-5 minutes to warm up. Just do not forget that you can’t put iron dishes in the microwave, and thin plastic melts easily ;-)
Estimate (No ratings yet)
Before planting seedlings, we still have time, so let's look at how to disinfect the soil. Not all summer residents every year, growing seedlings, buy new soil. It is clear that the healthier the soil, the stronger and stronger the seedlings themselves will be. And this means that the land from the garden is not a source of infections for plants, it must be disinfected before use.
At home, disinfection is carried out in the following ways:
- freezing,
- calcination,
- steaming,
- pickling.
We will analyze each method and note the advantages and disadvantages.
freezing
Prepare the soil in the fall by filling a bag with it. During severe frosts (15-20ºС), take the bag of earth outside or onto the balcony for several days. After the ground freezes, bring it into warm room for about a week. This is done in order to wake up wintering pests and weed seeds in a warm environment. The temperature contrast of the soil is arranged 2-3 times.
But this method has drawbacks.
- Frost has a negative effect not only on pathogenic microorganisms, but also on beneficial microflora. This means that this method is not suitable for soil, which contains vermicompost.
- No low temperatures will destroy late blight pathogens. They should be destroyed only by heat treatment.
Calcination
The soil is scattered on a metal tray with a layer of no more than 5 cm, and then the soil is spilled with boiling water and placed in an oven heated to 70-90ºС for 30 minutes. The temperature should not be higher than indicated, otherwise a higher temperature will lead to nitrogen mineralization and deterioration of soil quality.
The advantage of this method is the death of all microorganisms, they simply do not survive.

Steaming in a water bath
Despite the fact that the method is more gentle than calcination, it is also quite reliable. Its advantage lies in the fact that in addition to disinfection, it also saturates the soil with moisture.
The earth is poured into a colander and, gradually stirring, is kept over a pot of boiling water for 10 minutes. In this case, the colander is placed above the pan so that the bottom of the colander does not touch the water. Some gardeners combine both temperature methods, that is, they first steam the soil, and then take it out into the cold.
With such heat treatment, not only pathogenic, but also beneficial microflora dies. Therefore, the steaming procedure is carried out in advance to restore the soil before planting.

Etching
The easiest way to disinfect the soil. The idea of etching is to water the soil with a pink solution of potassium permanganate, diluted at the rate of 3 g per 10 liters of water. But remember that the solution processes only the surface layer of the earth and does not affect the bulk of pathogens.
Therefore, antifungal drugs (fungicides) are used for more thorough processing:
- Zamair,
- Renaissance.
The meaning of the treatment is to suppress the pathogenic flora with beneficial bacteria that are contained in these preparations, actively developing. The process takes 2-3 weeks, therefore, the processing is carried out in advance.
Soil disinfection in the microwave
The essence of the method lies in the fact that the prepared soil for seedlings is abundantly shed with a pink solution of potassium permanganate, and then put in the microwave for 3 minutes at high power. How to do it watch the video.
In conclusion, I will add. Remember that immediately after disinfection, the soil is sterile. But after a couple of weeks, the microflora in it is restored, and not the fact that it is only useful. Therefore, after disinfection, if you do not immediately use the soil, transfer it to a clean (sterile bag). And just before planting, add biohumus (1 liter per bucket of earth) or supercompost (1-2 cups per bucket of soil).
Tillage in a greenhouse
The soil in the greenhouse must be processed twice: in the fall, after harvesting, and in the spring before planting seedlings. Treat the soil with the following preparations.
Phytosporin treatment
How to prepare a solution for use, I described in detail in an article about phytosporin. It is better to buy it in the form of a paste. After dissolving a 100-gram package in 0.5 liters of water, you will get a dark brown liquid. The concentrated solution is diluted to prepare a working solution no earlier than a day later. This is necessary so that the living bacteria that were in the product are activated.
Immediately before tillage 1 tbsp. l. a concentrated solution is diluted in 10 liters of water and already with such a solution, the soil in the greenhouse is abundantly shed from the watering can. The greenhouse is closed for 14-20 days for the bacteria to do their job. After that, the greenhouse is opened and you can start planting seedlings.
The unused concentrated solution is removed in a dark place and stored there until the next use.
Disinfection with potassium permanganate solution
Disinfection is the easiest way to cultivate soil in a greenhouse. The essence of the method is to induce a pink solution of potassium permanganate and abundant watering of the soil. To bring such a solution, it is enough to dip a raw toothpick in potassium permanganate crystals, and then dissolve what is left on the toothpick in 1 liter of water. The soil is poured abundantly with the prepared pink solution, left for several hours.
Boiling water treatment
Another very simple and affordable way disinfecting the earth in a greenhouse - spill it with boiling water. It is enough to pour boiling water over the earth, and then cover it with plastic wrap. Under influence high temperature all harmful microbes will also die.
And there is another point that needs to be taken into account. Even after disinfecting the soil for seedlings, pathogens can be introduced with seeds. This means that before planting, the seeds should also be processed and then your seedlings will be strong and healthy.
Soil mixtures ( substrates) for indoor plants should not contain pathogenic bacteria, and weed seeds. To ensure this condition, it is necessary to treat, or sterilize the soil.
Special soil mixtures for planting seedlings and indoor plants can now be purchased in stores, as well as made independently at home. Depending on the purpose for which the soil mixture is prepared, its composition may be different. It is necessary to prepare all the components for the manufacture of a nutrient mixture of the required composition. The main component of the soil mixture is the earth, which includes clay, fine sand, humus and nutrients.
The composition of the soil mixture
The best soil for growing indoor plants is garden soil, because it is well cultivated, fertilized and fed. First, it must be prepared accordingly: select the roots of weeds, earthworms, beetles. It is not recommended to use lime-treated soil, as most houseplants prefer acidic soil. To ensure a good soil structure, you can add to the mixture:
- Soddy and leafy soil;
- household compost;
- crushed tree bark;
- Peat;
- Sand.
All supplies for the future substrate must be made in the fall, put in separate bags and stored until spring in a cool place, occasionally moistened with water. From properly preserved soils in the spring, you can make the nutrient mixture necessary for plants.
tillage
Land taken from nature needs to be cultivated. At home, it can be made sterile thermal and chemical treatment.
Thermal methods of substrate disinfection include freezing and steaming. The soil can be kept in the cold all winter, and in the spring it can be thawed and plants can be planted in it. The disadvantage of this method is that freezing does not destroy the seeds. weeds, pests also remain in the soil.
For steaming, the wet substrate must be poured in a thin layer on a baking sheet, then heated at a temperature of 120 ° C for 1 hour. During this time, the soil must be mixed 3-4 times.
The soil can also be treated with steam in a water bath. To do this, it is poured into a metal dish, which is placed in a container of water. With this method, the soil is steamed for one and a half hours.
But heat treatment also has its drawbacks: as a result of steaming the soil, not only pests die in it, but also beneficial bacteria. Therefore, it is best to combine heat and chemical treatment of the substrate. To do this, the steamed earth must be treated before use with biological products. Preparations such as Baikal-EM-1, Gamair, Alirin, Fitosporin, Vostok-EM-1 contain beneficial bacteria and fungi, which, when they enter the soil, destroy pathogenic microbes. In addition, the preparations contain strains of bacteria necessary for plant nutrition.
If you need to process large volumes of soil, then you can use only the chemical method of disinfection. Need pre-prepared soil mix treat with the above biological products, then add peat and BakSib before planting (to populate beneficial bacteria). Thus, from a sterile substrate, an enriched soil mixture is obtained, ready for planting.
In such a soil mixture, you can plant seedlings of vegetable crops, as well as any houseplants.
Video on how to choose the right substrate.