Making a soft bean bag with your own hands. Instructions for making your own frameless furniture
Ho-ho! Dreams tend to come true, especially if you really want them to come true. For hoo years Kostya and I have been looking at the bean bag chair, or as it is also called: bean chair, pear chair, frameless chair, Big Ben, cushion chair, etc. And somehow it didn’t work out to get this coveted thing: either there was a catastrophic lack of space in the last apartment, or there was no repair to accommodate such beauty, or we simply couldn’t find polystyrene foam anywhere (those same foam balls that fill bag chair).
During the time of nurturing the idea of creating a bean bag chair with our own hands, we managed to accumulate enough information about how and from what to sew it, how to stuff it, how to choose the size. In addition, we found a beautiful natural fabric for the outer cover and an ugly, but knitted fabric for the inner cover. And we also found out that granulated polystyrene foam entered the permanent sale of the Epicenter retail chain. And when there was time and Kostya was accidentally brought to the nearest Epicenter, from where he dragged 200 liters of white balloons, it became clear that we would be sewing a bean bag chair very urgently. And so it happened.
So, how we made a bean bag chair with our own hands.
We needed:
- Fabric for the inner cover (2.5m x 1.4m). It should be a well-stretched fabric. We took an old knitted sheet.
- Fabric for outer cover (2.5m x 1.4m). Any dense non-stretch fabric (cotton, velor, furniture fabric, even leatherette) will do. Our fabric is thick cotton, it turned out to be very pleasant and soft on the finished chair.
- Expanded polystyrene 200-300 l. These are the balls into which we used to break unnecessary packaging foam plastic in childhood :) In hardware stores, this happiness is sold in large bags. It is better to take smaller balls, they stray less. In Kyiv, as I already wrote, we found a suitable polystyrene foam for stuffing a bean bag chair with our own hands at Epicenter (200 l - 95 UAH), Leroy Merlin also has polystyrene foam, but not always in larger granules (300 l - 120 UAH). We bought 1 bag of 200 liters, although it was written in the recommendations that we would need 300-400 liters. When we stuffed the bean bag and began to test it, we came to the conclusion that it was just enough for us, since the soft bag takes the shape of the body better than the elastic one. The back rests very well on such a chair, and for a pregnant tummy it is generally an indispensable thing :)

- 2 zippers. For the inner cover - 50 cm, for the outer - 100 cm.
- Strong threads
- Paper for large patterns. We took craft. You can take old wallpaper.
- 2 Velcro 10 cm long. They will be needed to connect the inner and outer covers.
- Sewing machine. Manually, in my opinion, sewing all this is unrealistic ...
Stages of work:
1. Build a pattern. A standard bean bag chair consists of 6 wedges and 2 round or hexagonal parts (the upper one is small, the lower one is large), and a handle is also attached on top. There are a lot of different patterns of a frameless chair on the Internet, but the meaning is the same. The appearance of the bean bag does not change much whether the bottom is a circle or a hexagon, the width of the wedges will be 40 or 50 cm. affects how your chair will end up looking.
We found and finalized the pattern of the middle bean chair (120 x 90 cm). It seems to me that the standard width is enough. If you increase only the height of the wedges to about 140 cm, then the length of the headrest will increase, that is, the chair is suitable for a taller person.

Bean bag patterns
To transfer the wedge pattern to a large sheet, you need to draw the middle of the wedge - the axis, put marks on it at a distance of every 10 cm and measure the widths indicated on our pattern, and then connect them in one line. This will be the side bend of the wedge. Then we fold the pattern along the axis and draw the second half of the wedge symmetrically. There is a deflection on the bottom of the pattern. We measure the specified deflection size from the height of the axis. Then we apply the ruler to the two lower edges of the pattern and bend it to the specified deflection mark and draw a deflection under the ruler. Cut out the finished pattern.

How to draw a deflection on a wedge pattern
In order to draw a circle, we take a non-stretching thread and tie a loop at one end (we will thread a pencil into it). We measure the length of the radius of the circle from the pencil to the finger on the ruler. We press one end of the thread to the center of the circle, thread a pencil into the second and draw a circle. Cut out.

How to draw a bottom pattern for a bean bag chair
To build a hexagon, you need to draw a rectangle, and then place the hexagon in it according to the specified dimensions. Cut out the detail.
Don't forget about the rectangle pattern for the handle.

Patterns for a frameless chair
2. Now we place the patterns on the fabric, as in the figure. It is needed for more rational use material. For the same purpose, the round part is cut into 4 parts. Before sewing a bean bag chair, they need to be sewn into a full circle. When cutting the fabric for the inner cover, we did not divide the bottom part, because the old sheet was large, and it was enough for us to place all the patterns in full size.

Placement of bean bag chair patterns on fabric
3. Cut out all the details, not forgetting the seam allowances (1-1.5 cm).
4. We sew the inner cover first. We sew the wedges together, sew a 50 cm zipper into the last seam.

This is what the outer case looks like without a bottom and top
5. Sew on the bottom. For convenience, it is worth connecting the wedges and the bottom with pins.
6. Then sew on the top hexagon. Do not forget to sew 2 Velcro on this part.
7. In the same way we sew the outer cover. On the inside we sew 2 velcro on the hexagon, and on its outer side we sew the handle of the bean bag chair (first, fold the rectangle in half with the wrong side up, sew along the edge, turn it inside out, and then sew it to the hexagon).

Finished inner and outer covers
8. When 2 cases are ready, it's time to stuff the inner case with Styrofoam balls. To do this, I advise you to go out into the entrance, or at least into the corridor, since the balls tend to crumble and scatter in different directions. Have a vacuum cleaner or broom and dustpan handy. The package with balls needs to be cut quite a bit in the upper corner. Otherwise, cutting off the entire top of the package, you run the risk of spilling a lot of balls past the cover. And this means that it will take a long, long time to clean them. Insert the opening of the bag into the cover of the bean bag chair and slightly shaking the bag, slowly pour the contents. This action is best done together. After filling the chair, fasten the clasp.
9. Insert the inner cover with balls into the outer one, fasten the upper parts of both covers together with Velcro. Zip up the zipper and enjoy your big bean bag, which you did make yourself :)

Velcro to connect two cases

Kostya is holding a bob-chair by the handle
All three of us spent the whole day testing this miracle of comfort and discovered the additional functionality of Big Ben. In addition to being a 2 in 1 chair and couch, it has a very good body streamlining, which allows pregnant women to finally place their stomach in a comfortable position.

Bean bag - the joy of the child :)
In addition, Xenia appreciated the bean and began to use it as almost a trampoline, slide and sofa at the same time. It is noteworthy that it is quite difficult for her to get out of the arms of the chair, which means that she strains her muscles and this is very useful. It is very funny to watch how a baby bogged down in a bag flounders, rolls over, pushes off and squeals with delight. In addition, the bumpy texture of the balls is still felt through the covers, and for small children's legs this is a wonderful massage.

Evening family reading
By evening, it was found that the enveloping effect of the chair helps to put the obstinate baby to sleep :) A couple of cartoon episodes, a comfortable position in the chair next to the mother and the cub is sleeping. Another property of the chair will please those who love warmth. It is very warm. As you know, polystyrene is an excellent insulation, and polystyrene balls that cover the body from all sides are warm so that you will not freeze, even if you really want to. Just remember to bring a cozy blanket with you.
Here is a new piece of furniture we recently got. We immediately appreciated its merits and made it habitable, even sometimes arguing who will sit on it. If you have any questions when creating a bean bag with your own hands, write to us and we will definitely answer them.
We wish you inspiration to create wonderful cozy things!
P.S. After 5 months of active use.
Today is about how to sew a bean bag chair with your own hands. The bean bag chair comes in different shapes, but most often it is a pear chair or a ball chair, in terms of comfort they do not compete, it’s only in your preference, bean bag patterns different forms, as well as a bean bag chair for children in this post. What does a bag chair look like in the interior of an apartment?
Benefits of a bean bag chair
The bean bag chair belongs to frameless furniture, it is comfortable, it is pleasant for adults and children to relax in it.
One of the advantages of the bean bag chair is that it is mobile, it can be easily moved from room to room, placed in any part of the room and even taken outside, into the garden, to relax in the shade of trees.
 The bean bag chair is filled with polystyrene foam balls, so it is very comfortable to sit in such a chair, because. the chair takes the natural curves of the body and the spine relaxes, because. the load is removed from it, even in such an armchair it is warm to sit, and this is especially desirable in the evening - relaxation and warmth.
The bean bag is safe for children, because. it has no hard and protruding parts.
The bean bag is easy to keep clean. it consists of two covers, the inner one is padded and the outer one is removable and machine washable.

Bean bag in the interior
Some difficulty lies in the fact that not every interior fits a bean bag, the only room in which a bean bag will look, in almost every house, in its place is a children's room. I see a way out of this situation in the following, the bean bag needs to be “settled” in the children's room, and since it can be easily moved, use it where you want, and then return it to the nursery. So that the bean bag does not seem like something foreign in the room, sew it from a fabric that is in harmony with the color of other furniture and / or textiles, it is not desirable that the chair merges in color with the wallpaper in the room, but isn’t that just a disguise)
 You can buy a bean bag chair in a furniture store, and on the Internet more often stores specializing only in bean bags of various shapes. The beauty is that in such stores you can buy pear chairs, ball chairs, etc. with various funny prints, a Mickey Mouse chair, a banana chair, etc., but this complicates the situation even more, such a chair in the interior may look like a foreign body.
How to choose a bag chair in a store
If you decide to sew a bean bag chair with your own hands, you will have some advantage in the choice of fabric, color, add some savings to this family budget and the scales will shift to the side: sew a bean bag with your own hands!
How to sew a bean bag chair with your own hands
Sewing a bean bag chair with your own hands is simple from a technical point of view, it can be a little inconvenient, due to the size of the chair.
By and large, the bean bag chair consists of two covers. The inner cover of the bean bag chair must be made of durable fabric, because. the load on the chair will be substantial, and if you sew an inner cover from shabby fabric, such as old curtains, sheets, tablecloths, etc., then there is a high risk that such a cover will tear and all the filling will spill into the top cover, pouring it is not an easy task . For the inner cover, it is good to use mattress fabric, it is not very easy to find, but this fabric is elastic, adds softness and improves appearance the chair itself. Or at least a waterproof fabric and durable like polyester, if you spill a drink on a bag chair, the filler will remain dry and you won’t have to fool around to dry it, just wash the top cover.
It is preferable to sew the inner cover of the chair from a light fabric, in case the top cover is translucent. The top case also needs to be made of durable fabric, for obvious reasons.
What fabric to sew a bean bag chair from: choose a bean bag chair for a long time good quality upholstery fabric, such as leatherette, oxford, thermal jacquard, etc.
What is the bean bag filled with?
Expanded polystyrene balls are used as a chair filler, 2/3 of the filler should be poured into the inner cover. If you fill the filler into the inner cover, then pulling the upper cover will be problematic. Over time, the expanded polystyrene balls are crushed by weight, their volume decreases, then they need to be refilled. For one chair, you will need about 200-250 liters, depending on the size of the chair, you can buy balls at a hardware store. It is better to choose balls with a density of 10 kg / m3; they will last longer. wrinkle less. In order to sit comfortably in the chair, add 500g to the filler. synthetic down (holofiber)
From this video you will learn how polystyrene foam balls differ and which ones are more practical to use as a filler for a bean bag chair, how to pour the filler into a chair cover and how to remove spilled polystyrene foam from the floor. Practical Tips!
We sew a bean bag chair with our own hands
According to the patterns below, you can easily sew a bean bag chair with your own hands.
A pear chair, according to the above pattern, it will turn out to be large, this is a chair for an adult, even a large person.
 The zipper should be at the back between the two petals. The width of the zipper, teeth-5 mm., The lock must be fixing.

This chair is sewn from leatherette, because. This fabric does not allow air to pass through, leaving holes for air to escape.
 .
.
Olga Volkova will clearly show how to sew a bean bag chair with your own hands.
.
Comfortable bean bag chair for children with their own hands
you will need a 55 cm zipper, two pieces of fabric 115 * 80 cm.
 sew the fabric along the lines indicated in the photo
  fold the fabric in half, lining up the sewn edges
 measure 15 cm from the corner of the fabric and cut
 unfold the fabric


 where to sew the zipper


 and that's what happens, a wonderful bean bag chair for the baby.


 Children love to play on the floor, and with such a bean bag, children can sit and not bend their legs under them, which is very unhealthy.
Bean bag in the interior photo, good examples
The bag chair in the interior can look very harmonious and has the right to be in the house, but it is important that the color and style of the chair be in harmony with the rest of the items in the room. Use the color combination rules.


Quite a large number of owners modern houses and apartments prefer minimalism in interior design. Excess furniture and its huge size are now considered almost a sign of bad taste and old-fashioned. That is why frameless furniture has entered our lives with great success.
An upholstered bag chair, being a great alternative to bulky armchairs and sofas, can decorate any room, organically fitting into its interior. This embodiment of convenience, originality and comfort can rightfully be called a breakthrough in modern furniture design. A practical and functional ottoman bag will not only become a bright accent of the room, but will also help you relax and relieve stress after a long day at work.
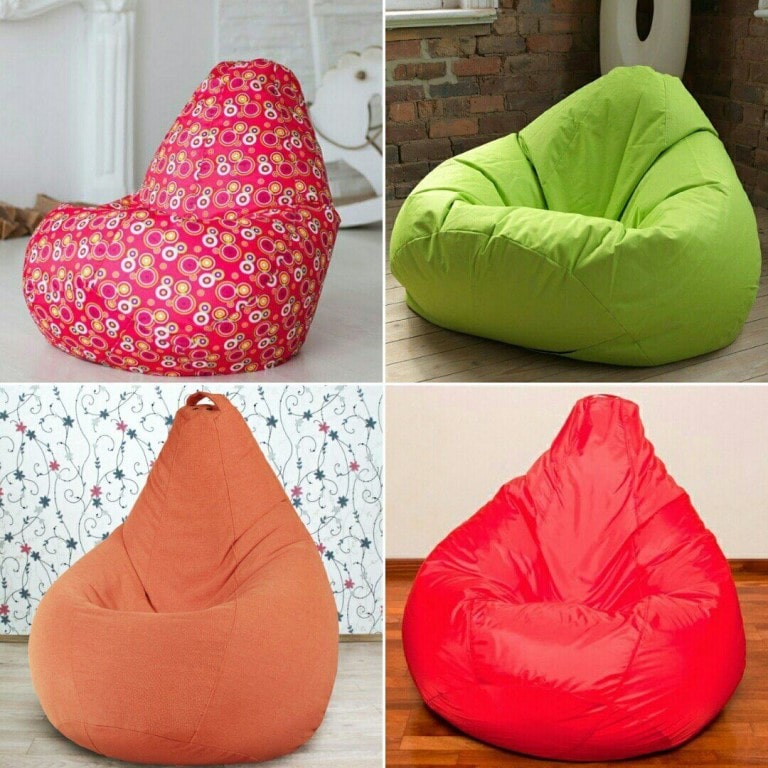
The bean bag is suitable option for almost any interior Red bean bag chair in an eclectic living room
One of the main advantages of this amazing piece of furniture is the ability to sew a bag chair with your own hands. And this can be done by almost anyone who owns even the smallest knowledge in the field of cutting and sewing. Today you have the opportunity to verify this by reading our article on how to make a bag chair with your own hands.
The modern market offers many models frameless chairs, presented in a wide range of colors, different shapes and sizes. But among this huge selection It is not always possible to find exactly what you need for yourself. After all, everyone wants to equip their housing in such a way that it is not like anyone else - due to non-standard furniture, unusual decor elements and other things. In addition, making something with his own hands, the master puts his soul and positive emotions. Such a thing will not only add originality and comfort to your home, but also bring favorable energy into its atmosphere. Our master class will show you a fairly simple way to sew an ottoman yourself without much effort and difficulty.

Armchair with fabric cover
Before you start making pear, you need to solve a number of questions for yourself:
- Having decided for which room we are sewing a pouffe, choose the most optimal sizes for it.
- Depending on the design style of the room, decide on the texture and color solution for upholstery fabric.
- Choose your filler.
- Prepare all the necessary tools and auxiliary materials for the job.
What should be the size
The dimensions of the future bag chair are selected depending on the availability of free space in the room and on the height of the person, whether it is an adult or a child:
- for people up to 150 cm tall, a chair with a diameter of up to 70 cm is suitable;
- for a person with a height of 150 to 170 centimeters, a pouffe with dimensions of at least 80 cm in diameter will be optimal;
- when the height is over 170cm, the chair diameter should be over 90cm.

Not the right size

The size is just right!
We have given an example of approximate sizes that a bag chair should have, you decide for yourself what will be best for you. But, most importantly, remember - for coziness and comfort there is no too big chair. The larger it is, the more accurately it takes on the shape of the human body, thereby providing maximum convenience. Therefore, you should not save on fabrics and fillers, especially when the free area of the room allows it.
Making a frameless chair
If the tailoring of the chair is intended for arranging a children's room, its design can be made in different bright and cheerful colors - with prints, polka dots, flowers, etc. A soft pear ottoman can also be decorated with decor in the form of favorite children's cartoon characters.
A bag chair made by hand will be an excellent and convenient accessory for a nursery, and due to its lightness and safety due to the absence of sharp corners, your child can easily move it around the room. Sewing a chair made of vinyl or eco-leather for a nursery will make it much easier to care for it, as you can wipe the furniture with a sponge or a soft brush.

Eco-leather ball chair
For a living room or bedroom, the pear chair design should be chosen in accordance with the interior of the room. So, for example, chairs, the upholstery of which is made from natural fabrics - linen or cotton, are perfect for a country-style interior.

Chenille fabric can be used for sewing a bag chair
If the interior of the room is made in the fusion style, you will have many ways to design bag chairs - they can be bright accents of the room or, conversely, merge with the overall interior palette.

Fusion bean bag chair
The cover is sewn in various colors and textures, it can be knitted from yarn, have a long pile or a plain, smooth surface - when you make ottomans bags with your own hands, there is no limit to fantasy.
Whatever style the room is decorated in, the presence of a pouffe bag will add sophistication, individuality and modernity to it, and will also emphasize the good taste of the owners of the house.
Filler - the secrets of the right choice
Despite the fact that at first glance the choice of filler for chairs may seem quite simple, in fact it is a bit different. In the vastness of Runet, you can find various videos in which you will be offered recycled polystyrene foam, obtained as a result of processing defective or used foam plastic products, to fill the pear chair. Such expanded polystyrene is categorically not suitable for filling pouffes, as it has soft granules of a broken circle, which quickly shrink and crush.
For stuffing furniture, it is better to use primary polystyrene foam - its granules have a perfectly round shape and are more resistant to stress and deformation. The size of the balls of primary polystyrene foam can be of different sizes, but in our case it is better to use a diameter of 2 to 6 mm.

Granules with a diameter of 5-6 mm
Styrofoam beads help the chair hold its shape, adding stability to it. And in order not only to sew a bag chair, but also to provide it with the necessary softness, softening materials should be added to the filler - foam rubber crumb or holofiber. Foam rubber has a low cost and availability, but, at the same time, it quickly ages and turns into dust.

Baby foam
As for artificial fluff (holofiber), its quality characteristics are much higher. It passes air well, does not absorb odors, is hypoallergenic, does not accumulate dust, and is durable.
Furniture, the filler of which consists of a combined composition, including polystyrene foam and holofiber, will be much softer, more practical and more comfortable.

Sagging armchair without artificial down

It looks like a chair, complemented by artificial down
Tools and other materials
So, in order to sew a comfortable and stylish ottoman bag for one adult, with a diameter of about 85 cm, we need:
- Fabric of dense texture (linen, tapestry, velor, eco-leather, faux fur, etc.) for sewing an external removable cover 150 cm wide and 320 cm long.
- Filler - volume of at least 0.5 - 1 cubic meter.
- Smooth, sliding, plain synthetic fabric for the inner bag 150x300 cm.
- Pattern paper - tracing paper is ideal.
- Two zippers 40 cm and 60 cm.
- Sewing machine.
- Reinforced threads.
Stages of work
The step-by-step step-by-step instructions presented by us with a photo will show you how to make an ottoman with your own hands at home. The proposed scheme contains all the exact dimensions of the patterns.
Cutting details
Before you start sewing a pear chair, you need to cut out the details of the pouffe (one small lower part for the base and six wedges for the chair itself) - draw them on paper, and then transfer them to the fabric for the inner bag and outer upholstery.

The location of the details on the fabric
Do not forget to mark the seam allowances - about 1.5 cm. Before you start sewing the patterns, you should process their inner edges.

Bean bag pattern
Assembly
Sewing a frameless chair begins with alternately sewing to each other all the wedges of the inner bag, leaving areas for the zipper. First, the six main parts are alternately folded face to face and chipped off with pins so that the fabric does not move out in different directions, and the sewing is even, and then they are sewn on a sewing machine. The bottom of the bag is sewn on last. A zipper is sewn into one of the wedges for easy filling of the filler and its renewal. By a similar principle, we sew the outer cover.
 Pattern for a large pear chair
  An example of a large pear chair
  Pattern for ball chair
  Ball chair example
Tip: sew the inner bag first, and then start sewing the outer one. Thus, you can, having made mistakes that are not so critical for the interior, avoid them when making the outer upholstery, because it must be perfect.
After the covers are ready, you can start filling them. Two-thirds of the filler is poured into the inner bag, as if in a bag, then the zipper is tightly closed and the outer cover is put on top.

Dimensions for patterns of adult and child seats
What could be more pleasant in the evening than to collapse into a soft bean bag chair and watch your favorite TV series? Children love them no less than adults: kids seem to be playing on the floor, but it seems to be on an armchair! It's good that sewing such a practical piece of furniture is not difficult at all, especially if you have a sewing machine.
To create a bean bag chair with your own hands, you will need:
- graph paper;
- two types of fabric - dense and beautiful (for the outer cover), one more (any) - for interior decoration, 3 m;
- two zippers;
- strong thread;
- filler (synthetic winterizer, stuffing from under old pillows, toys, polystyrene granules, foam balls, etc.).

We start sewing a bean bag chair with our own hands step by step instructions and schema:
1. Using graph paper, transfer the pattern from the pattern to the fabric.


2. Cut out the details for the exterior and interior of the bean bag.
3. We sew the wedges together, sew a zipper on the side to one.
4. Sew on the bottom, top and the first and last wedges for the outer and inner fabric.0
5. We stuff the bean bag with filler, fasten the zipper. In the future, it will be very convenient to wash the outer cover.
And here is another version of the bean bag chair:

These bean bags can be easily sewn with your own hands:


In this article, we will provide detailed instructions creating a comfortable and original frameless chair. Such a ready-made bean bag chair in furniture showroom can be very expensive. Meanwhile, the process of its creation is quite simple and does not require significant efforts and costs.
Frameless chairs are considered to be the best option children's furniture - soft, safe, comfortable, easily adapting to the shape of the body. Yes, what is there, such bean bags will appeal to both adult inhabitants of the house and guests who will appreciate the originality and comfort of such furniture.
Presented in stores today wide selection bean bags in a variety of shapes and colors. But the price, unfortunately, may seem too high for such, in fact, simple and unpretentious. So why not sew a bean bag with your own hands, especially since nothing special is required for this.
Both comfortable furniture and a great toy for children - that's what a bean bag chair is.
A bit of history
Bean bags (bean-bag), sacco, pear, ball, bag - as soon as they do not call frameless chairs, which are rightfully considered one of the most unusual types of furniture. The history of bean bags or sacco, which in Italian means the same bag, began in 1968. It was then that Cesare Paolini, Franco Teodoro and Piero Gatti came up with frameless furniture, simply transforming an ordinary bag stuffed with leaves and hay.
The Italian industrialist Aurelio Zanotta undertook to bring the idea of the designers to life, who decided to invest in the mass production of bean bags and did not lose. The furniture novelty received several design awards and became an exhibit of museums as an example of art and a new word in interior design.
Today, bean bags are popular in the most different countries of the world are actively used in the design of office receptions and public places, cinemas and halls of student dormitories, children's and living rooms.
On average, the price of a finished frameless chair is $ 90-100 and depends on the quality of the filler, the fabric chosen for the cover and the popularity of the manufacturer's brand. The price of products from genuine leather can exceed $ 1,000, and the usual ball chair, so popular in the design of children's rooms for boys, costs an average of $ 120.
The price, of course, is not so high, but why spend far from extra money if you can buy inexpensive filler, fabric, threads and make a bean bag chair with your own hands?
 Bright pear chairs and balls can become a real highlight of the interior and are quite a popular option in both residential and public spaces.
What you need to create a bean bag chair with your own hands
So, you have decided that you can handle it on your own and are ready to start sewing a bean bag chair yourself. First of all, you need to take care of the availability of the following materials:
- Scale-coordinate drawing paper, that is, a simple graph paper, which will be needed to create a pattern.
- Inexpensive, but durable fabric for the inner bag, which will be filled with filler. The most common natural mixed fabrics are suitable, for example, satin or tisi (fabric for sewing workwear), mattress or raincoat textiles, durable, water-repellent and at the same time lightweight polyester material. The size of the fabric cut depends on which chair you want to sew. For example, to sew a pear chair 120 centimeters high and 90 centimeters in diameter, 2.5 meters of fabric 115-122 centimeters wide are required. This chair can easily withstand weight up to 100 kilograms. If you want a slightly larger chair - you will need at least three meters of material, a maximum of three and a half, unless, of course, you are sewing a small sofa.
- Fabric for the outer cover. The cut will need the same size as for the inner cover, but the choice of fabrics is much wider here. You can use flock, velor, jacquard, chenille, artificial leather or fur, tapestry or artificial suede. It all depends on how much you want to spend on sewing a bean bag chair and the desire to create a bright and at the same time durable thing. It is believed that flock is ideal for a child seat-ball or pear - water-repellent, non-fading and at the same time very soft, pleasant to the touch material.
- Two zippers from 30 to 100 centimeters long, depending on the size and type of bag. On the outer cover, the zipper can be replaced with Velcro. The zipper on the inner cover is necessary so that in the future you can pour the filler, and sooner or later you will have to wash or clean the outer bag. In addition, if you wish, you can sew several external covers to change the appearance of the chair, surprising guests every time.
- Pencil for building a pattern.
- Meter line.
- Chalk to transfer the pattern to the fabric.
- Scissors.
- Strong reinforced threads for secure seams.
- Filler. How to fill the bean bag - you choose. Initially, the creators of this frameless furniture filled it with water, but then this idea had to be abandoned. Such "water" chairs turned out to be too heavy, and no one canceled the danger of a flood. Straw or hay is not a very convenient option and it will be uncomfortable to sit in such a chair. In addition, straw and fragrant hay do not like high humidity, and such a filler will have to be changed every 6-12 months. Buckwheat husk or rice - the chair, again, will turn out to be too heavy, clumsy and expensive, but we really want to save money. Scraps of fabrics, synthetic winterizer, cotton wool - all these fillers sooner or later clog, fall off and the chair will become uncomfortable. Perfect option- Styrofoam balls with a diameter of not less than 0.5 and not more than 1 centimeter. Styrofoam balls that are too small will make the chair quite heavy, and large ones will not be able to evenly distribute on the chair and it will be uncomfortable to sit. For our standard chair, you will need from 200 to 300 liters of filler. Remember that such a volume of filler weighs only 1-1.5 kilograms - do not buy, for example, ten-kilogram industrial packages - they can take half a house. It is believed that imported polystyrene balls are better than domestic ones, but they also cost a little more. Do not try to replace the finished filler with "crushed", that is, recycled defective foam. This is a cheap option, but a chair with such a filler will not provide comfort.
- Sewing machine.
Now let's calculate the costs. We hope that you already have a sewing machine, scissors, a ruler and a pencil, and you can replace the chalk with a bar of soap. A bag of filler with a volume of 100 liters costs from 200 to 500 rubles (depending on the manufacturer), and we will need three of these packages. The cost of fabric for covers depends on the type of material. Let's say we chose tisi fabric for the inner bag (from 85 rubles per meter), and flock for the outer cover (from 190 rubles per meter).
Filler today can be ordered online or purchased at a hardware store, fabric - at a specialized outlet or also online.
As we remember, we will need about three meters of each fabric (we will take with a small margin). So: 600 rubles - filler, plus 255 rubles - fabric for the inner bag, plus 570 - material for the outer cover. Total - 1425 rubles. Yes, a skein of reinforced thread also costs money - about 9 rubles. As you can see, even in the case of using a fairly expensive upholstery fabric, the cost of a hand-sewn bean bag chair is about half lower than the finished options.
 To create such a standard pear chair, you will need about 2.5 meters of fabric for the inner and outer covers.
Bean bag design options
Frameless chairs can take the most bizarre and unusual forms. Below we give patterns for the three most popular options for creating such furniture, but before dwelling on one of them, think about where your bean bag chair will be located and what function it will perform in the interior.
For example, if you are planning to place a frameless chair in a nursery, then your imagination in terms of colors and shapes is limited only by the predilections of the child himself and your financial “ceiling” in terms of buying fabric for the outer cover.
It is more difficult to place a bean bag chair in the living room, since the general style of the interior design of the room can contrast sharply with such an unusual item. We note right away that to fit a frameless, actually shapeless chair into classic interior- complicated.
Such furniture is more suitable for the style, which is characterized by bizarre shapes and the absence of straight lines, as well as modern interiors.
In any case, remember that the color of the outer cover of the chair should be in harmony with the overall colors rooms.
 The three-color bean bag chair fits perfectly into the interior of this bright children's room.
 Neutral beige shade of these frameless chairs allowed them to become a harmonious part modern interior
The process of creating a bean bag chair
Let's proceed directly to sewing a frameless chair:
- First of all, we determine the shape and size of our product and transfer the pattern to graph paper. The pattern is transferred to paper according to the specified scale. You can create your own version by calculating the dimensions that are required for you, and if the chair is intended for a child, simply proportionally reduce the width and length of the wedges, as well as the dimensions of the remaining parts.
- Next, according to the prepared paper patterns, we cut out the material, not forgetting to leave an additional 1.5 centimeters on each side for an allowance. You should have six wedges for the main part, two bottom parts and one top part if you are sewing a pear chair. For the ball chair, you will need a lot more details - 20 large hexagons and 12 small pentagons. For a rectangular chair, you should cut out the bottom, two side, front and front parts, as well as the back.
Yes, do not forget - this is only the inner cover, then you will have to do the same, only on the fabric chosen for the outer cover of our chair.
- Then, for convenience, all parts are fastened together with needles and basted manually. Similarly, at this stage, lightning should be swept - in lower part each cover, so as not to spoil the appearance of the chair.
- Now we sit down sewing machine and we securely sew each seam with a reinforced thread, and remove temporary seams - we don’t need threads sticking out anywhere.
- To make the chair durable and last for a long time, you should additionally impose a second line or process each seam with an overlock, having previously bent the start we left.
- Now we turn the resulting “pouch” and proceed to filling the inner cover with polystyrene foam balls.
Before filling, we advise you to remove small children and pets from the room, as light balls tend to become electrified and fly around the room with lightning speed. Getting a small ball into the respiratory tract is very dangerous, and swallowing them is strictly not recommended. If the balls managed to scatter, use a vacuum cleaner to collect them.
It is much more convenient to fill the filler through a large watering can, which is inserted into the neck of the inner cover, a paper funnel or simply cut off plastic bottle. It is impossible to fill the inner cover “to the eyeballs” - by about two-thirds, in order to leave the chair the ability to adapt to the person sitting.
- Now it remains to iron the outer cover (if the selected textile requires it) and put it on the inner, already filled one.
By the way, you can put one cover on another immediately, and then pour the polystyrene foam balls inside - as you prefer.
- For convenience, you can also sew a strap, for which you can carry the chair from one place to another. Although, in the case of a ball-chair or a rectangular model, the strap will be clearly out of place.
One more nuance: if you use artificial leather for sewing the outer cover, you should leave a few eyelets (holes with special metal round inserts) to allow air to pass through. That's all, it's not that difficult, right?
 Pattern for a pear chair, dimensions are for an adult version. 1 - wedge; 2 - bottom 2 part; 3 - bottom 1 part; 4 - top
 Pattern for a round bean bag in the shape of a soccer ball. 1 - 20 parts; 2 - 12 parts
 Pattern for a rectangular bean bag. 1 - piece of fabric; 2 - side parts 30x80x60 mm; 3 - frontal detail 30x70 mm; 4 - front detail 93x70mm; 5 - back 60x70 mm; 6 - bottom 70x80 mm
 Pattern transferred from paper to the fabric of the inner cover
 This is what the bean bag chair looks like inside
To begin with, we advise you to try your hand at sewing a small pear chair for a nursery. If the experiment is successful, and the chair turns out to be beautiful and comfortable, you can start sewing an adult model - after all, you most likely still have the filler.
Experienced bean bag makers can afford to decorate their product with applique or embroidery, turn a child seat into a cartoon character, an animal or a futuristic object. In addition, pockets for small things and toys can be sewn to the chair to make it not only comfortable and beautiful, but also a useful interior detail.