Flask from a bottle and leather with your own hands. Stylish do-it-yourself bottle flask with polymer clay decor
This flask case looks very nice. The principle of its manufacture is very simple. The biggest difficulty is finding a laser machine for cutting leather. You can simply order this service or make a similar perforation manually. The latter option is very time consuming and requires great care, but if you really like this kind of framing, it's worth it.
materials
To make a leather flask case with your own hands, you will need:
- the flask itself;
- two pieces of leather (black and burgundy);
- sharp knife;
- awl;
- needle;
- waxed thread;
- laser machine;
- skin glue;
- leather wax;
- nail polish;
- cotton pad;
- acetone;
- soap;
- water;
- computer and photoshop;
- sheet A4;
- Printer.
Step 1. The flask was previously framed in a leather case, but it leaked over time, and it had to be replaced urgently, since the container itself was quite fragile and could be damaged if dropped without such a casing. Before work, the old leather layer and all remnants of its attachment should be removed. To do this, the skin must be finally torn off, the remaining glue should be cleaned with a cotton pad dipped in acetone and the surface cleaned. After that, the flask should be washed with soapy water and wiped dry with a waffle towel.


Step 2. Take measurements of the side walls of the flask. Be sure to take into account the few millimeters that you will need for the upper perforated piece of leather. If you do not take them into account, the workpiece will have to be redone.
Step 3. Pick up an image in black and white with a perforation ornament. Process it in Photoshop, filling the cutouts with black and making their edges as clear as possible. After that, adjust the image to the parameters you need. Along the edges, mark the slots for the seam. Print the image on paper.


Step 4. From a black piece of leather for the base layer, cut a blank of the appropriate size.


Step 5. Send a piece of red leather along with the prepared paper template for perforation on a laser machine. Set the appropriate parameters before work.

If you decide to do everything manually, be sure to stock up on very sharp knife for leather and awl. The first you will make the perforation slots, and the second - the holes for the seam.
After creating the workpiece, be sure to process the edges of the slots and the product itself. During laser treatment, the skin will have bad smell, wipe its surface with a damp toothbrush and lay the material to dry on a paper towel. Flatten it first, but do not stretch it.

Step 6. With waxed thread, sew the perforated blank along the long sides of the rectangle. You can fix the ends of the threads with transparent nail polish on the wrong side.


Step 7. Apply glue to the black blank. Attach it to the flask, after leveling it so that there are no creases. Be careful with leather and glue so that the piece of leather does not deform.

Today we will talk about flasks: what and how these things are made, what volumes they come in, how best to choose a flask, what to pour into it, how to care for it. We also recall a few basic rules of “flask etiquette” and make a short digression into history.
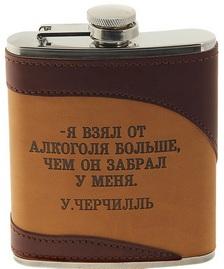
“Portable bar”, “combat 100 grams”, “lighting liquid” - as soon as the people do not call a flask. A small container with precious drops of alcohol is an indispensable part of the equipment of any alcoholic esthete.
Wherever you go: on a fishing trip, on a hike, for an interview, to the theater - your personal damask in your pocket will make you independent of bars and shops, will give you the opportunity to relieve stress at any time, warm up, tune in to positive, relax. Do not forget that the flask is an indicator of style, a pretentious attribute. In short - "You can at least not drink at all, but you must have a flask!".
What is a flask and where did it come from?
The word "flask" itself is German, derived from "Flachmann", which means only "flask" in translation. "Flyakhmans" were used mainly by soldiers - during World War I they were made of glass and dressed in a cloth case. They fought, go ahead, already running - just imagine how much schnapps was spilled on the battlefields by the Kaiser's troops!

But, of course, containers of alcoholic substances appeared long before the Imperialist one. Leather, gutted cattle stomachs, wood, shells of some fruits (eg coconut) - portable "bottles" for wine and other drinks have been made from all this since their appearance.
The flask began to acquire a modern look, presumably, in the eighteenth century, in good old France. It was at this time that the flask left the category of a practical everyday item and moved into the plane of a design element, even luxury. Silver, gold, chic ornaments, gem inlays, family coats of arms, engravings, icons are proof of this.

The main jump in the popularity of this device happened in the States, in the 1920s. At the time, alcohol could only be sold from under the floor. Someone from the future Al Capone came up with a special type of liquor known as " filling stations". The meaning is simple - a worker, eager to get his throat wet, enters a certain institution. Drinking on the spot was not allowed for reasons of secrecy - the bootlegger poured only "to go".
Those who wanted to refuel needed a "gas tank", or rather a "tank", which could be hidden in a pocket or behind the bootleg and carefully transported to a safe place.
After the repeal of the dubious Eighteenth Amendment, flasks remained part of the everyday life of ordinary Americans. They, for example, were often found on the bodies of US soldiers who died on the fronts of World War II. They took them to Korea and Vietnam. It must have been from there that a convenient and useful object penetrated the expanses of the USSR.
Capacity and material
Many years ago, when I bought my very first flask, I was always surprised that the capacity on it was indicated not in milliliters, but in some mysterious “OZ”. In fact, there is nothing surprising here - Americans measure the volume of alcohol in ounces, equal to 29 ml with a trifle - just a small shot. The minimum volume is usually 3 ounces, the maximum is 12.
But there are exceptions. For example - miniature flasks-key rings. My friend's uncle worked at some mysterious flask production - so he has everything, from vegetable oil before moonshine, it was stored in mastadont 3-5-liter flasks.

The choice of volume is a personal matter for everyone. I like 9 OZ - 255 grams. Just enough cognac to relax a little and treat a friend. A smaller, 6-ounce flask will come in handy on a hike - you can pour 98% alcohol into it, which will do to kindle a fire due to dampness, and disinfect a wound, and get a company of 2-3 adult men to drink.
Just keep in mind - alcohol, especially strong alcohol (alcohol, absinthe, undiluted tinctures) should not be stored in a metal container for a long time - there is a risk that the drink will change its taste, become "iron".
And, by the way, another life hack - “for warming up” is much better suited not for brandy or vodka, but for strong wine - port wine, Cahors. It has been tested in practice - at one time I had to work a lot in the cold. From wine it becomes warmer without prejudice to the mind. And to relieve stress, it is recommended to take no more than 50 ml, especially in extreme conditions - on a hike, etc., where it is important to maintain dexterity and clarity of thought.

Now about the material. As already mentioned, flasks are made from anything - even from glass and polymers. We will focus on metals.
- stainless steel- the most common material. Beautiful, suitable for engraving, corrosion-resistant. Compliant character. On sale most often there are flasks made of brazed stainless steel. If you want to completely protect yourself from tin, lead, acid and other solder elements, it is better to look for one welded with argon. Aerobatics - seamless stainless steel. But you will have to pay for the exclusive accordingly.
- Aluminum- also not subject to corrosion, lighter than stainless steel, but - prone to deformation, due to which the caps begin to twist worse, and precious moisture leaks. But I do not recommend aluminum for other reasons - it noticeably spoils the taste of alcohol, and not only strong.
- plain steel. There are no options - immediately in trash.
- And finally silver. This, of course, is chic - not only will silver not spoil the taste, but, according to many reviews, it can slightly improve it. Of course, I can’t imagine an adequate person who will spend over 15,000 rubles on such a trifle. But as a gift to the boss or business partner - that's it.

And yet - it is worth paying attention to accessories for flasks. For some flasks they make glass corks - maybe it's more convenient for you to drink, but I think that the cork should be attached to the body on a hinge - otherwise it will be 100% lost. If you do not like to effectively drink from your throat, it is better to purchase a set of metal shot glasses in a separate case. Take thicker - they quickly bend.
But the watering can is a very useful thing, especially when you pour the rest of the booze into a flask in the morning after drinking. I personally don’t see the point in special cases - except that, in addition to a flask, it fits, for example, a pouch or a cigarette case.
Secrets of care and "flask etiquette"
There are a few unspoken rules that flask owners follow. For example:
- Cocktails are not carried in a flask.
Only pure alcohol, only hardcore! Love ""? Carry rum with you, and mix the rest in a glass. Agree, "Bloody Mary" in a flask is not entirely aesthetically pleasing, and unhygienic.
- Only you and your closest friends can drink from the bottle.
Treating unfamiliar characters from your own flask is in bad taste. An alternative is portable glasses.
- The neck must not be grasped by hand.
And in general - the flask must be kept clean, thoroughly washing every time after it is emptied.
 When not carrying alcohol, the flask should be kept clean and dry. From the inside, it cannot be washed with soap or detergent - only ordinary warm water.
As a last resort, if some painfully fragrant or sweet, fatty drink was stored inside, you can use citric acid or a weak solution of vinegar, after which the container must be rinsed again several times and dried well with the lid unscrewed.
You can also wash the flask with… rice! Rice is a good adsorbent, it perfectly absorbs odors and flavors. A few grains need to be poured inside, add warm water and let stand for half an hour, then rinse the vessel thoroughly.
Outside, a simple metal or wood-encrusted flask can be washed with soap or a neutral dishwashing detergent. For the skin, ordinary shoe products will do, only those that do not smell. Tin can be rubbed with a mixture of vinegar, flour, and salt, allowed to dry on the surface, and washed off with warm water.
It is also necessary to rinse a new flask several times immediately after purchase, then dry it and fill it with vodka or other alcohol, which is not a pity. If in a couple of days the drink has not changed its taste and smell, then you have acquired a good vessel!
That's all!
The article partially used materials from the site furfur.
The original leather flask, made according to this master class with your own hands, is suitable for a gift to your beloved husband, boyfriend, son or father.
The manufacturing technique is simple and accessible to beginners. Without using special materials, tools and skills, you will get not only a beautiful and stylish, but also a practical thing. It is convenient to store strong drinks, balms, herbal infusions, water in a flask. You can take an unnecessary leather jacket or bag as a basis, then the cost of crafts will be significantly reduced.
Decoration materials
To make a leather flask with your own hands, you will need the following materials and tools:
- a flat glass bottle with a volume of 200-250 ml, the shape of which resembles a classic flask;
- thick skin;
- clasp for a small strap;
- strong thick thread in skin color;
- a sheet of thin cardboard;
- transparent universal glue for needlework;
- ruler;
- ball pen;
- scissors;
- awl.

Recommended immediately note on the other, which is ideal not only for a gift for a man, but also for a woman. Another involves working with polymer clay. Choose what you like best or do it all!
How to make a leather flask case
Thoroughly clean the bottle of labels by soaking in water. If indelible traces of glue remain, remove them with cotton wool soaked in acetone.
Measure the length of the bottle from neck to neck through the bottom. For convenience, use a rope, it is easier to measure it with a ruler.

Measure the width of the flat part of the container. Draw a rectangle of the obtained dimensions on the cardboard.
Separately draw a figure similar to a kite on the cardboard.
The width of the diamond should be 1 cm less than the width of the bottle measured earlier. The length of the rhombus and the "tail" of the kite is equal to the height of the future flask in a leather case. The length of the "nose" of the snake is 3-4 cm. The width of the stripes is 1 centimeter. Cut out the cardboard patterns.

Draw the outlines of the templates on the pieces of leather with a ballpoint pen. If there are no two relatively large pieces, then the second figure can be assembled from leather strips 1 cm wide, sewing them together in an appropriate way. Cut out the details.

Sew a fastener to the tail of the second part.

Then sew the second part along the symmetry line of the rectangle.


On the wrong side of the skin, draw and cut a rectangle 3 cm wide and 12 cm long. Fold it in half and sew on the side of the sewn part of the rhombus. Thus, you will get a loop with which a man will hang a hand-made leather flask on a trouser belt.

Using an awl and a ruler, make holes along the long sides. Find the middle of the main rectangle, measure 5 mm from it on both sides, pierce the holes. The next - after 2 cm. Further, symmetrically with respect to the central point, pierce repeating holes at intervals of 15 mm, 7 mm.
Lace the sides of the case with a strong waxed thread, starting from the middle of the sides.

Insert the glass bottle into the leather case and tighten the threads on both sides.

Tie the threads in a beautiful knot. To decorate the flask, you can string a copper bead.

Pierce holes along the center line in several places on the unsewn strip of the second piece.

Measure the circumference and height of the leather flask lid. Cut out the appropriate details from the leather, adding a height allowance of 10-5 mm. Apply transparent glue to the surface of the cover and leather parts, let it soak in a little. Cover the lid with leather.


This is such a beautiful flask! Give it to a man New Year, February 23 or any other day.


If the bottle breaks by accident, loosening the lacing allows you to insert another of the same shape into the case. look which is still quick and easy.
A master class on making a gift flask in a leather case was prepared specifically for the Women's Hobbies website. Share the link on social networks to show the idea of reincarnation to your friends.
Making a distiller with your own hands is the best way out for those who consider it an unjustified investment to buy it. However, you can do alcohol mashine from a flask, and the necessary "", the same refrigerator, or even - buy separately.
Many in their dachas, especially in private homes, have perfectly preserved aluminum milk flasks of 38 liters. It was the most popular size in Soviet times. They were inexpensive, but were (and remain) very practical due to the possibility of hermetic closing.
And to be honest, even then these cans were actively used by home distillers for their own purposes: they put mash in them and successfully drove them. It is worth noting that today the choice is even greater: you can buy a flask from 5 to 100 liters.
In Europe and China, flasks are mainly used stainless steel. Probably the main reason that medical research is ambiguous about the use of aluminum. Allegedly, when interacting with an aggressive environment (which is), especially when heated, it oxidizes. At the same time, substances harmful to humans are released.
Even today, we continue to produce aluminum flasks and pots.
Reference. Not a single case of poisoning associated with the use of aluminum utensils has been reported worldwide. That is, the conclusions of scientists are only theoretical.
However, for those who are worried about the material, there is an alternative - to buy a stainless steel flask. They are produced in China and European countries and sold here.
note. To save money, you can independently write out a flask of the required size from China through Internet sites, the same Aliexpress, for example.
Although European ones are much better in quality. But why then fool your head, if for the money paid for a European flask, you can buy quite a decent Russian-made one.
Benefits of milk cans

- this is an almost finished cube that requires minimal alterations. And even then, if heating is planned on a stove (gas or electric), only the lid will require changes, the can itself can not be touched at all;
- flasks are made of thick metal, have a large margin of safety;
- do not rust, durable;
- in the same vessel you can put mash;
- aluminum heats up quickly, transferring heat to the mash, thereby accelerating the distillation;
- voluminous neck that allows you to track and also easy to wash the can.
The disadvantages include the presence of a special rim near the bottom of the can. It is difficult to heat such a flask on an electric stove, but for gas stove, steam generator, heating element, it does not matter.
Valve is safer
One of the main reasons is the blockage of the steam pipe with foam or even solid particles contained in the mash. At the same time, pressure increases inside the cube and when the material of the tank cannot withstand the pressure, an explosion occurs. Sometimes such force that the windows fly out in the house, the moonshiner gets serious injuries, he can lose consciousness. And at this time, a fire breaks out due to alcohol vapors escaping.
Therefore, in no case do we leave the device unattended during the haul and take additional security measures. The main one is safety valve installation.

Attention. Many moonshiners explain their reluctance to equip the distillation cube with a valve by saying that in this way, they say, part of the alcohol vapor will “fly away” into the atmosphere.
Will not! With proper distillation, there is no excess pressure in the cube, alcohol vapors rise through the outlet pipe, and the valve “does not work”.
Remember how a pressure cooker works (and a slow cooker too). Steam starts to come out only when the liquid inside boils. When distilling, the mash never reaches the boiling point and no steam is released through the valve. But the presence of the valve saves in case of unforeseen situations.
You can choose from these options:
- valve for the compressor, which operates at a pressure of about 10 atm. This is too much, the material of the flask may not withstand, especially if it is far from new. Price from 140 rubles;
- safety valve Chinese production, "switching on" at 1.6 atm. Price - 500 rubles. and higher;
- pressure cooker valve. Its price on Chinese online sales sites is 70 rubles;
- thermometer in an open (not sealed) capsule.
To do this, a 10 mm hole is drilled in the wall of the flask at the top or in the lid, in which a stainless steel tube is hermetically fixed. A conical gum from a dropper is inserted into it, and then a bimetallic thermometer.
Its probe is inside the cube, and the round scale is outside. In the distillation or rectification mode, the thermometer informs about the temperature inside the cube. But if an emergency suddenly occurs, and the pressure rises sharply, it will simply push out the thermometer and be discharged through the tube.

Drain valve and steam generator
A drain cock will be needed if you have a large flask. For a 10-liter (which actually fits no more than 7 liters of mash), there is no particular need for it. And for the convenience of freeing a 40-liter container from the stillage, it can be very useful.
It is better to use a faucet made entirely of brass with a rotary lever. You can even connect a garden hose to it and drain the used mash even into the sewer, even for compost heap in the garden.
If you want to equip your device steam generator, with which you can distill even a very thick wort, which, with normal heating on the stove, will surely burn, it is not difficult. A fitting is screwed into the can 3 centimeters above the bottom, ensuring it is tight.
FROM inside a can (that's when a wide neck is important) a bubbler or a spiral is installed on the fitting, reaching the middle of the container. A steam pipeline is connected to the external one.
Electric heater
 In many cases, the use of heating elements is advisable, and their installation is not difficult.
It is enough just to make two holes - exactly the size of the connection for the heating element and fix the heater in the flask, stepping back about 5 cm from the bottom.
As a rule, all connecting elements - gaskets, nuts - come with the heating element. For a can of up to 20 liters, 2 kilowatt heaters are sufficient, or two, installed one opposite the other, but of lower power. For a 38-liter heater, you need a more powerful heating element - by 3.5 - 4 kW.
Peculiarities. With the help of a heating element, a clean, filtered mash that does not have sediment is distilled.
When trying to distill a thick wort containing particles of the product, it will certainly burn out, worsening the quality of the moonshine.
How to do it yourself?
Having decided on how you see your future moonshine still, proceed to create it.
Important. If you plan to use purchased additional products: , or distillation column, it is better to order them in advance and make all connections already under the existing "canopies".

- Making a sealed lid. A standard flask lid already has a seal, but it is rubber, which means that the final product, which we strive to make crystal clear, will smell like rubber. New seal can be made from silicone hose. It is reliable, durable, not afraid of heating up to 250-300 ° C, does not enter into chemical reactions with the chemical elements of the brew.
- Making a hole for the steam pipe, insert the fitting. As an option - a hole for a distillation / strengthening column. It must be made of a larger diameter, focusing on the existing equipment.
- In the lid or top of the can preferably fix the safety valve and which will help clearly fractionate distillate: up to 78 ° С - heads, from 78 to 85 ° С - body, higher - tails.
- If scheduled drain cock or steam line- we do, not forgetting that all connections must be hermetically sealed. In addition to gaskets, we use silicone sealant, fum tape for plumbing, heat-resistant sealant where there are threaded connections.
- Having put the heating element, be sure protect yourself from electric shock, securely insulating wire connections. The cross section of the wire is at least 2.5 cm. It is very good to install thermostat, uninterruptible or rheostat. This will help regulate the heat for best results.
- We provide for the presence of a coil and a refrigerator- without these "details" no distiller will work. The refrigerator can be bought in specialized stores or made independently.
Everything else is up to you. Do not forget that in those compounds that are in contact with alcohol vapors and moonshine, you can only use
In this master class, you will make a flask from a bottle with polymer clay decor and putty with your own hands.
Stylish design hides a simple glass and turns an ordinary container into a beautiful accessory - a worthy gift for a man. The flask is decorative in nature, withstands a slight ingress of water. So that the product can be washed and actively used for its intended purpose, cover it in two layers with yacht varnish.
Decoration materials
A flat bottle is suitable for decoration, as the decor will not look so impressive on a rounded surface. Round is best used for manufacturing. From another similar vessel you can make an unusual one.
Materials for decorating a bottle with polymer clay:
- polymer clay of different colors;
- latex putty - 200 g;
- gouache;
- starch or building mixture 4 tbsp. l.;
- dishwashing liquid;
- old eyeshadow.

Tools: stacks with rubber tips, nail scissors, video clip.
Equipment: modeling mat, wet wipes.
If you want to make your own leather flask, see our other step by step tutorial. We also have, as well as for the transformation of unnecessary dishes into masterpieces.
How to turn a bottle into a flask
First, cover with jasper. To do this, you need to get different shades of clay.
Thoroughly knead brown, yellow, red, black and green plastic. Divide the brown mass into four parts and add the separately listed colors to each.

You should get four shades of polymer clay.

Roll each piece with a roller randomly into layers of different thicknesses.

Lay one layer on top of the other and twist the tourniquet.

Cut the tourniquet into pieces with a knife, pull each one out a little. Lay out the canvas from the resulting elements. Roll lightly with a tie roller. Jasper is much easier to get than to make.

Put the resulting canvas on the bottle.

Cut the workpiece into an oval shape with a knife. For a decorative element - a figurine of a bull, you can draw an image on paper, attach the silhouette to light brown clay rolled into a layer and cut it out with nail scissors.

To get a more spectacular relief image, blind the figure. From the mass rolled into a ball, pull out the part for the head and legs.

Fashion legs, head, tail. Stack the body of the animal.

For a metallic finish, dab eye shadow onto the flask with your finger.

Run a random pattern with a stack and send the flask to bake under the conditions specified in the thermoplastic instructions.

A gift for a man should be brutal, so you need to add coarse jewelry. For a mixture that imitates masonry, pour plaster or starch into the putty to make a plastic mass.
To prevent the mass from sticking to your hands, pour in 1 tsp. dishwashing liquid and stir. Add some black, yellow and green gouache, mix again.
Cover the bottle with a mixture of 0.7 cm thick, excluding places covered with plastic. Stick around the lid of the flask to get the effect of a stone.

Apply a stone-like pattern with a stack. Smooth out uneven areas with your fingers dipped in water. Leave the flask out of the bottle to dry for a day or two.


If you need a sweet gift for a man, pay attention to sweets - no one will remain indifferent to such a present. Don't be afraid to give guys homemade surprises, even if they aren't perfect. The recipient will definitely appreciate the fact that you have put your soul into the work.
A master class on making a decorative flask for a man with his own hands was prepared by Natalya Neustroeva, the idea and photo of the author.