Guidelines for the manufacture of garden shovels. Recommendations for the implementation of independent extracurricular work of students educational and methodological material on the topic
MKOU "Nizhnegridinskaya Secondary School"

Prepared by: Andrey Okhotnikov
Head: Anichkin V.I.
The urgency of the problem.
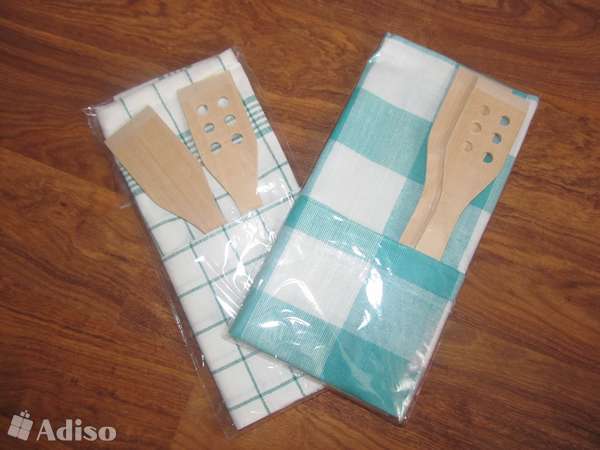
Along with a new Teflon-coated pan, a problem appeared in our house. After all, when preparing a number of dishes, you can not do without shoulder blades. They can be metal or wood. The most suitable for a Teflon-coated pan is a wooden spatula, which we did not have.
Idea development.
D
wooden spatulas and forks can have different shapes (Fig. 1, 2). There are more complex options, but I need to choose a product for manufacturing that would be easy to use and could be made at home. I chose the spatula shown in Figure 1 and the fork shown in Figure 2. They have a fairly simple shape, but at the same time they look original. And if you make the same spatula and fork, only a few smaller sizes, then they are also used for table setting.

The choice of material.
A blank for kitchen spatulas and forks can be obtained by splitting a log into chocks. In this case, the wood fibers remain intact, so that the products are durable. But you can use a board of appropriate thickness from hardwood of medium density (alder, birch, beech, maple). The timber harvest must have the following dimensions:
300x50x12 mm.
Choice of tools.
To work, I need the following tools:
Flat chisel 15 mm wide
Drills: Ø 8, 12mm.
Rotate.
Round file.
Flat file.
Medium grit sandpaper.
Routing
"Making a kitchen spatula"
| Technological operation | Execution sequence | Tools and equipment |
|
| Wood blank | Plane the plank in thickness wedge-shaped (Fig. 3) | Planer, ruler |
|
| Template making | Draw the contours of the blade on thick paper and cut out a template from it. | Ruler, pencil |
|
| Blade marking | Mark the contours of the blade on the workpiece | Template, pencil |
|
| Cutting a workpiece | Make several transverse cuts near the concave contours (Fig. 3). Cut the spatula along the contour with a chisel and a knife. | Hacksaw, chisel, knife |
|
| Hole marking | Place Hole Centers | Ruler, pencil |
|
| Hole drilling | Drill holes (oval holes are made on the basis of round ones) | Rotary, drills |
|
| Cleaning holes | Clean the holes with a chisel and files | Chisel, files: round and flat |
|
| Product finishing | Chamfer, round edges and filter the product with sandpaper | File, sandpaper |
A wooden fork is made in a similar way.
Economic calculation.
I did not spend a penny of money on the manufacture of kitchen utensils, since we had all the tools and materials at home.
Project quality assessment.
I I showed my mother the spatula and fork I made, and she liked them very much. She appreciated the convenience of working with them, the optimality of their sizes.
Outside it is cold and windy. We listen to a blizzard song and imagine winter in the image of the Snow Queen - from cold ice floes, prickly snowflakes, harsh, inaccessible, evil. And just recently the sun was shining, the snow was shining and creaking, and the winter looked like a Snow Maiden girl - affectionate and friendly. Winter is many-sided, mysterious, fabulous. Not a single season has left so many bright, memorable images in the folklore and literary heritage.
Preschool children love to draw on winter themes. They like to depict lacy snowflakes and patterns, trees in snowy robes, bullfinches on bright scarlet bunches of mountain ash. Fairy-tale images and analogies are also reflected in children's works - Santa Claus's beard is not white from gray hair, but from hoarfrost, his tears are icicles, and ordinary snowmen with carrot noses. Observation of winter nature helps children to get rid of visual clichés, encourages them to independently search for new ways of depicting. So, for example, some people see winter not only in bright colors: “In winter, evening comes early, we walk in the dark, so there should be black in its image.”.
Of course, all these abilities do not come at once - their effective development is possible only under the conditions of proper pedagogical guidance, which involves the creation of emotional and evaluative attitudes towards the perception of nature, to enrich the artistic and figurative content of classes, and also if the necessary materials for productive creativity are available.
One of the effective ways of developing children in this direction is the creation of a didactic paper model "Sorceress Winter".
This work contains the most interesting children's ideas for the personification of winter: a hat - the night sky with falling snowflakes, a hairstyle - snow-white curls and curls - a symbol of frequent snowstorms, a dress - decorated with winter trees and brightly breasted bullfinches, a flowing train of a raincoat, immersed in a snowdrift . A cheerful, good-natured snowman and snow-covered Christmas trees were also proposed by children as components of the image of this season.
Materials:

1. Whatman sheet
2.Double-sided colored paper (blue, silver, brown, black)
3. Corrugated paper in pastel colors and bright green
4. Thick cardboard
5. PVA glue, glue gun
6. Scissors
7. Gouache, brushes, markers
8. Thin wire, wire cutters
Manufacturing:
1. Cut out a square with a side of 25 centimeters from thick cardboard. Cut off a strip 35 centimeters high from whatman paper, roll it into a cone, fix the cone with glue on a cardboard base. To give stability to the structure, strengthen the hollow body with folded newspapers.

2. Cut out dress decoration elements from black and purple paper. Fasten them around the base.
3. Hands - sleeves are made of high sharp cones. The base of the cone is whatman paper pasted over with blue paper, the decoration is a garland and snowflakes carved in the traditional way. Fasten the prepared parts to the torso of Winter.

4. Trees and twigs - easy to make from a paper strip with uneven cuts, using a diagonal twist with different pressures (it is best to use special pastel or layout paper for this work). Fasten the branches to the torso of Winter.

5. To emphasize the volume of the snowman, wrapping in a paper napkin will help. On the basic forms (three cardboard circles of various sizes), we glue the crumpled pieces of paper, and then “wrap” the resulting blanks in a paper napkin, tucking and gluing its edges to the wrong side of the circles.

6. A whisk will complement the image of a snowman - made of corrugated paper, folded into a tube and cut on one side and a thin wire wrapped in brown paper.

7. We proceed to the manufacture of Christmas trees. The volume of the figure is achieved through the use of crumpled paper. The shape of the tiers is traditional. Fold the prepared circles of different sizes into 4 triangles. A necessary condition is gluing blanks along the edge of the sides of the triangles. At the same time, the tiers themselves do not press against the base, but only slightly touch it in several places.

8. Train - Winter's cloak can be made from thin and plastic cashew paper. Cut out a square, fold it diagonally, cut out a strip that has a rounded shape at the top and bottom. The width of the stripes at the center is 35 centimeters. Lay deep folds on the blank of the cloak. Fasten the cloak on the base of Winter at the back, with a slight approach to the sleeves.
9. Cut off a strip of paper 15 centimeters wide, 35-40 centimeters long. Using gouache and markers, draw the “face” of Winter. Let the workpiece dry, roll into a truncated cone. Glue to the body.
10. Curls and curls of Winter can be cut out in a spiral from small paper circles. Gently unfolding thin spirals, glue them to the base.

11. We start making a hat. Cut out 2 circles with a diameter of 15 centimeters from black cardboard. In the center of one blank, cut a round hole with a diameter of 7 centimeters. Glue the cone with a base of 7 centimeters. Connect the top and brim of the hat. Then glue the second circle on the underside of the hat. Attach it to Zima's head. When decorating a hat with lace snowflakes, use corrugated paper or napkins.

12. The completion of the composition and the addition of the image of the “Sorceress of Winter” will be the use of crumpled corrugated paper or white and light blue napkins to create snow drifts and drifts in the foreground and a slender beauty Christmas tree and a flexible mountain ash in the background.
Usage:
The didactic manual "Sorceress Winter" is an artistic and graphic generalization and personification of inanimate nature, fascinating material for the development of the intellectual abilities of children 3-4 years old. Can be used for group and individual work with children in kindergarten.
Target: Generalization and consolidation of pupils' knowledge about the season - winter. The development of mental processes in children of primary preschool age.
Tasks:
Promote the development of visual, short-term and long-term memory;
Develop attention and perception;
Develop thinking by establishing a connection between objects, phenomena and concepts;
Develop active speech, the ability to express your thoughts;
Develop children's sensory ability.
Options for using the grant.

Option 1. The manual is used in the framework of educational activities.
Option 2. The allowance is used in the independent activities of children.

A sufficiently high level of abstraction at this age is possible only under the condition of existing ideas about natural phenomena, with the necessary number of impressions, emotional "living" of the states of nature. Poetic images, folk proverbs, sayings, riddles about winter help to concentrate the attention of children. The didactic manual "Sorceress of Winter", thanks to a conscious choice of artistic material that is adequate to the idea, will contribute to the formation of associative-figurative thinking, help kids see the variety of colors and textures of paper, and bring children the joy of communicating with a beautiful object.
1. Justification of the problem . …………………………………...3
2. Purpose of the project . .............................................................................................3
3.Project objectives . ............................................................................... 3
4. Basic requirements and limitations for the product. …………………. 4
5. Choice of scoop shape. ……………………………………………………. 4
6. Material used. …………………………………………….... 5
7. Calculation of the capacity of the scoop. …………………………………………………….. 7
8. Equipment and tools. …………………………………………… 8 9. Technological map of scoop production. …………………………..9
10. Preparation time. …………………………………………………...12
12. Economic calculation. ……………………………………………… 12
13. Quality control and self-assessment. …………………………………… 13
14. Literature. …………………………………………………………….14
15. Appendix 1. …………………………………………………………….15
Justification of the problem.
Every day at our school we go to the canteen, where the chefs prepare delicious meals for us. The kitchen has a lot of different household appliances, which facilitates the work of the canteen workers. But such a simple item as a scoop for hanging bulk products causes criticism from them. Scoops purchased at the store are very inconvenient to use, their capacity is too small. They are made of plastic, often break, so you have to spend money on buying them, and besides, scoops look unaesthetic. Therefore, I decided to make a scoop with my own hands from the materials that are available in the school workshop - scraps of sheet metal, the remains of bars and boards.
The manufacture of a scoop contributes to the consolidation of the previously studied topics "Technology of turning wood on a lathe", "Production of cylindrical parts with a hand tool", "Technology of sheet metal processing". Equipping the school workshop allows you to complete this project.
Target project.
Make a scoop for the school canteen for hanging bulk products.
Project tasks.
1. Choice of scoop design option.
2. The choice of materials for the manufacture of the scoop.
3. Calculation of the capacity of the scoop.
4. Preparation of technological documentation.
5. Choice of equipment and tools.
6. Execution of the product.
7. Economic calculation.
8. Product evaluation.
Basic requirements and limitations for the product.
1. The product must be made of materials that are safe for products.
2. The capacity of the scoop should be 800-1000cc. cm.
3. The product must not have sharp corners on the tray.
4. The product must be durable.
5. The product must be easy to use.
6. The product must look aesthetically pleasing.
Choice of scoop shape.
The scoop options presented in Appendix 1 do not meet the basic requirements for the product. The scoops in photos 1 and 4 are made of plastic, the first is too wide, and the second is small in volume. And the scoop in photo 4 is carved from a solid tree trunk, which requires a lot of labor and the use of special tools. The scoop in photo 2 is made of aluminum, so it is relatively heavy. When designing an object, one should take into account its reliability, durability, aesthetic appearance, lightness and ease of manufacture. Based on the above requirements, I developed a semi-cylindrical scoop design, consisting of three parts - a tray, a back, a handle, and made a sketch of it.
material used.
Now it is necessary to determine from what materials I will make the tray, back and handle.
 https://pandia.ru/text/80/127/images/image004_135.gif" width="612" height="192">.gif" width="612" height="192">0 "style=" border-collapse:collapse;border:none">
Name details
Material
Dimensions
Tin plate galvanized
Wood
Wood
Equipment and tools.
When making a scoop in a school workshop, you must use the following equipment and tools:
1. Carpentry workbench.
2. Locksmith workbench with a vise.
3. Drilling machine with a set of drills.
4. Wood lathe.
5. Scissors for metal.
6. File.
7. Hacksaw for wood.
8. Rasp.
9. Mallet.
10. Hammer.
11. Hand vise.
12. Sanding paper.
13. Measuring and marking tools - compasses, ruler, square, scriber, pencil.
14. Tassel.
Technological map of the manufacture of the scoop.
Table 2.
The sequence of the operation. | Graphic image. | Fitting tools. |
|
Cut a workpiece from tin, editing, sweep, markup. |
| ruler, scriber, hammer, metal shears, sandpaper. |
|
cut corners, process with a file. |
| Metal shears, vise, file. |
|
Drill holes 1.5 mm. |
| Drilling machine, hand vise. |
|
bend tin |
| mallet, vise, |
|
The choice of blanks for the backrest with a thickness of 16 mm. Marking R60 mm |
| ||
Cut out the back, drill a hole 16 mm |
| Hacksaw, rasp, drilling machine. |
|
Cut out the handle. |
| Wood lathe. |
|
Connect parts 1 and 2, fix with nails 1.5x25mm. |
| Locksmith vise, hammer. |
|
Connect parts 2 and 3, fix with a nail. |
| Mallet, vise hammer. |
|
Varnish part 2 from the outside and part 3 with varnish 2 times with intermediate drying. | Paint brush. |
||


Preparation time.
Making a scoop does not take much time. I spent 2 hours and 30 minutes on this.
Safety regulations during work.
Since the work on the manufacture of the scoop was carried out in the school workshop, the safety precautions were observed in accordance with the instructions approved by the MOU SOSH. These are instructions for metalworking, manual woodworking and working on a drilling machine, which are located at the workplaces.
Economic calculation.
Considering that the handle, backrest and tray were made from waste, the cost of making the scoop was mainly caused by electricity, the purchase of 6 nails and furniture varnish.
When turning a handle on a lathe for 30 minutes, a 1.5 kW electric motor consumed 1.5 kW of electricity. x 0.5h. = 0.75 kWh.
The cost of 1 kW / h. - 1.46 rubles, which means that electricity costs will be
0.75kW. x RUB 1.46 = 1.1 rubles.
Nails 0.01 x 40 rubles = 0.4 rubles.
Varnish 0.03 kg x 120 rubles / kg = 3.6 rubles.
In total, the costs amounted to 1.1 +0.4 + 3.6 = 5.1 rubles, which is 3-5 times less than the cost of scoops sold in the store.
Quality control and self-assessment.
The scoop meets all the requirements: it turned out to be light, with a smooth comfortable handle, without sharp corners, with a favorable appearance, safe for bulk products, and at a low cost. While working on this project, I learned that before making any product, you need to do a lot of preparatory work - to design, make a sketch, make technical and economic calculations. I worked on this scoop with great interest, and when it was ready, I handed it over to the principal of the school with great pride. I am very glad that I have benefited the school.
If I were to start the same project again, I would first paint the handle and back of the scoop with multi-colored patterns, and only then varnish it.
Literature:
2. Objects of labor. A guide for the teacher. , . M. Education, 1993.
3. Technology. Textbook for 6th grade students. Edited by. Moscow. "Ventana - Graf" 2005.
SECONDARY VOCATIONAL EDUCATION
TOGLYATTI COLLEGE OF SERVICE TECHNOLOGIES AND
ENTREPRENEURSHIP
on the implementation of practical work by students
according to the professional module
MDK 04.02 Technology for growing tree and shrub crops
MDK 04.03 Fundamentals of green building
Profession 250109 Gardening and landscape construction
Togliatti 2012
Approved by PCC
Protocol No. ___ dated "___" _______ "2012_
Chairman of the PCC
Osipova S.A.
Developed by: Rodionova E.V., teacher
Reviewers:
Zhestkova N.M., Deputy Director for MMR GAOU SPO TKSTP
Shubenin A.N., director of the garden center "EcoAsta"
Review
Performing work by the profession of workers: green farm worker
Rodionova Elena Valerievna
The methodological manual was developed on the basis of methodological recommendations for planning, conducting and organizing practical classes in educational institutions of secondary vocational education (letter of the Ministry of Education of Russia dated April 5, 1999 No. 16-52-58 in / 16-13).
The manual contains a title page, an explanatory note, the content of practical work, a list of recommended literature. The content of practical work on each topic provides information on the formed ideas, knowledge and skills of students, as well as theoretical material necessary for the performance of the work.
Recommendations:Performing work by the profession of workers: green farm worker
Reviewer: Shubenin A.N., director
garden center "EcoAsta" ____________________________
Review
for the methodological manual "workbook"
on the implementation of practical professional module PM04 " Performing work by the profession of workers: green farm worker» teacher of special disciplines SAOU SPO TKSTP
Rodionova Elena Valerievna
The methodological manual was developed on the basis of methodological recommendations for planning, conducting and organizing practical classes in educational institutions of secondary vocational education (letter of the Ministry of Education of Russia dated April 5, 1999 No. 16-52-58 in / 16-13). The manual contains a title page, an explanatory note, the content of practical work, a list of recommended literature. The content of practical work on each topic provides information on the formed ideas, knowledge and skills of students, as well as theoretical material necessary for the performance of the work.
The methodological manual has a practical focus and allows students to develop professional competence. Promotes the development of students' spatial thinking and the ability to perform work on soil science.
Recommendations: The methodological manual corresponds to the program of the professional module PM04 " Performing work by the profession of workers: green farm worker”and is recommended for implementation in the educational process in the specialty 250109 “Gardening and landscape construction” for full-time education.
Reviewer: Zhestkova N.M.,
Deputy Director for UMR GOU SPO TKSTP ___________________
Explanatory note
The purpose of the guidelines is to assist in the implementation of practical work provided for by the curriculum.
The main objective of practical work is to consolidate and deepen the knowledge gained in the lessons. As a result of completing tasks, students develop professional thinking, information culture, the ability to analyze the material received, to connect it with practical activities. When performing some practical tasks, there is an element of research, which makes the work as interesting and productive as possible.
When starting to perform practical exercises, it is necessary to remember the following principles:
It is necessary to repeat the lecture and material on the topic;
To get acquainted in detail with the content of the work, methodological instructions for their implementation;
Analyze the parameters of technological calculations;
Repeat safety precautions when performing tasks related to mechanisms and machines.
Schemes of processes, machines, mechanisms, results of measurements, research and calculations recorded in a notebook serve as the main material for evaluating work. A report on the work done is compiled for each task. The text of the report is drawn up in ink, diagrams and drawings - in pencil.
The test for practical exercises is carried out when students are provided with completed reports.
Rules for performing practical work
Before starting the task, read the recommendations for implementation in this methodological manual. Read the list of recommended literature, repeat the theoretical material related to the topic of the work.
After completing the independent work, you must hand over the result to the teacher. If you encounter any difficulties while working, please contact your teacher.
Criteria for evaluation:
You have completed the task correctly. The work was done neatly - 5 (excellent).
You failed to complete 2-3 elements. The work was done neatly - 4 (good).
The work was done inaccurately, technologically incorrect - 3 (satisfactory).
| Topic name | Name work | Number of hours |
| Topic 1.1 Adaptations and devices for growing flower and ornamental crops | P.work. No. 1 "The use of specialized equipment and tools in the cultivation of flower and ornamental crops" | 2 |
| Topic 1.3 General methods of agricultural technology of flower crops. | Etc. work No. 2 "Conducting pre-sowing treatment of seeds." | 2 |
| Etc. work No. 3 "Carrying out vegetative division of plants" | 2 |
|
| Etc. work No. 4 "Conducting vegetative division of plants" | 2 |
|
| Etc. Work No. 5 "Carrying out vegetative cuttings of plants" | 2 |
|
| Etc. work No. 6 "Carrying out vegetative cuttings of plants" | 2 |
|
| Etc. Work No. 7 "Preparing the soil for sowing plants" | 2 |
|
| Etc. Work No. 8 "Preparing the soil for sowing seeds of flower crops" | 2 |
|
| Etc. work No. 9 "Performing sowing seeds" | 2 |
|
| Etc. Work No. 10 "Performing sowing seeds" | 2 |
|
| Etc. work No. 11 "Planting plants" | 2 |
|
| Etc. work No. 12 "Planting plants" | 2 |
|
| Etc. work No. 13 "Care for seedlings of plants" | 2 |
|
| Etc. work No. 14 "Determining the readiness of seedlings for picking" | 2 |
|
| Etc. work No. 15 "Performing a picking of plants" | 2 |
|
| Etc. work No. 16 "Performing a picking of plants" | ||
| Etc. work No. 17 "Planting seedlings of plants in open ground" | 22 |
|
| Etc. work No. 18 "Planting seedlings of plants in open ground" | 2 |
|
| Etc. work No. 19 "Planting seedlings of plants in containers" | 2 |
|
| Etc. Work No. 20 "Compliance with the conditions for planting plants in open ground" | 2 |
|
| Etc. work No. 21 "Determining the need for transshipment of plants by external signs" | 2 |
|
| Etc. work No. 22 "Determining the need for transshipment of plants by external signs" | 2 |
|
| Etc. Work No. 23 "Carrying out the transshipment of plants" | 2 |
|
| Etc. Work No. 24 "Carrying out plant transplantation" | 2 |
|
| Etc. work No. 25 "Care for transplanted plants" | 2 |
|
| Etc. Work No. 26 "Irrigating plants" | 2 |
|
| Etc. Work No. 27 "Carrying out weeding of plants" | 2 |
|
| Etc. work No. 28 "Conducting soil loosening" | 2 |
|
| Etc. Work No. 29 "Carrying out plant nutrition" | 2 |
|
| Etc. work No. 30 "Carrying out tweezing of plants" | 2 |
|
| Etc. work No. 31 "Processing plants against diseases" | 2 |
|
| Etc. Work No. 32 "Processing plants against pests" | 2 |
|
| Etc. work No. 33 "Formation of plants" | 2 |
|
| Topic 2.1 Devices and devices for growing tree and shrub crops | Etc. Work No. 34 "The use of specialized equipment and tools in the cultivation of trees and shrubs" | 2 |
| Topic 2.3 Planting woody plants and their maintenance at the sites. | Etc. work No. 35 "Carrying out the division of tree and shrub plants" | 2 |
| Etc. Work No. 36 "Carrying out green cuttings of woody plants" | 2 |
|
| Etc. Work No. 37 "Carrying out the grafting of woody plants." | 2 |
|
| Etc. work No. 38. "Conducting pre-sowing seed treatment" | 2 |
|
| Etc. work No. 39 "Sowing seeds of woody plants" | 2 |
|
| Etc. work No. 40 "Sowing seeds of woody plants" | 2 |
|
| Etc. work No. 41 "Preparation of the seat" | 2 |
|
| Etc. Work No. 42 "Planting woody plants in accordance with agrotechnical requirements" | 2 |
|
| Etc. work No. 43 "Types of fertilizers" | 2 |
|
| Etc. work No. 44 "Feeding with organic fertilizers" | 2 |
|
| Etc. work No. 45 "Feeding with mineral fertilizers" | 2 |
|
| Etc. work No. 46 "Methods of feeding trees and shrubs" | 2 |
|
| Etc. Work No. 47 "Diseases, methods of protection and treatment of trees and shrubs" | 2 |
|
| Etc. work No. 48 "Conducting treatment against diseases." | 2 |
|
| Etc. Work No. 49 "Pests, methods of protection and processing of trees and shrubs" | 2 |
|
| Etc. Work No. 50 "Processing against pests" | 2 |
|
| Etc. work No. 51 "Giving the crown of a woody plant a given design form." | 2 |
|
| Etc. Work No. 52 "Types of formation of the crown of trees and shrubs" | 2 |
|
| Etc. Work No. 53 "Methods of forming the crown of trees and shrubs" | 2 |
|
| Topic 3.1 Devices and devices for garden care | Etc. Work No. 54 "Use of specialized equipment and tools for garden care" | 2 |
| Topic 3.2 "Elements of improvement" | Etc. work No. 55 "Creation of a flower garden on the primary landscaped and existing facilities" | 2 |
| Etc. Work No. 56 "Compositional solutions for the design of flower beds" | 2 |
|
| Etc. Work No. 57 "Working with various types of seedlings and potted crops" | 2 |
|
| Etc. work No. 58 "Methods for calculating the need for planting material" | 2 |
|
| Etc. Work No. 59 "Preparation of soil for sowing grasses" | 2 |
|
| Etc. work No. 60 "Carrying out uniform sowing of grasses according to the sowing rate, care for seedlings" | 2 |
|
| Etc. work No. 61 "Repair of the lawn" | 2 |
|
| Etc. Work No. 62 "Assortment of climbing plants and woody vines, methods of planting and fixing on a support" | 2 |
|
| Etc. Work No. 63 "Determining the type of vertical gardening, planting and fixing lianas and climbing plants on a support" | 2 |
|
| Etc. work No. 64 "Creating a hedge, caring for plants" | 2 |
|
| Etc. work No. 65 "Rules for cutting and maintaining hedges." | 2 |
|
| Topic 3.3 Construction of garden structures | Etc. work No. 66 "Preparation of foundations under the pond." | 2 |
| Etc. Work No. 67 "Establishment and repair of reservoirs." | 2 |
|
| Etc. work No. 68 "Preparation of the grounds for rockeries" | 2 |
|
| Etc. work No. 69 "The device of rockeries." | 2 |
|
| Etc. work No. 70 "Preparation of grounds for rock gardens." | 2 |
|
| Etc. work No. 71 "The device of rock gardens". | 2 |
|
| Etc. work No. 72 "Care for reservoirs, rockeries, rock gardens." | 2 |
Practical work No. 1
Use of specialized equipment and tools
Goal of the work
: to teach how to use specialized equipment and tools for growing flower and ornamental crops.
Equipment and tools:
General information
.
Before starting work on the site, you need to draw up a detailed plan, where you should note the location of the main groups of plants that will be planted on the site, outbuildings and other buildings, fences and reservoirs. A properly developed plan will allow you to achieve good results when growing horticultural crops and will be indispensable in the arrangement and design of a garden plot.
For site planning, special measuring tools will be needed.
Roulette and ruler
A tape measure is an instrument with a dashed flexible scale for measuring linear objects. The length of the scale can be up to 100 m.

Using a tape measure, you can measure the total area of \u200b\u200bthe site, the area allotted for planting certain crops, the distance between individual beds, flower beds and other parts of the site. It is recommended to choose the length of the tape measure scale based on the size of the plot: for a small area, a standard tape measure 10 m long will suffice, and for large plots, a longer tape measure will be needed.
The ruler is a necessary tool for drawing straight lines on various planes and spatial measurements.
It is convenient to use a ruler when measuring small distances, for example, between separately growing shrubs and flowers, hedge posts, beds, etc.
Level
This tool, used to measure the slope, is useful when laying water and sewer lines in the area, as well as when installing a drainage system. The level is a wooden or metal block, in the middle of which a glass tube is fixed, filled with water and hermetically sealed. Inside the tube there is a bubble, which, in the absence of a slope, is located in the middle. The displacement of the bubble in one direction or another indicates the direction of the slope, and its value is determined using a ruler in millimeters per 1 meter of the length of the pipe or surface.
Various tools are used for grafting, pruning trees and shrubs and forming hedges: secateurs, garden shears, hacksaws and others.
Secateurs is a garden shears designed for trimming tree branches, thin shoots, forming and thinning the crown of garden crops.
When choosing a pruner, preference should be given to a tool with rubberized handles to protect your hands from calluses. The secateurs should fit comfortably in the hand, and when folded, there should be no gap between the blades, otherwise the tool will crush the branches without cutting them.
With a strong and sharp pressure on the pruner handles, a clean, smooth cut is achieved without tearing the bark on the remaining part of the branch. In this case, the working blade of the tool must firmly rest against the cut off part of the plant stem.
For cutting flowers, herbaceous perennials, it is better to use a small pruner with thin blades.

Often gardeners use various knives, which must be well sharpened. Garden knives are suitable for pruning live and damaged, but not dry branches.
Using grafting knives, you can graft lilacs, roses, various fruit trees and shrubs. There are three types of such knives: for grafting by cuttings (copulation) with a straight blade, for grafting rootstocks of garden plants with a bud or eye (budding) with a slightly curved blade, and combined for performing both operations.
On the back side of the handles of all grafting knives there is an opener, otherwise called a bone, which is a protrusion designed to push the bark apart after an incision.
Budding knives consist of a steel blade and a smooth handle. The blade must be made of high quality steel. Such knives should be sharpened on a fine-grained bar, after which the blade must be brought to sharpness on a leather belt.
Every gardener needs to have at least one garden knife, regardless of the fact that pruning shears and brush cutters are mainly used when pruning branches. With a garden knife, it is easy to smooth out scuffs at the cut point, especially if the branch is thick.
Combined knives with two different blades are most in demand among gardeners, as they perform the functions of not only budding knives, but also copulation knives.
The pruning knife is one of the most common garden tools. It has no special purpose and is used for various works: preparing cuttings, cutting flowers.

In the formation of horticultural crops, a huge role is played by scissors, which are used for shearing, pruning non-lignified thin shoots and other work. In gardening, various scissors are used, the main features of which are convenience and good sharpening. 
Lever-operated grass and flower shear handles are made of glass-fibre reinforced polyamide. The cutting ability of the tool is increased by the leverage. At the same time, the light weight and compactness of the scissors are of no small importance, allowing you to cut the branches of plants in the most inaccessible places. For greater convenience in work, the installation angle of the cutting part can be adjusted within 270 °.
To trim the edges of the lawn, you need special curb shears with long handles, which can also be used to level the grass in height.
Light small scissors are recommended for cutting cuttings, trimming shoots, cutting stems, the thickness of which does not exceed 10 mm. Notches located on the base blade of the scissors prevent smooth or wet branches from sliding on it.
In specialized stores you can buy various garden inventory, intended for tillage. It is best to give preference to tools designed to make the gardener's job as easy as possible and able to reduce the load on the back and shoulders. Shanks of shovels and other tools should be comfortable, suitable in length and thickness.
Tool handles are most often made of varnished wood, less often of durable plastic or steel pipes.
The tool most commonly used by gardeners is shovel, Made of durable stainless steel with a thin blade. Shovels are designed for digging up soil, digging holes, etc. They can also be used for other tasks, such as removing debris. There are several types of shovels used in gardening.

Lightweight general purpose shovel consists of a strong handle and a sharpened metal blade. The handle is most often made of aluminum with a rubber coating, and the blade is made of hardened aluminum.
Folding shovels made of hardened boron steel, aluminum and plastic are very convenient and practical. Such shovels are indispensable for various works in the summer cottage and, due to their compactness, do not cause much trouble during transportation.
With this tool, you can cut the roots of plants, form lawns.

shovel
For digging the soil, it is best to use large bayonet shovels. Due to the pointed shape of the blade, such shovels easily penetrate to great depths and turn over the layers of soil.

bayonet shovel

Heavy soil attachment
A shovel is good for preparing soil mixtures, applying organic fertilizers or other work related to bulk materials.
Rake are a metal nozzle with teeth arranged at right angles, fixed on the handle. The tool is used when cutting beds on a garden plot, cleaning leaves and debris, evenly distributing fertilizers over the soil surface and other works. In specialized stores and garden centers you can find a wide variety of types of rakes.

Leveling the soil with a rake
Very practical rake with interchangeable nozzles of various shapes. Typically, the handle of such a rake is made of lightweight aluminum, and the nozzles are made of durable plastic. The advantage of this tool is that plastic nozzles are not subject to rust when in contact with wet grass or soil, and the main disadvantage is lower strength compared to metal rakes.

Rake
Depending on the design, the purpose of the rake varies. The most common rake has 11 short and strong teeth, used for working with soil and raking grass and leaves.
The leaf rake has 25 long, often spaced, springy teeth that provide efficient harvesting.
The small leaf rake has 7 long, springy teeth. This tool is useful for raking leaves in hard-to-reach places, between tall plants and under bushes.
The large leaf rake has 25 curved teeth to prevent branches from getting stuck in the rake. They are very handy when working in large areas.
Pitchfork are a steel nozzle with long, straight, sharp teeth, mounted on a handle. This tool is used for loosening the soil after digging. In addition, forks are used for other types of work, such as stacking hay or straw.
Recently, sharp and durable 4-prong telescopic garden forks have been introduced, which are great for working on areas with hard, stony soil. The bending angle of the handle is 13°.

Pitchfork
A useful auxiliary tool when working in the garden is a scoop, which is a small shovel with a short handle and curved sides.

Trowel
A variety of scoops made of glass-fibre reinforced polyamide are now available at garden centers and can withstand temperatures of 40-150°C. This tool is durable, easy to clean from dirt, the edges of the blade are rounded, which reduces the likelihood of damage to plant roots. The blade can be sharpened if necessary.
Ice rink are a tool consisting of a roller of various widths and shapes and a handle attached to it. This device is used to till the surface of the soil. Rolling helps to increase moisture permeability, allows you to accelerate the decomposition of organic fertilizers. To compact and level too loose soil, smooth rollers are used, and for easy mixing of the upper layers of the soil and improving its structure before sowing, ringed and ribbed ones are used.
Harrows- the tools used for pre-sowing tillage are of several types. Conventional harrows, with the help of which harrowing is carried out, that is, loosening and mixing of the upper layers of the soil, have two varieties - tooth and disk. In the most common tine harrows, the elements loosening the soil are sharp teeth, while in disc harrows they are replaced by discs with a diameter of 4–5 cm.
For sanding - leveling the soil surface and crushing lumps - shovels of various designs and trains are used. These attachments spray less soil than harrows and allow the best possible preparation of the site for sowing.
Among the garden tools, a special place is occupied by mechanical means. Mechanisms for tillage, depending on the power of the motor and the number of functions performed, are divided into three classes: light, medium and heavy. An important characteristic of these mechanisms is also the size of the covered area and the depth of tillage.
Motor cultivators Can run on gasoline or electricity. The former are safer, they can be used at a considerable distance from the garden house. Electric cultivators are more environmentally friendly, but their main disadvantage is that the length of the wire limits the use of devices.
Light motor cultivators are relatively inexpensive, but they have a short engine life and are often equipped with a small number of attachments. Motor rippers belong to the same class - units for hilling, weeding and loosening of row spacings - and motor cutters suitable for surface tillage (to a depth of 10–15 cm).
therefore, their use does not require the application of great physical strength.

Motor cultivator
A 75 mm wide hand mini-cultivator can be used on a plot of any size. This tool is highly durable, does not bend when digging up excessively dry soil, and is convenient in that its use does not require gasoline or another source of energy.
Usage motoblocks greatly facilitates the work of the gardener, especially if it is necessary to cultivate large areas of land. They can be used for a wide range of gardening jobs: digging, loosening, hilling, killing weeds, fertilizing, etc. Models are currently on sale that perform more than 30 operations thanks to the various attachments included in the kit.

Motoblock
The breakdown of flower beds and the creation of beds on the site should be started only after large plants are planted - fruit and berry and ornamental trees and shrubs. To do this, you will need rakes, forks, choppers, rippers and other tools.

Device for marking beds
Ripper, or, as gardeners often call it, a scratch rake, is used when loosening row spacings in beds with vegetable or flower crops. The tool consists of a nozzle with long sharp teeth made of high-strength steel and a shortened wooden handle.

The order of the work.
1. Study and write down basic information in a workbook O specialized equipment and tools used for growing flower and ornamental crops.
2. Draw in a notebook all types of equipment and tools used for growing flower and ornamental crops
Practical work №2
Carrying out pre-sowing treatment of seeds
Goal of the work : learn how to carry out pre-sowing treatment of seeds of flower crops.
General information .
Seeds of flower and ornamental crops differ in shape, size, color, have different germination periods. So, in nasturtium, sweet peas, the seeds are large, and in poppy, tobacco, they are small. The germination period of seeds of annual lupine is one year, and for fragrant tobacco seeds - up to 10 years.
Ornamental flower crops propagated by seeds can be divided into two groups: those grown by sowing seeds directly in open ground and those grown in seedlings. The seedling method includes sowing seeds and growing seedlings in protected ground, followed by planting them in a permanent place in open ground after the end of the period of night frosts.
Flower crops grown by sowing in open ground include plants with a short cycle of vegetation development (mignonette, nasturtium), cold-resistant plants (marigold, matthiola), as well as plants that cannot withstand picking due to the tap root system (annual lupine , poppy).
The second group includes heat-loving plants or plants with a long growing season, which are not enough for the development of warm summer days. At the same time, using the seedling method, it is possible to achieve early flowering of crops.
Seeds intended for sowing must have high varietal and sowing qualities. In varietal seeds, the admixture of other varieties is not allowed. Sowing qualities of seeds are determined by their purity, vigor of germination, germination.
The sowing qualities of seeds are influenced by their storage conditions. Seeds should be stored in paper bags in a dry, ventilated area with a constant (preferably low - +5 ... +10 ° C) temperature.
To obtain friendly shoots and healthy seedlings, the seeds are subjected to the following types of pre-sowing treatment.
Stratification consists in a long (from 2 to 9 months for different ornamental crops) keeping seeds in a humid environment at a low temperature (+4 ° C) in the presence of air. Seeds are mixed with wet sand or peat in a ratio of 1: 3 and stored in a cellar or in a refrigerator. The natural process of seed stratification occurs when they are sown in open ground before winter.
Air heat treatment. In warm sunny weather, the seeds are scattered in a thin layer in the sun and constantly stirred during the day. Germination and germination energy of seeds after such treatment are significantly increased.
Scarification used for partial destruction of the shells of poorly germinating seeds with a thick skin. Through the damaged shell, the soil solution more easily penetrates to the embryo, and the germination process is thereby accelerated. The following scarification technologies can be used:
- mechanical: the seeds are shaken together with small pebbles;
- thermal, consisting in repeated alternation of freezing and scalding with boiling water;
- chemical, in which the seeds are left for a day in a weak (0.1%) solution of acetic or hydrochloric acid.
seed soaking. Large seeds of sweet peas, nasturtium, flowering beans are soaked in warm water for a day, then dried and sown. Soaking in a solution of growth stimulants (epin, heteroauxin) also accelerates the germination process.
Seed dressing protects seedlings from fungal and bacterial infections. At home, seed disinfection is carried out in a 0.2% potassium permanganate solution for 15 minutes or by keeping in hot (50–60 ° C) water for several minutes. After treatment, the seeds are washed in clean water, dried and sown immediately.
The order of the work.
1. To study the basic information on the pre-sowing treatment of seeds.
2. In the workbook, write down the main types of pre-sowing treatment of seeds of flowering plants.
3. On the basis of the studied material in the laboratory, carry out dressing, issued by the teacher of seeds, flower crops.4 . Describe in the workbook the procedure for seed treatment of flower crops.
Practical work №3-4
Carrying out vegetative division of plants
Goal of the work
: learn to conduct vegetative division of flower plants.
General information
.
Vegetative propagation called reproduction by individual vegetative organs of the mother plant. In addition to hybrid plants whose offspring change their characteristics during seed propagation, vegetative propagation is used for crops that do not form seeds at all or have a long development cycle, or for crops that are very difficult to grow from seeds, or in cases where it is necessary in minimal timing to get flowering offspring.

Municipal budgetary educational institution
Secondary school No. 1
PROJECT
"SHOVEL KITCHEN"
Shlisselburg What is a kitchen spatula for?
In any kitchen there is such a type of utensils as a kitchen spatula.
Since people learned how to cook food in dishes, they can not do without it. It is needed for turning cutlets, mixing food in a pan, etc. At first, it looked like an ordinary stick, but over time it acquired the shape of a shoulder blade. Where it is necessary to mix a large amount of food - the spatula has the size of a small oar, and in an ordinary kitchen it has a small size - no more than a kitchen knife.
Work plan
- Problem Goals and objectives Project scheme Design specification Material selection Routing Work progress, cost calculation Environmental assessment Self-assessment of performance
Goals and objectives
Consolidate the acquired knowledge, skills and abilities in the study of technology course.
Learn to independently solve technological problems, think logically, choose the necessary materials and apply the necessary tools.
Perform any technological operations.
Observe safety precautions.
Use drawings and tables in your work.
Find the right solutions and optimal options, as well as improve skills and abilities in the process of performing carpentry technological operations.
Project scheme
Design specification -
list of product requirements
SHOVEL KITCHEN
SELECTION OF MATERIALS
Material selection criteria

Selection of materials
Unedged coniferous board
Conclusion:
The most affordable, suitable and environmentally friendly material for a blade is an unedged birch board.
Routing
Technological map for the manufacture of the product
"Kitchen spatula"
Progress
One of the indicators of the value of a material is its availability. The quality parameters include the absence of cracks, rotten knots, the absence of insect damage. It is also necessary to choose wood according to the following parameters: wood color, texture, the presence of beautiful healthy knots. In the presence of machine tools and hand-held power tools, simplification of wood processing operations is allowed. With the help of machines, several operations can be combined, which leads to faster processing of wood.
Cost calculation table
kitchen spatula production
Pen

Working part

Total - 10 rubles 44 kopecks.
The cost of this product in retail is 60 - 80 rubles.
Conclusion: Making a blade with your own hands is profitable and economically justified
Environmental assessment
Sample
Quality assessment criterion
The goal has been reached. The blade is made by yourself, cheaper than in the store. In the course of manufacturing, certain experience was gained, new knowledge about the woodworking process was obtained, new skills and abilities were obtained in this field of human activity. PRODUCT SAMPLES"Kitchen spatula"