Spikes for boots with their own hands. Studded winter shoes at home
I have three goals in life. 1. Make an ecological revolution on the planet or in any country i.e. plant forests for free, at the expense of ...
I need a network assistant, not remote, who supports my ideas. Recruiting a team to save the planet. Learn to grow trees. I can…
I will show the youth the way in life. I will show the way to your future kind. I will teach you how to raise a queen from a girl, and not a servant of people. Everyone is growing service...
1. Invented a tool with nozzles from plumbing parts. 5 -9 nozzles. 3 knives. Plant seedlings in paper cylinders. Cuts seedlings up to 2…
 How to plant acorns, nuts and other seeds in the fall. Rodent control.
Important. When planting acorns, chestnuts, nuts, etc. in autumn, they are often eaten by rodents. For several years, I have been written a lot that planted acorns, ...
 Planted 3000 acorns in autumn.
1500 along the river, 1500 along railway. One weedy, American maple grows there. Some places are hard to get through...
A few years ago I wrote that the worst is yet to come. That's all for me, I'm a pessimist, I see only the bad. And what do we see? Everything is confirmed. Deterioration from all...
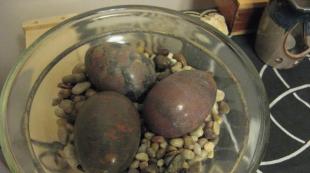
 Collected acorns.
I found good, large acorns this year, although I never got to some oaks. A few years ago I did...
 How to get apples, pears, etc. every year.
I'm writing from memory, so I might miss something. It is believed that the harvest happens in a year, they rest for a year. To understand, you need to know that any crop ...
AT winter time, especially after temperature changes, ice forms on the roads and sidewalks of the streets of our cities. In order to be more stable on my feet under such circumstances, the author figured out how to make overhead spikes for shoes.
Materials and tools that were used to create this homemade:
- metal plates
- self-tapping screws
-vise
-wrench
- a few files
- hacksaw for metal
-ribbons
Detailed description of the manufacture of removable spikes for shoes.
The easiest way, of course, is to screw the screws into the sole, but not everyone wants to spoil the shoes in this way. Therefore, the author thought about creating a removable anti-slip system for his boots.
Step one: the base for the anti-slip device.
Since the author had quite suitable furniture mounts in the form of T-shaped plates with holes already available, it was decided to use them as the main platform for anti-slip adaptation.

Still, the plates were too large to be used in this form. Therefore, they were securely clamped in a vise and processed with a hacksaw.

Step two: workpiece processing.
Having slightly shortened the plates, approximately as much as shown in the photo above, the author proceeded to process the resulting parts with a file.

In addition, they expanded side holes, using a round file. The holes were given oval shapes to make it easier to attach them with ribbons later.

Step three: installing self-tapping screws on the base.
After the base in the form of a plate was prepared, it was necessary to attach self-tapping screws to it, which would prevent slipping. To do this, the self-tapping screws were screwed into smaller holes using a regular wrench.


And in order to make sure that the fastening is secure, the author decided to tin them on both sides.


Step four: fastening to shoes.
After that, the plate was completely ready, it only remained to take care of attaching it to the boot. As fasteners, special strong tapes with fasteners were used, which were threaded into pre-prepared elongated holes in the plates.
In the photos below, you can see the bindings put on the boots.

As you can see from the photos, in this case, rather large self-tapping screws were used, which are more suitable for outside urban use. To use such a device in the city, it is better to either cut off part of the length of the screws with a saw, or use smaller screws in advance.
Last year, I asked myself... How to make ice drifts (ice access) yourself? But I still couldn't think of a normal one. bindings for boots. This year I looked for inexpensive turnkey solutions who dress up for shoes. I ordered a pair for ~8$.
Moreover, they did not have the most popular inscription in the world - Made in China or Made in PRC(which is equivalent), but made in Ukraine. After 2 weeks of active wear steel spikes worn out thoroughly , and the rubber mount broke after drying indoors. How do you propose to do it?
Do not buy the same low-quality product a second time. Kill ... but I want to run on ice, and not move like a granny, constantly afraid of falling.
Decided! I'll do it own ice drifts! The structure is the same, but spikes this time will be faster. Which one is better to choose?
At first I wanted to do it quite hardcore - with a bunch of self-tapping screws, but poor floors) After all, you will have to walk not only on the street.

Whoever wants to, of course, can repeat this option 🙂
The next thought was to use bolts with wide washers. But the head will interfere. AT hardware store found a perfect copy for my ice drifts with a hidden head!
 I combined fastening methods and bolt length in a test instance.
The most reliable seems to be this: 6-8 mm countersunk head bolt + washer + 2-3 layers of rubber (the central one is the longest) + washer + engraver washer (so that the nut does not unscrew) + self-locking nut (for greater reliability).
But not the fact that it is the most optimal.

I made rubber bands by cutting an unnecessary machine chamber. holes did skin punch.
 By the way, with a set of punches you can get cool pads for domestic needs.

Bottom view. Collecting…

Side view.

New homemade and old, torn ice drift. Optimal length ice access for an adult leg 385 mm.

Experiment share your experience with
Bad weather most often comes unexpectedly and brings with it a sharp cold snap, which can turn any surface into a very slippery skating rink. But what to do in such a situation. After all, not everyone can afford shoes with a special sole that will not slip.
How to make ice drifts yourself?
In winter, ice is not a rare occurrence, so you need to prepare for this time of year. There are a large number of different ways that can handle ice. Everyone knows how to protect themselves and their families from such a phenomenon. Often, pads made of sandpaper are used or the sole is lubricated with a mixture of glue and sand. But these are not very practical methods of solving this issue.
Most often, such methods only spoil the shoes, but do not give a result. The most reliable ways to solve this problem at home are:
- use self-tapping screws;
- removable rubber pads from ice;
Self-tapping screws are suitable for boots with thick soles for rooms in which it is not a pity to spoil flooring. For economical people who want to make a product similar to ours, there is also a solution from a rubber inner tube. A template is made, carefully cut out two products, then fasten the spikes or rivets as hooks.
Ice drifts using self-tapping screws
In order to make ice drifts yourself, you will need to take self-tapping screws and shoes with a fairly thick sole. Next, you need to tighten the screws inside the shoe. In this case, it is the thickness of the sole and the length of the screw, the shape of the head that plays an important role. But you should know that if you use this method, then it is no longer possible to wear shoes without such protection. Therefore, it is best to use shoes for this, which you will use purely as ice drifts.
Ice drifts with removable rubber pads
It will not take much time and effort to make ice drifts with removable rubber pads. To make such an ice drift, you need to take rubber 3-5 millimeters thick. Next, you need to prepare a sharp tool, which is necessary in order to cut the overlay later. And most importantly, these are spikes that must first be fixed on a rubber pad. Be sure to choose tires that are resistant to temperature changes. It should easily tolerate frost and should not freeze. When creating a rubber pad, you need to consider how such an overlay will be attached to the boots. The spikes should not hang out and have a height of approximately 0.6 millimeters. They should be comfortable to walk on.
Advantages of homemade ice drifts
Of course, if you do not want to do it yourself, you can purchase ice drifts in our store. We have a wide range of the most different models which are made from different materials. But you must admit, home-made ice drifts have a number of advantages:
- saves you money. No need to pay an online store, but you will spend time making your own
- made according to their pattern;
- are used available materials
- take little time to manufacture;
Ice drifts will protect you in non-flying weather from serious injuries that may occur. Try to buy the most comfortable shoes for the winter. We wish you in winter period time to move around safely.
The transitional period has begun. Ice on the street.
Even the softest sole on a shoe may not save a person from ice and slipping. The risk of falling in these conditions and injury is very high.
Now we will consider several options - how to make anti-slip pads for anti-slip shoes at home with your own hands. And if you do not have the opportunity to buy these linings, then we will tell you how to make sure that your shoes do not slip in ice.
How to cut a snowflake out of paper in 1 minute:.
1) Option 1.
We take an old felt boot. We cut off a piece from it and nail it with small carnations to the sole of our shoes. Or glue it to the sole. Usually such an option using an old felt boot (a piece of felt is also suitable) will help to resist slipping shoes if there is no rain (not damp) outside, if there is no snowfall. If all this is present (snow or rain), then the felt will simply take on a small crust and will also slide along the road, as if you were skating. This method protects shoes from ice for 7-10 days. Then the felt is washed off.
2) Option 2.
To make your own anti-icing shoes, you will need Moment glue. Apply glue to the sole of the shoe with a snake. Let's let it dry a little. Then with a match we smear it on the sole with a small snake. After a day, when the glue dries, rub it a little with a large sandpaper so that its surface becomes rough. Usually this method protects against ice for 4-6 days (for a week).
3) Option 3.
Simplest. Take a large adhesive plaster and stick it in pieces to the sole of the shoe. The effect is about the same - for 3-4 days you will have enough protection against ice. But it is necessary that there is no snowfall or rain, so that the adhesive plaster does not take on a crust.
4) Option 4.
The hardware store sells special strips with sticky sandpaper (see photo). They are usually used near shops, pasted on the porch so that visitors do not fall in winter. In the same way, they can be glued to the sole of the shoe, like a patch. Usually this method is enough for 2-3 days with ice, as the sandpaper quickly wears out when walking on asphalt or at the entrance of the house.


5) Option 5.
The use of various heels made of polyurethane. This material is soft, like silicone, and does not tan when iced. Therefore, it clings well to the ice and prevents a person from sliding on it. Usually these heels last the whole season.
6) Option 6.
Metal heels. They are manufactured and sold specifically for those regions where ice is frequent. Or for special services that work in the mountains or in conditions of frequent slipping of shoes. These can be special heels with spikes, with nails, heels around the perimeter of the shoe, etc. But in the city, where after the street people enter the room, these heels are somehow uncomfortable, they knock like metal horseshoes. Therefore, they should be used only as a last resort, when other methods do not help.
7) Option 7.
Special anti-icing pads for shoes. They are rubber. And from below they have metal spikes, like a spiked car tire. Wearing such slips on shoes, a person will walk very steadily on ice and not fall.


And the most important thing. How not to fall into the ice.
First tip
. It is necessary to choose shoes specifically for winter. That is, so that the sole is not made of plastic, which in the cold becomes “oak, wood” and slides like skates. And to be made of polyurethane, which remains soft in the cold.Second tip . The sole of the shoe must be grooved. Then she will "grab" the ice, preventing her from slipping.
Third tip . Develop the habit of walking in ice in a special way, not like in summer. How to walk on ice? Very simple: a) we bend our legs a little at the knees and do not straighten them to the end until we step on a normal, stable surface. b) take small, short, slow steps. If we go fast, wide, if we run, then we will quickly fall into the ice. C) be sure to look under your feet, marking areas with ice. If we do not look under our feet, then we will not be ready for dangerous areas, and the risk of falling in this case is very high.