How to make swing gates with your own hands: drawings. Do-it-yourself swing gates, drawings, videos, step-by-step instructions What kind of gates you can make with your own hands
It is believed that swing gates are the oldest type of gate. Their existence is measured in millennia, but the principle of the device remains constant, and changes concern only the materials of manufacture and design.
They are used almost everywhere: in enterprises, cottages, and private homes. The availability of materials necessary for their manufacture, reliability and simplicity of design explain such a wide distribution of gates of this type. Gates can also become a decoration for your property if you manage to make their lining beautiful. The lining can be made from corrugated sheets, metal sheets, forging, etc.

The advantages of swing gates include:
- simplicity of design
- low manufacturing cost
- versatility
- long service life
- almost complete absence of maintenance required.
However, these gates also have disadvantages:
- In winter, snow removal is required to open them
- Gate leaves require significant free space so that they open freely
Let's start manufacturing - stages of work
The first thing you need to take care of is load-bearing pillars. They need to be manufactured and then installed. For swing gates, pillars made of a profile metal pipe with a diameter of at least 100 mm, wooden beams made of hardwood, or concrete can be used. When installing such pillars, they must be concreted to a depth of 1 m or more.

If the pillars are built of bricks, then their foundation must be concreted to the same depth. The pillars themselves and their base must be reinforced. From the pillars inside the opening, a corner must be released or installed, which will be necessary for attaching the gate posts.
Concrete for concreting pillars is made from a mixture of cement, crushed stone and river sand in a ratio of 1:4. To make it easier to work, it is best to use fine crushed stone.
After pouring the load-bearing pillar, let it sit for 7 days or more so that the concrete sets well.
While waiting for the concrete to harden, you can do manufacturing of gate leaves. First of all, you should prepare the pipes for making the frame. They must be cleaned of corrosion and dirt, degreased with solvent or gasoline and a layer of anti-corrosion primer applied. When the pipes are ready, the frame must be welded in the form of a rectangle or square. To ensure double-sided lining, an additional pipe is welded flush with the main one in the middle part of the frame. After sanding the weld seams, the gate frame must be primed and painted.

After the paint has dried, you should begin sewing up the door leaf. The choice of lining material and the order of lining is a very individual matter and depends mainly on the taste of the owner.
The next stage is suspension gate If the supporting pillars are metal, then the gate hinges are welded to the pillar itself. If the pillars are stone or brick, then a metal stand must be attached to them using dowels. And the hinges are already attached to this rack.
If you make swing gates with your own hands, they will cost you much less. If you know how to do basic plumbing and if all the necessary materials are on hand, then making swing gates will take two or three days.
Owners of private houses and garages have long appreciated the convenience of swing-type entrance gates.
This is natural, because such a design was almost the only one for hundreds of years.
Ease of operation and reliability have always been at a premium. Even now, summer residents and cottage owners continue to improve their design.
And if previously these were basically wooden blind gates, then their modern type can be represented by a high-tech automated complex.
Types and types of swing gates
As noted above, swing entrance gates, depending on the material, can be of two types: wooden and metal. By design, it is customary to distinguish gates with two floors (double-leaf) and with one hollow (leaf).
Very often, especially in the construction of gates for garages, hangars and warehouses, a combined type is used - double-floor gates with a wicket. This saves space and materials for a separate entrance. But in most cases they are made as “blind” elements, and only in some places (government institutions, hospitals, etc.) can you find forged, lattice or tubular swing gates with an entrance to them.

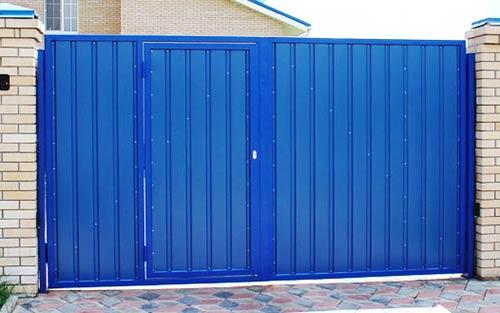
Another type of gate is a metal swing gate with two wings using artistic decoration and (or) lined with painted profiled sheeting. The gate floors have a lightweight appearance, and the entrance (wicket) is made next to them.

This type is perfect for a private home. It is widely used because it lasts for decades and requires virtually no repairs, unlike its wooden counterparts. Additionally, the design can be equipped with automation, which will further increase their functionality.
Swing gate device
Let's look at a drawing of a typical gate design made from corrugated sheets. It is based on a frame made from the profile of a square or ordinary pipe with a diameter of 20 to 40 mm. Each leaf can have one or two horizontal veins to enhance the rigidity of the structure (Scheme 1).

Other options are also possible, for example one horizontal and two diagonals. This arrangement clearly maintains the geometry of the gate (diagram 2).
Any owner can make swing gates with his own hands, provided he has sufficient skills in assembling metal structures. You will need to be able to use a welding machine, drill, grinder, screwdriver and measuring instruments. May also need painting.

Each gate leaf is screwed onto self-tapping screws or welded onto hinges to the posts. Two hinges with a diameter of 20 or 30 mm are enough per sash. The pillars are also made in the form of a metal pipe with a diameter of 70 -76 mm, or a profiled pipe 20 x 40 mm.
Iron pipes (hanging post) can be used directly as a gate support, but depending on the design of the fence, they are mounted in brick (concrete) columns. To do this, you need to provide two embedded parts in the brickwork, onto which the hinged gate posts are welded. For diagonals (slanted) and transverse, it is recommended to use a profile of 20 x 20 or 20 x 40 mm.
Practice has established that the optimal width for private entrance gates can be considered 3 meters. This is quite enough for any car or truck. If you want to save money, then you should not reduce the size by more than 20 cm. The height of the gate in most cases, excluding the rise above the ground, is equal to two meters.
The gate locking mechanism, as a rule, consists of an “L” shaped pin (stopper) located at the bottom of each gate. At the base of the ground in the place where the gate is fixed, holes are provided from pipes, the internal diameter of which is 5-10 mm greater than the thickness of the stopper. There are no strict restrictions on the length, but it is still advisable to make them no more than 50 cm. In addition to the stoppers, you can provide a horizontal shutter, transverse along the line.
As already mentioned, the simplest and most practical option for finishing gates is lining them with corrugated sheets. The corrugated sheeting will fit organically into the overall design if the fence is kept in the same style. Typically, corrugated sheets are attached to gates at a distance of 5-7 cm from the level (base).
Gate automation
So far we have looked at the design of a conventional swing gate. But what if you suddenly get tired of manually constantly opening and closing the doors, or for some reason you want to modernize them. For this case, design engineers developed so-called linear electric drives (automation).
This system consists directly of the linear electric drives themselves (2 pieces), as well as a control unit, warning lamp, antenna and electromagnetic lock. Automatic swing gates are powered by a regular household AC voltage of 220 W. In the photo, all elements of the system fit elegantly into the original antique design of the gate.

It is very important to provide supporting pillars in advance before installing the automation. As in the previous examples, it is advisable to make them from concrete, or even better from brick.
There are three options for installing automatic gates depending on the opening direction of the gate: outward, inward, and inward with modification of the supporting pillars. In each of them, installation of automation is carried out in a certain sequence. In our case, external installation may be required, or the latter option (for the future), since we initially considered the option for future automation.
The location of the system control unit may be different (left or right), it is important to select the correct wire cross-sections. The figure below shows an approximate diagram of the arrangement of system elements and wire cross-section.

The drive for installation has a special feature; for it, a special distance from the supporting pole must be provided. If this is not provided and the gate needs to be made inward, as in our case, then you just need to carefully hollow out and arrange the places for it.

The price of linear drives ranges from 23 to 36,000 rubles. For example, an electric drive from DoorHan Swing-5000 (up to 5 meters) costs around 25 thousand.
Assembly and installation technology for swing gates
Gates should be made in stationary conditions on the ground and a leveled surface (carriage). The dimensions of your gate must exactly match the design drawings. That is, all workpieces must be sawed off with a grinder with a tolerance of 1 mm. Then, checking the right angles, they weld the parts of the future perimeter of the gate leaves, and then the crossbars and diagonals.
The markings for the hinges are made at a distance of at least 30 - 40 cm from the edge of the frame and then welded to it. Hinges can be bought in a store or ordered from a lathe. Then they bring up the hanging pole and do the same actions with welding, using the tack method.
If everything is exactly the right size, the loop is completely scalded. You don’t have to use welding, but then you’ll have to screw each canopy through thick steel onto self-tapping screws. After painting the metal, you can screw the corrugated sheet with screws and a press washer.
The installation of swing gates begins with marking the support (concrete or brick) pillars along the centers of the main axis of the gate. At the base of the pillars, an iron pipe with a diameter of 100 mm must be mounted on the concrete. It must be dug to a depth of 130 -150 cm. This is best done using an auger (drill) of the appropriate diameter, leaving a space for pouring concrete of approximately 10 cm around the circumference.

When setting up the base of a brick pillar, use a level and check the vertical in both planes. A gap of 20 mm is required between the gates, which can be covered from the outside with a metal strip 50 mm wide. So tolerance is necessary, because on hot days, when heated, the metal expands, and your gate may simply jam. Homemade swing gates will look no worse than their factory counterparts if you approach the process of assembling them wisely.
There are many options for gate design, but it is simply impossible to describe them all. Each case is individual and therefore the manufacture of swing gates can be called a creative process, where each owner can implement his own ideas or take existing ones.
When arranging a summer cottage or a country house, the question arises of how to make a gate with your own hands. Before starting the work process, you should decide on the type, materials and installation method. Taking into account all the nuances, you can make the gate yourself, without resorting to the help of professionals. Each type of gate is different from each other and has its own characteristics and quality characteristics. They are worth considering in more detail.
Swing type
In the photo of the gate you can see the easiest model to implement. The design of this plan is equipped with a gate. This is a fairly common option for a private home. Pillars are used as a basis; they are installed in width. The third post is necessary in order to establish the exact width of the gate.

Mounting occurs according to the following gate diagram:
First, the gate leaves and gates are installed on welded hinges that are located on the posts. This is an important stage, because depending on it in the future the direction of their discovery will be determined.

In general, sashes are frames made of metal. Other options are also possible, for example, a profile pipe, or a corner that is sheathed with a metal sheet, wood, or corrugated board.


There is a manufacturing option that involves using exclusively wood. In this case, it is worth securing the boards to a reinforced frame.

Heavy gate structures should not be used, as this places a significant load on the hinges and support posts. It is best to adhere to the weight of the sashes. A closing device is useful for the lock's hinge; you can use a powerful latch.

This type is really easy to install. The work can be done independently. It is worth considering the disadvantages in this case as well.

During installation, the support pillars may tilt, as well as the sashes may sag. This drawback is observed if the installation was initially broken. Reasons also include incorrect calculation of the weight of the sashes. It is important to deepen the foundation of the supports. Heavy material will make the situation worse. The weight of the loops must match the material.

The advantages of this choice are as follows:
- economical, fairly compact placement, there is no need to clear additional space for installation;
- easy installation work.

The working process
For a successful final result, you need instructions for installing the gate yourself. If the weight of the gate is normal, then the choice of metal poles made from pipes is considered optimal. Their diameter averages about 80-100 mm.


A profiled pipe with a similar diameter is also suitable. This type of support elements copes with the task perfectly.


The following installation methods can be distinguished:
- clogging;
- concreting.

If we are talking about the first method, then the depth to which the pillars are driven is 1.2-1.3 m. This type has its advantages. Among them, reliability and speed of work are of particular importance.

You should drill the hole you need. This should be a depth of half the future depth of the pillar.
Columns should be installed in the wells. You can hammer them in with a sledgehammer or impact head. At the same time, pay attention to the verticality of the stand.

The next step is to attach the posts to the fence posts. Then you need to weld the hinges. Designate a place for this in advance.

After this, you should hang the doors on the hinges. At the same time, the correct convergence of the elements to the central part is checked.
The second installation method is concreting.

This method increases rigidity as well as stability. This method will require the use of heavy and wide sashes.

Reinforcement is not carried out. You will need a reinforcing glass. The workflow steps for beautiful homemade gates look like this:
- drilling The diameter is about 200 – 250 mm, the depth is about 1.9 mm;
- prepare sand and crushed stone, they will be needed to fill the bottom of the hole. The components should be compacted carefully, each layer should be about 100 mm;
- the pillar is installed directly on a bed of sand and gravel;
- It is worth pouring the solution around its area. Until it hardens, it is important to install the post vertically. Use supports as anchors.


You can use a reinforced structure for installation. In this case, installation work is carried out in the same way as without the use of reinforcement.

conclusions
After carefully studying the drawings, as well as step-by-step instructions, you can do all the work yourself. It is necessary to pay attention to the selection of necessary materials and get into the flow of work.

It is best to carry out work together with a person who has experience in this area. Then the quality and duration of work will pleasantly surprise you.


DIY gate photo


Nowadays, hinged doors are popular for entering a garage or garden. They are very practical and do not require special care. They can be ordered from a specialized construction company and received ready-made, or you can design and install them yourself, having previously selected the material for manufacturing. This is a simple system, consisting of two doors and complemented by a built-in or adjacent gate.
Swing gates with a built-in wicket made of corrugated sheets and metal profiles
Ready-made gates are much more expensive than the same design of your own making. In addition, building it with your own hands is the implementation of ideas for arranging your own property, without which no home craftsman can create. He immediately faces questions: is a gate needed? if necessary, then what it should be.
The practicality of a built-in wicket door in one of the planes of the gate is undeniable. There is no need to rattle a lock or bolt at every pedestrian entrance/exit, or waste time opening or closing heavy metal doors.
An example of a built-in gate made of corrugated sheets. In addition, there is a clear saving of space, especially if it has to be cut out when arranging a garage or cottage. And the mandatory threshold in front of it prevents the accumulation of snow, which prevents it from opening.
The adjacent gate also has many advantages. Usually it is installed without a threshold, which creates inconvenience when going outside with a stroller or bicycle. There is no obstacle for kids, who can easily get injured when overcoming it. However, after a snowy night it can be opened after appropriate clearing of the area.
The type of gate is determined not by the frame, but by the material with which it is filled. In this regard, they are:
- wooden;
- from corrugated board;
- metal;
- from forged metal.
Wicket doors, regardless of whether they are built-in or adjacent, always use the same material from which the gate is made.

Drawing with dimensions of the gate and built-in wicket
Otherwise, the whole structure will look unattractive, even ridiculous. Therefore, when purchasing wooden boards or sheets of corrugated sheets, you need to take into account the dimensions of the future adjacent gate.
Wooden gate
For a long time, the fence or entrance to the estate was equipped with a picket fence - narrow wooden slats nailed to the crossbar. No additional frame was required to strengthen the entrance structure. It is very simple to build, and the home craftsman will not need professional carpenter skills. However, due to frequent use, such gates soon became warped and required repair or replacement.
To strengthen the wooden entrance structures, they came up with a metal frame for attaching the cladding material. Such gates last longer, but even with the most careful care, wood is exposed to insects, precipitation, and temperature changes.

Construction of wooden gates and built-in wicket
It wears out much faster than metal parts. It won’t take much time to do it yourself next to the gate if it was designed in the fence before it was erected. It will cost the owner very little, even if you use high quality boards. You can't do without it here
- door awnings;
- handles, latches;
- self-tapping screws;
- antiseptic solution for wood treatment;
- wood primers, varnishes;
- concrete mortar.
The general procedure for DIY installation is extremely simple. The boards, which have been pre-treated with an antiseptic, are laid out on a flat horizontal surface in the form of a future door.

Diagram with dimensions for making a built-in wooden gate
Two transverse bars and one diagonal are nailed to the top and bottom edges. Then pre-prepared support pillars with sidewalls are installed.
The distance between the supports is equal to the width of the gate plus 2–3 cm. The depth of their immersion is determined by the level of soil freezing. They must stand on frost-free ground. Then the sash is hung, coated with wood primer and varnish. The door handle and latch can be attached last. With careful use, this design will last 10 years.
If the gate is made of a sheet of tightly adjacent boards, and they are strengthened by a metal frame, then the gate door should be made in the same style.
Gate made of metal picket fence and corrugated sheet
Later, a metal picket fence appeared, which strengthened the swing fencing structures and gave them a completely new look. This material, compared to wood, extends the service life of the wicket door by three times. However, routine maintenance is required, primarily painting and repairs.
A metal picket fence treated with a polymer composition can have a wide variety of shades. It has great design possibilities for creating color harmony in an ensemble with roofing tiles and brick walls of a dacha or a private city house.
Equipped with a steel picket fence, very durable. Their cost is much lower than brick or stone. The metal frame is covered with a picket fence with some clearance, so, unlike solid ceilings, it creates less windage under strong wind pressure.

An example of a built-in gate made of corrugated sheets
This is very important for a dacha that cannot be protected by nearby tall buildings. And the installation sequence is the same as when installing wooden gates. Regular fastening materials and tools are used.
Corrugated sheeting also has many advantages. This is a modern building material made from corrugated steel sheet, produced by cold rolling. It is galvanized and coated with a special polymer layer to protect it from adverse weather conditions. For this, you should use a profiled sheet with double-sided coating. Despite the metal frame, they will be equally attractive both from the yard and from the street.
The corrugated sheet is lightweight, so the installation of structures in a fence made from swing doors can be done with your own hands, without the use of complex construction equipment.

Drawing with dimensions of the metal gate frame
During installation you cannot do without the following power tools:
- welding machine;
- Bulgarians;
- screwdriver.
The installation of support pillars is carried out according to the same rules as when constructing a gate made of wood or a steel picket fence. If the swing gates are already installed, then you can install a mortise gate in one of them. Moreover, all this can be done with your own hands.
Forged metal gate
Gates and wickets made of metal decorate not only fences for summer houses, luxury estates, cottages, but also the surrounding landscape. And the metal forging elements create an atmosphere reminiscent of the heyday of the Renaissance. Not everyone can do it with their own hands. Here it is necessary to follow a rather complex technology of cold or hot forging using special equipment. The posts for the future gate must be strong enough, so they are usually made of brick.

Original design of gates and wickets made of forged metal
The most reliable option is to install columns from a profile pipe or other material to which the curtains will be attached, and cover them with brickwork. The metal is pre-treated by removing corrosion stains with a grinder wheel. Then they are washed with gasoline to remove traces of technical oils.
Holes are dug in the ground 1 m deep, metal posts are inserted there and reinforced with compacted rubble. At the same time, using a plumb line, constantly check their strictly perpendicular position. Concrete solution is poured on top. The finished supports are covered with bricks.
Other options are also quite effective. For example, each support can stand on a separate concrete base or on a strip fence foundation, which is laid along the perimeter of the site and continues under the entrance structures. This solidity ensures high strength of the entire fencing system, including the gate and wicket entrance.

Design option and diagram of a gate with a built-in wicket
In this case, laying the foundation strip with your own hands will require time, appropriate building material and strict implementation of the laying technology. Then, after all this work is completed, you won’t have to redo the rickety, sagging swing doors and gates after the winter. The simplest is a frame frame with a solid backing welded to it without any additional decorations. They just coat it with bitumen varnish.
However, such metal structures are not found so often and, as a rule, they are used for arranging a summer house, and not for the garden plot of a city house.
The trend of recent years is swinging facade structures with openwork bent elements and magnificent hot forging details. Today you won’t surprise anyone with gates made of forged metal. They are installed, first of all, not for arranging a summer house, but for a fashionable cottage or country estate.

Design option for a built-in forged gate
They prompted the resumption of the ancient craft and the emergence of new modern technologies that imitate the elements of forging. Such doors with decorative lathing are durable and of very high quality. They are expensive, but they are a fairly reliable investment that will be useful to more than one generation of owners.
Installation of such gates can be successfully done with your own hands by welding or using bolted fasteners. Initially, the frame frame is welded, which should be 2–3 cm narrower than the entrance opening. Then, having laid it on a flat horizontal surface, it is strengthened in the middle with a jumper, the role of which can be played by a decorative detail.
In accordance with the pre-designed pattern of the gate, cast decorations are laid out within the frame.  As long as they are not secured, they can be rearranged in search of the most attractive option. Having found it, the decorative elements are secured, and the welding seams are processed with a grinder's grinding wheel. The lock, latch, or deadbolt can be attached to the door once it is suspended from the structural support. After cleaning, it is coated with primer and paint.
There are also double-leaf swing gates that contain the best qualities of various materials. For example, a steel corner is used to strengthen the frame, and the frame is complemented with forged decorative elements. If the owner wants passers-by not to see what is happening in the yard of the dacha or estate, then the interior space is filled with corrugated board or wood. There are a lot of design options to express the tastes and preferences of the owner.
In order to choose one of the gate options, you need to learn about each type separately. The most popular among the population are swing and sliding structures. Each of these types has its own positive and negative aspects during construction and further use.
Swing design
Swing gates (book) are the most common type of fencing, which can be seen mainly on the territory of private houses and country houses. It is popular because for the construction of this structure you can choose the most affordable materials, and even beginners can install it with their own hands.
The flip gate design is a simple frame in the form of two or three pillars onto which the doors are secured using hinges. Depending on which side of the supports they are attached to, it is determined whether the gate will open inward or outward of the yard.
The doors, as a rule, are made of a profile pipe and externally look like a frame structure, which can be sheathed with various materials, such as wood or metal sheets. When making the frame and installing the casing, it is important to take into account that their total weight should not be too large, since the support pillars may bend and the gate itself will not function properly.
The main disadvantage of using a swing structure is the availability of free space for opening the doors. It is especially inconvenient to use it during the winter period, when it becomes necessary to clear snow in order for vehicles to enter or leave the yard.
Types of sliding structures
Sliding gates, which you can make yourself, are divided into several subtypes: cantilever, sliding and hanging. The last of those listed are rarely used as part of a fence, since their design has an important distinctive feature - the doors are hung from above, which significantly limits the height of cars that can drive into the yard.
Any new type of construction should be taken seriously and with special care, and the same applies to the construction of the simplest type of gate - swing gates.
To manufacture such gates, you will first need to decide on their design, and then prepare a drawing with exact dimensions, thanks to which you can calculate the amount of material required. Basically, beams or metal profiles are used for supports, and boards and corrugated sheets are used as cladding.
Regardless of the material chosen for construction, it must be carefully inspected for flaws and processed before use. If it is wood, it is impregnated with several layers of an antiseptic solution, and in the case of metal, all corrosive formations are cleaned with sandpaper. The material is then cut into pieces according to the dimensions indicated on the drawing. After which you can proceed directly to the construction of the structure.
Installation of pillars
The installation of swing gates should begin with the construction of support pillars. To do this, you need to put markings in accordance with the distances in the drawing and dig 2 or 3 holes, depending on the presence of a gate in the structure. Their depth, as a rule, is no more than 1 meter.
For reference! In some projects, a wicket is provided in one of the gate leaves, so a separate post is not required for it. However, this design is not entirely successful, since the additional weight can affect the level of the frame and its possible deflection.
The bottom of the wells is filled with sand or crushed stone to a thickness of about 0.1 m and carefully compacted. After that, supports are installed in them in a strictly vertical position, the bottom of which is sometimes tied with a metal frame to ensure a more reliable fixation.
Then the supports are filled with a concrete mixture to the edges of the holes and wait until it hardens completely. Typically, the cement hardening process takes several weeks.
Fabrication of the frame and construction of the structure
While the foundation under the supports hardens, you can start making the gate frame. To do this, they take pre-prepared blanks, which are most often made from a steel profile, and weld them together to form a frame. Also, certain crossbars are attached to the frame, onto which the gate trim will be fixed.
The sheathing can be fixed before hanging the frame or after it is installed. The material is attached to the sashes using self-tapping screws or rivets, and the frame itself is attached to powerful hinges pre-welded to the support posts.
After the structure is installed, they begin to decorate it externally. If it is made of metal, it must be degreased, primed and painted. Then, after the paint has dried, closing devices and decorative elements are hung on the gate.
By performing all the above steps in order, it will be quite simple to make swinging iron gates even with your own hands. In addition, the construction of this type of structure is considered the least expensive, since the materials for this can be used not only the cheapest, but also not new.
Features of installing sliding gates
Sliding gates are most common in areas that are not subject to heavy snowfalls and a strong decrease in air temperature in winter. Their design is carried out in such a way that the sash, when opening and closing, moves along a channel built into a concrete foundation.
For reference! This type of gate is controlled mainly by an automatic mechanism, which allows you to control it remotely.
As in the case of swing gates, the construction of sliding gates should begin by developing a sketch and drawing up a design drawing indicating all dimensions. The width of the opening in this case is usually no more than 4 meters, and the height should be equal to the main fence.
In addition, it is necessary to prepare components, materials and tools for work in advance. The most optimal sheets for this are considered to be metal profiles and corrugated sheets, however, some owners of personal plots use wooden beams or forged cast iron elements as cladding for the structure.
Laying the foundation
To install the sliding structure, it is necessary to dig a trench according to the dimensions previously indicated in the drawing. It digs from the side of the gate where the main load falls, that is, where the leaf will be fixed.
Next, the bottom of the trench is covered with layers of crushed stone and sand, which must be compacted. After that, formwork is installed in it, on top of which waterproofing material and a frame of reinforcing steel rods are laid.
Then the trench is filled with a concrete mixture, and the channel is placed in it with the shelves down until they are completely immersed. It will be possible to continue the process of installing the gate only a few weeks after laying the foundation, until the cement has completely dried.
The supports for sliding gates are usually brick or concrete pillars, which are installed in the usual way after the foundation has hardened.
Connecting the frame structure and fastening the sheathing
The frame of sliding gates is most often made from a profile pipe with a cross-section of 60x40 or 60x30 mm. To install jumpers, you will need steel rods with a smaller cross-section. All material should be pre-treated with a solvent, cut using a grinder into pieces of the required size and painted.
Parts of a professional pipe with a large cross-section are welded together along the perimeter, forming a frame structure. After that, jumpers are installed on its inner part in the middle and diagonally, and a supporting beam is welded to the lower part.
Attention! All welding areas should be sanded to avoid rough deposits and coated with anti-corrosion primer and paint.
Installation of the sheathing can be done immediately, before the frame is secured to the poles. To do this, the corrugated sheets are cut into sheets and secured to the frame with self-tapping screws or special rivets so that the second and subsequent sheets slightly overlap the previous one.
At the same time, the distance between the fastening points should not be too large; there are 6 clamps per 1 m2 of canvas.
Gate installation
To install the finished structure, you will first need to assemble the sliding mechanism. To do this, the carriages are mounted on the mounting plate and welded to the channel along the marked distance. Rollers and catchers are installed on them and on the sash using bolts and welding, the operation of which must be immediately checked.
To make an entrance gate with automatic control, you should select a suitable automation kit in advance, taking into account the size and weight of the entire structure. It is best not to install it yourself, but to entrust the installation to specialists.
No matter how difficult the installation of metal or various structures may seem at first glance, it is still possible to do all the work for this yourself. At the same time, fencing made by yourself will not only save on hiring specialists, but will also bring invaluable experience that can be useful in the future, and will also bring pleasure from the process itself.
2018-04-25


