Drawing on milk at home. Unusual drawing on milk
It’s even hard to say whether this is drawing, or just an interesting experiment. Although, probably, both at the same time.
But the fact is that I had to repeat it three times in a row. Svyatoslav was very impressed with the process! His eyes widened periodically, and his mouth broke into a smile.
Therefore, I highly recommend conducting this experiment with a child, especially since all the ingredients are always at hand for this.
So, you will need:
- milk
- several containers with diluted paint. I took the usual gouache diluted with water
- some liquid soap.
Pour the milk into a wide bowl.
We drip different paints and watch how the paint spreads, you can mix the colors a little with a stick


At the end of the process, drip liquid soap, or dip a cotton swab in soap and lower it into a plate.
And watch the magic...


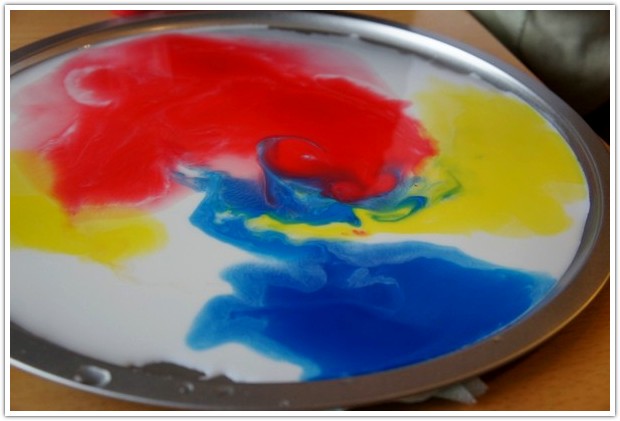
And when everything was mixed, this is what happened: 
We lowered the paper into the final spills and printed paint on it, the print turned out to be also interesting, but a little pale.
Our experiment was a success! Now, however, we have to hide milk, otherwise it will all go to an endless repetition of this experiment 🙂.
Irina Belova
Master class for teachers "Drawing on milk"
Master class for teachers: "Drawing on milk".
Prepared by:
teacher Belova Irina Valentinovna.
Members:
educators.
Conduct form:
pedagogical workshop.
The purpose of the master class:
exchange of professional experience with teachers of preschool educational institutions, on the organization of work with children and parents on artistic and aesthetic education.
Tasks:
Train teachers to work in this technique.
To promote the development of creative imagination, artistic and aesthetic skills.
Generate an interest in fine arts.
Master Product:
drawing, using acrylic paints, on milk.
Material:
Whole milk (cream 20% and above);
Plate;
Acrylic paints;
Glasses with water;
Wet wipe;
White paper.
Motto:
"Work for the hands - a holiday for the soul!"
Master class plan.
1. Introduction.
From the history of drawing on milk.
2. Practical part. Drawing technology.
3. Final part. Summarizing.
4. Reflection.
I. Hello, dear teachers! Thank you for coming to the master class. What is a master class?
It's fun and interesting.
This is an opportunity to create, to make a real thing with your own hands! Children, unlike adults, love to do everything themselves, in their own way.
This is a powerful development of abilities in many directions.
At the master class, you will receive information, acquire useful skills and abilities. For some, this is an opportunity to try something new and interesting. And someone, who knows, will find his hobby!
A bit from the history of drawing on milk.
This is a way of drawing on the water - the Ebru technique. And very ancient. Only the birthplace of the ebru technique came to us from Turkey, and even earlier (presumably) originated in ancient India, then passed to the Persians - it was they who brought the ebru technique to the Ottoman Empire. For ebru, a special solution is used: a mixture of water with the juice (nectar) of the Turkish endemic Gevena plant. This component gives water additional stickiness. Paints for the Ebru technique are used insoluble, spreading on the surface of the water. (You can use a mixture of paint with linseed oil). Traditionally for the Ebru technique, tools - a kind of "brush" - are made of rosewood and horsehair. With these “brushes”, the artist works with an insoluble film of paints - he mixes colors, stretches, twists, etc. As a result of such drawing, the paint on the water acquires a pattern similar to marble (another name for the ebru technique is Turkish marbling). Also, with the help of the same paints, additional drawings are applied over the marble background with the same tools - or only the background is saved.
You can try to reproduce some semblance of drawing on water using the ebru technique at home using milk and acrylic paints.
What are the benefits of drawing with milk?
Every child who paints with milk has a unique opportunity to express their hidden talents, to immerse themselves in the world of boundless fantasy, in the world of beauty and kindness.
Drawing on milk is a very interesting technique that children and their parents will definitely like, and even the most restless children who are quite difficult to interest in something for those who are older, such drawings are no less useful - if you dip paper into milk and carefully pull it out, then it will turn out to be a real work. This fascinating drawing technique will captivate not only children, but also adults - such creativity can be mastered by everyone, and doing it is a real pleasure. It also has bright colors, the magic of turning colors into funny patterns on milk. And the development of children's imagination.
Relatively simple techniques for making a drawing on milk make this area of \u200b\u200bcreativity unusually attractive.
Today I will introduce you to the technique of drawing on milk.
II. Practical work.
I would like to start my practical work with the words:
The cow sends greetings to you all!
Drink milk people
Eat milk people
And draw too.
You will be healthy!
There is a saying “It is written with a pitchfork on the water”, which means something fleeting and elusive. So how can we get such beautiful drawings from this fleeting and elusive?
(showing works in this technique)
These are the works of parents made at the Big Break events. The works are individual, not similar to each other, with different colors.
And today we will learn how to draw with paints on milk, we will master the method of marbling on milk.
So let's start in order:
(Eastern music on)
For drawing, we need fat milk, and even better - cream. Water for washing brushes and paint. I took acrylic gouache, it gives relatively bright, but at the same time pastel shades and almost does not mix with milk.
To paint with gouache on milk, you just need to dip the brush with paint into milk and wait until the paint forms a spot of the desired diameter around the brush.
And now with a wand in the air, repeat after me wave-like movements vertically, now wave-like movements horizontally, or maybe you want to make movements in a circular spiral, but someone wants to bring chaos to your creation.
Meditate gently on your milk. Do not think about the result, let yourself go on a personal flight of fantasy, surrender to the charm of the process itself!
But the most amazing thing about this drawing is the transfer to paper. Porous watercolor paper is best suited, it perfectly absorbs the paint, taking it all from the milk so that you can then paint on it again.
You just need to put a leaf on top of the milk for 4-5 seconds. Grasp the edges of the paper and gently drag it over the edge of the tray to remove excess liquid. It turns out so beautiful that you can even hang on the wall! Drawing dries from 30 minutes to an hour.
But, nevertheless, it will also be drawing on water, and the result can be very beautiful and original. And most importantly - handmade and unique.
(showing the work of participants)
(Music ends)
Conclusion: What gives me in my work the use of non-traditional drawing techniques, in this case, the technique of drawing on milk?
The unusualness of drawing helps to develop the cognitive activity of preschoolers, the desire to experiment, and most importantly, to correct their mental processes, because drawing on milk is a meditation that captivates, fascinates, and calms, and for a child, the result that causes joy, amazement, surprise is important.
Therefore, I believe that for children, drawing on milk is an excellent tool for developing imagination, motor skills, and creativity.
Reflection.
Dear teachers! I ask you to complete the reflection on the method of "Emotional writing". To do this, I suggest that you choose from the proposed emotions an icon that matches your mood in our master class and explain your choice. (Pictograms are offered: cheerful, sad, surprised, etc., those present choose a pictogram.)
Thank you for your cooperation! Creative success to you!
Related publications:
Master class for teachers on art therapy "Drawing in the sand as a method of development and education of preschoolers" Master class for teachers: Art therapy "Drawing on the sand as a method of development and education of preschoolers" Frolova Maria Alexandrovna Teacher-psychologist.
Master class for teachers and specialists of the preschool educational institution "Ebru - drawing on water, non-traditional technique" Master class for teachers and specialists of the preschool educational institution "Ebru-drawing on water, non-traditional technique." The purpose of the master class: To introduce the participants.
Topic: "Development of creative abilities of preschoolers by means of non-traditional drawing technique" Ebru "Purpose: Increasing the motivation of teachers.
Master class for teachers "Unconventional drawing in the genre of pointillism" Topic: "Unconventional drawing in the genre of pointillism." Purpose: to introduce the features of creating an image using the "pointillism" technique. Material:.

Do you believe in miracles? What about being a wizard yourself? This is possible with the help of seemingly ordinary items that can also become magical. Now you and your baby have the opportunity ㅡ to become magic artists who create truly unusual paintings. We will draw on milk, and also get acquainted with the technique drawing with cling film and not only. These techniques will help you because they are not difficult at all and very interesting. So let's get started!
Drawing on milk: create milky patterns
Are you familiar with drawing on milk ? It is very exciting! And now you will learn exactly how to do it. First, prepare liquid paints. It can be food coloring, diluted gouache or watercolor. But multi-colored mascara is best for our idea (the colors will be brighter and richer).
Pour milk into a bowl. Feel free to pick up paint with a pipette and drip it onto the surface of a white liquid in random order. Now the kid can take a toothpick or a skewer and create colorful patterns, stretching and twisting them as he wants.
Do you want to surprise your child and yourself even more? Dip a Q-tip in liquid soap or dish soap and touch it to the milk. Watch the magical dance of colors that can delight any kid! The higher the percentage of fat content in milk, the more active and longer the movements will be.

Drawing on milk can be modified with other techniques. The pattern on milk can be transferred to paper. Touch the surface of the milk with a piece of paper for a couple of seconds. Dry the leaf. And now, in front of you is the relief of some unknown distant planet or a map of an unexplored part of the globe. And you, as its discoverers, can come up with names for all the islands, seas, rivers with your baby. Let them be unusual and funny. All objects can be signed. And you will get a real map, where on the coast of the Chocolate River, which flows into the Tarampampura Sea, the island of Kurnosiki is located.
Milk can be replaced with potato starch, diluted to the thickness of sour cream, or stationery glue. Patterns on a more viscous surface will be fixed longer, and you can even feel like a novice master of Ebru, the ancient oriental art of painting on water. I suggest watching the video for inspiration.
I hope that drawing on milk for your children will become a new, interesting and exciting activity.
Miracle blot and magic wand
Here is another way unusual drawing with children . For it, you will need liquid paints and an ordinary cocktail tube. Help your child scoop up the paint with a teaspoon and pour it onto a sheet of paper. Now let the baby arm himself with a tube-magic wand and begin to inflate the blot to the sides, in a circle. You can simultaneously put several colored blots near each other. The child will simultaneously observe how a new color is born when several others are mixed.

Now turn on the fantasy. What does your blot look like? You can draw it to a certain image. If a child sees a thicket of the forest on a sheet, try to offer to complete the drawing so that half of the drawing becomes a fairy forest where a good wizard lives, and the other where an evil or harmful witch lives. Or let the child create a “good” and “evil” forest, having received this task when there is nothing on the sheet yet. Prompt that the character can be conveyed by color, but just do not impose your ideas about the emotional impact of color. Everyone can have their own.
And you can also add eyes to the blot, and now this is not a blot, but Barabyaka Pampukskaya in person, get acquainted! Write a story about a hero with your child, for example, like this ...

Barabyaka and ginger kitten
Once upon a time there was Barabyaka Pampukskaya. She was friends with a red kitten. Sometimes friends quarreled, and then Barabiaka's mood deteriorated, and she turned into a hissing and snorting tenacious scratchy paw. But the friends very quickly reconciled, and the sharp scratches of Barabyaki Pampukskaya became soft and fluffy. And when she folded them and folded them under herself, then everything turned into a ball of thread with which a kitten could play.
Dasha, 6 years old
Or you can send Barabyaka to the forest, where the very kind wizard lives, and then to the thicket, where the evil sorceress lives. What adventures will meet on the way of the restless Barabyaki?
Food film artist
Drawing with cling film ㅡ Have you ever heard of such a thing? Most likely not heard. I suggest you get acquainted in practice with this interesting way.
First, help your baby dampen the paper. Now let boldly apply color spots with a brush. The paint must also be sufficiently liquid. Take cling film or a cut plastic bag. Attach it to the sheet and slightly wrinkle, creating as many folds as possible.

After the work has dried, remove the film.As a result, vacuum bubbles are obtained, which cover a sheet of paper with a thin magic cobweb.


Here you can easily guess the mountains and the sea. If you have a home theater, these drawings can also be a beautiful backdrop for the stage.
Now let's add some music!
Any of these methods unusual drawing with children can be performed to different moods and tempo music. The drawings will be different in character. And you can offer the reverse task - to select a musical etude corresponding to the finished drawing from several data. Or maybe the child wants to “write” his own music for his picture and perform it. On a toy musical instrument or any household items that seem appropriate to him. You may have to endure a few noisy minutes of creativity from your undoubtedly talented kid.
Non-standard drawing techniques develop imagination, fantasy, creative thinking, as well as the emotional sphere. It's also a great way get your child interested in art if this interest is not already there. And, of course, they will give a lot of positive emotions. So do not expect a miracle, but wonder yourself with your children!
Oksana Yaremchuk, additional education teacher, psychologist
Greetings, friends! Today I suggest that you again be in the role of wizards and spend experience with milk, dyes and detergent at home for children. This experience is also called a color explosion in milk. But no matter how it is called, experience remains experience, and besides, it will not be difficult to make it, because every mother has all the components at home. Perhaps only with dyes there can be a problem. You can use the ones left after Easter. So, let's start experimenting with milk and dyes, the children have been waiting for
What you need for Color explosion in milk:
- Milk (water will not work!) - the more fat the milk, the better
- Dyes - you can use the dyes from the Easter set.
- Liquid soap or dishwashing liquid (we used Fairy
- Cotton buds or a match with cotton wool wound around the tip
- Deep plastic bowl
- Pipette
Experience with milk and dyes at home:
- First, we poured milk into a bowl. You need to pour in such a way that the bottom is completely closed, otherwise the experience will not work. Let the milk sit in the bowl for a while. Milk should be at room temperature, under this condition the experience will be more spectacular.

- Add a few drops of dyes of different colors to a plate of milk (you can use a pipette for convenience.
- Then, using a dry cotton swab, you can touch the milk a little (no need to mix). Remind the child that nothing is happening.
- After that, take another Q-tip and dip it in dishwashing liquid or liquid soap.
- With a stick dipped in dishwashing liquid, touch the milk for literally 10 seconds. Just touch, no need to stir!
- And then the most interesting begins - the child watches with admiration how the magic colors begin to “dance”, running away from the cotton swab. The child is delighted with the magic cotton swab and the colored explosion in milk. When we remove the wand, the colors continue to “dance”, move.


- Then you can invite the child to continue experiments - adding dyes, driving a cotton swab through the milk.
- My children experimented for a long time and in the end we got milk, as shown below in the photo. The kids were happy.

The secret of the milk experience: dishwashing detergent or liquid soap (depending on what you used to create the experiment) breaks down the fat in the milk and thereby causes the food coloring to “dance” in the milk.
I thought, maybe one of these methods will captivate their child ... I liked the idea with foam, let's try to draw in this way. Such a simple drawing can be done with paint and balloons.
1. Inflate a regular balloon to the desired print size. You can use different balls for each color.
2. Pre-prepare the paint, it can be either gouache or finger paints. It is most convenient to pour the paint on a disposable plate.
4. Then dip the ball into green paint and make an imprint next to the red, then another, make as many imprints as you want until you get the body of the caterpillar.
5. In order to show the mixing of colors, you can dip the balloon in blue paint and put a print on the already made green.
6. To complete the composition, draw eyes, legs and antennae.
Drawing in a box
But we prepared such a craft for our art box “Two palms” last year, we had a lot of fun!
We will need
- box
- paper
- ping pong balls
- paint (ordinary gouache is suitable, not very dense structure)
How to do:
1. Put a piece of paper on the bottom of the box.
2. We put the ball into the paint, one ball is one color of paint.
3. We lay out the balls in 4 corners of the box.
4. Close the box and shake or just roll the balls around the box in a circular motion. The fun is guaranteed, the masterpiece is ready, you can open your gallery or give the masterpiece to your dad or grandmother.
Drawing on shaving foam
Show the wonderful drawing technique to your little ones. Let's draw on shaving foam!
We will need:
- shaving foam (namely foam, not gel)
- utensils for mixing (this can be a bowl)
- paint that is easily absorbed (liquid food coloring, tempera paint or liquid gouache)
- pipette optional
- mixing stick
- landscape (porous sheet) paper
- flat wooden stick or board
We create:
1. Squeeze out the shaving foam into the container
2. Pipette different colors of paint
3. Stir with a stick
4. We put a sheet of paper in the foam, dipping a little
5. We take out, remove the excess foam with a flat board and voila, the drawing is ready!
Tactile drawing
What could be more interesting?
We will need:
- Finger paint
- bubble wrap
- food film
- sandpaper (not very rough)
- rough cardboard (you can tray from eggs)
It's simple - tell the kid about the different properties of materials, let him draw with his palms and see how the same paint falls on different surfaces, and, of course, the development of fine motor skills, where without it.
Drawing with a mixer
This idea is the BOMB!
So you haven't painted yet!
We will need:
- paints
- a box (you can even "Two palms")
- mixer
- sheet of paper (many sheets)
- good mood
Musical instrument?
No, it's a drawing tool
We will need:
- paper
- shoe box
- rubber band for money
- paints
Carefully! Spray!
Drawing in the rain
If it's raining outside, no problem!
Let's draw!
Just put multi-colored dots of paint on a piece of paper and take it out to the balcony or yard.
The rain itself will draw beautiful rainbow pictures.
Marvel at the magic with your baby.
Glue stained glass
It is very simple and fun to make bright stained-glass windows from glue and food coloring.
We will need:
- white glue (PVA is perfect)
- food coloring (liquid)
- toothpicks
- plastic cover
- hole puncher
- threads
We create:
1. Pour glue into the lid so that the entire surface is covered
2. Have your toddler put one drop of each color of food coloring
3. Give your baby a toothpick and ask them to mix the droplets, but just don't get too carried away so that you don't get a dirty brown color
4. Let the glue dry, it may take several days to dry depending on how much glue you used
5. When the glue dries, the edges will just start to separate from the lid
6. After complete drying, separate the resulting stained-glass window from the lid, make a hole and hang it to play with flowers on a tree or window.
Have fun and catch colored bunnies with your baby.
We paint salt
We offer to color the salt sculpture!
We will need:
- coarse salt
- a little water (so that the salt is not dry, but does not blur)
- molds for playing in the sandbox
We create:
Like in a sandbox, create your own salt “kusichku” together with your baby. Then take the liquid watercolor and gently pipette the paint onto the salt sculpture. Please note that if you do this with a brush, then the salt may crumble, but the pipette will not violate the harmony of your creativity.
This unusual and interesting activity develops creative thinking, fine motor skills, tactile sensations, logical thinking and will keep your child busy for a long time.
family app
Triple fingerprint application - fun for the whole family!
Make three footprints of all your family members, maybe even a cat or a dog - it will be fun!
If the prints are of different colors, the application will turn out rainbow :)
Each print must be cut out so that a small white strip remains.
Glue the cut out parts one on top of the other and insert into the frame!
colored bombs
We will need:
- Zip-lock bags
- cornstarch
- food coloring or watercolor
- vinegar
- soda
- paper towels or napkins
We create:
1. Mix starch, vinegar and coloring and fill one-third of the bags with the mixture.
2. Then pour soda into the middle of the napkin and form a bomb out of it.
3. Put a bomb in the bag and seal the bag tightly.
4. Then shake the contents well.
The package will begin to swell and in a few minutes there will be an explosion that will paint the streets with iridescent colors.
Drawing on the sheets
What could be more fun on the lawn in summer!?
You can invent and depict the whole world
Drawing with stamps
Drawing with stamps is always very exciting for children, but the most beautiful thing is that you can stamp with any materials at hand. Celery is no exception, it makes excellent stamps for children :)
We draw flowers with celery, the drawing can make an excellent postcard for grandmother on March 8.
Drawing on milk
We create:
1. Pour milk into a flat plate.
2. Add paint.
3. Dip the stick in dishwashing liquid, and lower it into the paint.
4. Hold the wand and see what happens.
5. We continue to add the soapy solution to different places on the milk.
Bubble painting
We will need:
- cups (can be disposable)
- bubble
- watercolor paints
- straw for blowing
- watercolor paper
We create:
1. Pour the liquid for soap bubbles into cups.
2. Add paint.
3. Mix well and start blowing colored bubbles onto paper.
4. We are waiting for it to dry and we can hang the work on the wall!


