How to embed a lock into an interior door: step-by-step instructions. How to embed a lock into an interior door with your own hands Install a lock on an interior door
This article is a step-by-step instruction on how to embed a lock into interior doors with your own hands. Here, ZAMSERVICE specialists share their skills and experience, describe the installation process in detail, and also give personal recommendations regarding the choice of a locking system. By following their advice, you can easily install the lock yourself.
If you bought an interior door without a lock or the old mechanism has expired, then it’s time to familiarize yourself with the nuances of installing a new product. The ease of installation directly depends on the modification of the selected device. The easiest way to mount latch handles is by carefully cutting out a hole of the required diameter, while locks with cylinders, rotary latches and handles require a more complex installation process.
For what reasons may you need to mortise the lock yourself?
Interior doors are installed in every apartment or house. They competently divide space, serve as protection against unauthorized entry, drafts, extraneous noise, etc. The door leaves themselves are not complete without a reliable locking mechanism. Many door manufacturers do not provide them with built-in locks.
If you bought an interior door without a locking system, then you can install it yourself. The main thing is to approach this issue responsibly, not to rush, to act carefully and consistently.
Another reason to cut the lock into the door yourself is if the old device breaks down. This can happen due to the expiration of the operational life, due to improper use of the lock, ignoring preventive measures, as well as due to mechanical damage to the structure.
In some cases, inserting a lock with a cylinder allows you to avoid large-scale repairs in the future, since replacing the cylinder is much easier and cheaper than completely changing the locking structure. Replacing the core will also be appropriate in cases where keys are stuck in the keyhole, as well as if they are lost or stolen.
How to choose a lock for interior doors
Before you install a lock on your interior doors, you need to purchase one. The design should be chosen based on the parameters of the door leaf; in particular, it is worth taking measurements first. If the width of the vertical bar of the door is less than 4 cm, then mortizing the lock is not only a pointless exercise, but also practically impossible.

In this case, door latches are more suitable, as they are quite easy to install and are the easiest way to lock doors. In addition, the choice of such designs is more than diverse. The modern market offers products of various sizes, installation types, colors and designs.
If the doors have higher security requirements and their width exceeds 4 cm, then mortise locks for interior doors of any well-known brand will be suitable. They are available in a wide range, ranging from standard models to multifunctional designs complete with door handles. The appearance of the product also matters, so the locking mechanism, or rather its external parts, must be in harmony with the color and design of the door.
Correct markings – high-quality lock mortise
Installing any lock always starts with markings. It is very important to avoid mistakes at this stage, since incorrect measurements lead to incorrect formation of the seat, which will certainly affect the quality of installation work in the future. As a rule, the consequence of illiterate marking is a distortion of the structure. That is why the contours should be marked as accurately and carefully as possible.
Many manufacturers of high-quality fittings and locking and hardware products complete their products with special templates for marking. This greatly simplifies the process and guarantees the exact location of the lock on the door leaf. If such blanks are not provided in the package, then you will have to make the markings yourself by attaching the structure to the door and tracing its contours with a pencil or any other writing instrument (felt-tip pen, pen, marker, chalk, etc.)

Before you pick up the tools for drilling holes and forming seats, you need to double-check the correctness of the markings several times. This will ensure reliable operation of the mechanism and eliminate the formation of distortions.
Step-by-step instructions for installing a lock
So, a suitable design has been found and purchased at the store, so it’s time to start inserting the lock. To do this, you need to perform a number of sequential actions:
- Mark the location of the lock on the door (usually 1 meter from the floor).
- Drilling a hole for inserting a lock with a drill (the diameter of the pen drill must be equal to the thickness of the lock, and the depth of the drilled hole must match the length of the lock structure).
- Marking the outline of the base plate on the door leaf.
- Carefully drill a hole for the handle (the drill should go right through the door).
- Marking the hole for the screws (attaching the structure to the intended seat).
- Drilling a hole to attach the lock to the door leaf (according to the received markings).
- Installation of decorative overlays.
- Fixing the rod connecting the door handles.
- Closing the doors and marking the location of the tongue on the door jamb.
- Apply the receiving pad to the intended location and trace its outline using a simple pencil.
- Measuring the length of the lock tongue and transferring it to the door frame.
- Attaching the lining to the seat with self-tapping screws.
- Checking the functionality of the device (adjusting or reinstalling the tongue if necessary).
As a rule, the above instructions are suitable for all types of interior doors, including those made of particle board, natural wood and plastic (in this case, you need to buy special locks designed for PVC products).
Features of mortise locks for various types of doors
Before embedding the lock into the MDF door, it is necessary to accurately measure 1 meter from the floor, since it is at this height that the additional wooden beam is located, and the rest of the door is hollow. By ignoring this recommendation, you can ruin the door leaf, and hopelessly. If any difficulties arise with the installation process, it is better to immediately contact specialists. The locksmith will install the lock expertly, while the door will retain its presentability and functionality.

Metal doors for installation inside apartments and houses are very rarely used, however, if you have this particular type of door leaf, then it is more advisable to use the services of professionals. In addition to the fact that such doors require a special type of lock, the process itself is particularly complex.
Interior doors made of plastic are quite common in modern interiors. You can fit a lock into such doors with the same ease as into wooden ones. The only thing is that the locking device itself must be designed for use in PVC products. Otherwise, the advice of specialists on installing locking systems in interior units is almost identical to the instructions above.
What tools are needed to mortise a lock?
You can install a lock on interior doors using simple tools that every home craftsman has. You will need:
- Hand drill with feather drills
- Chisel.
- Screwdriver.
- Screwdrivers (phillips and flathead).
- Carpenter's square.
- Hammer.
- Roulette (ruler).
- Pencil (pen, thin marker, felt-tip pen, chalk).
So, we figured out what tools are needed to install standard locks on interior doors. This list may vary depending on the complexity of the work, the type of door or mechanism. Some devices can be replaced with analogues. For example, instead of a chisel, you can use a chisel, and self-tapping screws can be easily screwed in using a drill.
And yet, not all types of locks can be cut using available tools. In some cases, you may need a milling cutter - a special device for door blocks that ensures high accuracy of the landing recesses. The milling machine is quite compact and easy to use. Using it, you can cut a groove of any shape and size, give the edges of the workpiece the correct shape, prepare niches for hinges and seats for locking mechanisms.
Mortising a lock with a router
If you have a milling machine at your disposal, then the task of installing a lock on interior doors becomes much easier. The lock is inserted with a router in a vertical position of the door on its side, which is achieved by securing it with a slipway. This avoids the need to constantly support the blade with your hands.

Having fixed the position of the doors, we proceed to mortise the lock:
- We mark the seat of the lock body and tongue.
- We cut out a recess for the locking device using a hand router.
- We insert into the machine a cutter corresponding to the dimensions of the plank.
- Adjust the required depth.
- We make a recess in the center.
- We prepare the seat for the body.
- We straighten its edges using a chisel.
- We insert the lock according to the above instructions.
A router is not a necessary tool for installing locking mechanisms, but some types of locks are almost impossible to install without it. This applies to latched locks, for the installation of which it is necessary to prepare a neat hole for the keyhole. Mortizing a lock without a cutter in the case of standard devices for interior doors is quite possible if you have all the necessary tools at hand.
In addition to step-by-step instructions for inserting locks into interior doors, each master has his own secrets that allow him to complete the installation as efficiently and quickly as possible:
- In order not to cut off extra millimeters with a router, the contours of the external markings can be limited with masking tape.
- Drilling through doors can damage the door leaf, so you can divide this stage into two steps. First you need to drill the door on one side, continuing drilling until the point of the drill appears on the back side. Then perform similar actions on the other side of the doors, using the resulting hole as the center.
- To hide the lock well in the hole, its depth should be 2-3 mm greater than the width of the lock body.
- If the lock is installed correctly, the door will unlock/lock without jamming or unnecessary effort. Otherwise, it is necessary to change the location of the counter plate.
- If you do not have suitable tools for installing locks, but you are going to buy them, then pay attention to special kits for inserting locking mechanisms. These kits include drills and bits that are exactly the right size.
- Immediately before attaching the lock to the door with self-tapping screws, it is recommended to verify its functionality. Try repeating several cycles of unlocking/locking the lock with the key and make sure that the mechanism is working properly.
Of course, you can install a lock in the door yourself, but if you are not confident in your own abilities and experience, then do not risk the doors and order installation from a professional service. Our technicians will come to your home and install the device quickly and efficiently.
While wooden doors and MDF panels are easily sawed and drilled, it is not so easy to install a mechanism in metal and plastic blocks. Therefore, in these cases it is also more advisable to contact specialists.
Installing doors in a doorway is a task that requires prudence and accuracy. But this door will not close without a lock. It cannot be opened without a handle. Embedding a lock into a wooden door means protecting yourself and your property from strangers, keeping you warm in the winter, and making the interior more interesting.
Mortise lock in a wooden door
How to install a lock on a wooden front door? To do this, you first need to prepare. Wood is a material that can be easily finished, but it requires experience working with wood flooring. You should know the type of wood and its abilities. To install a lock in a door you need:

The work involves stages that should be performed sequentially. If you don't follow certain, simple rules, the lock may stay in place, but will it work?
A selection of locks for wooden doors
Before choosing a lock, you need to answer questions about the lock:

Door locks are divided into types - rack, code, electronic, cylinder, lever. The rack lock is a simple design that is easy to break, you can break it yourself, and has a primitive appearance.
Cylinder lock – inside the lock there are cylinders located at different heights. If the element is not in its position, the lock will not open.
When forced, the lock is drilled or the core is knocked out. But, manufacturers add special elements to the lock material, against which the drill bit breaks. Such a lock has a long service life, is easy to change, and may have special plates, which are also a barrier for a burglar.

This is what a cylinder mortise lock looks like

The lever lock is a reliable design. This type of lock is practically unbreakable. To open without a key, a professional uses 2 master keys. Inside the lock there are levers that are driven by a key. 
Combination lock – to open the lock, you must enter a specific code. This lock cannot be installed on a wooden door. 
Electronic lock – does not have a keyhole. It has one button to open, which is located indoors. To open without a button, there must be a signal from the side. 
Once the issue of the lock has been resolved, you can begin to assemble the necessary tools.
Tools for cutting a lock into a wooden door
In order to embed the lock into the door, you will need to make a groove for the lock. After which the mechanism is installed. To do this you will need a cutting tool:


Set of tools for inserting a lock into a door
All these tools will be needed to install a mortise lock. To install the overlay mechanism, you will need a slightly different set of tools.
The process of making a lock groove
Before embedding the lock into the door, you need to take measurements and markings to cut out the groove. The instructions for the purchased lock indicate the different distance at which the handle should be located from the lock. This distance ranges from 95 to 100 cm, but many craftsmen correlate this distance with the height of the people living in the apartment or house. The taller the person, the higher the castle should be.
Making a groove for a lock:
- Let's say the height is 95 cm. It should be measured from the floor up.

Distance to the lock from the floor
- Next, you need to take the lock and place it in the place where the mark is placed, with the side that will be attached to the door. The lock mechanism needs to be outlined with a pencil.


- The hole for the lock is cut along the marked lines with a feather drill, the width of which coincides with the width of the lock bar. There are 2 methods for cutting the groove here. First: carefully, slowly move the drill inside the door 2 cm to the mark. Second: immediately drill the desired groove.

- The cut hole should be slightly larger than the width of the locking mechanism (by 2mm). This will allow the lock to enter the door calmly (without the use of physical force).
- You need to level the edges of the hole with a hammer or chisel.

- After this, you need to insert the lock into the resulting groove. It should enter the nest without hindrance.

- Next, you should mark the holes for the lock strip. To do this, you need to attach it to the door and circle it with a pencil.

Marking the holes for the lock plate
- Using the markings made with a chisel and hammer, a recess is made, the depth of which is equal to the thickness of the plank. There is no need to make the notch larger, but you also can’t make it smaller.

After the work has been done, you need to carefully and carefully try on everything. If there are any errors, they should be carefully removed with a sharp knife or chisel. So that nothing interferes with the insertion of the locking mechanism into the door.
When working with a drill, you need to keep the tool level. If the work is done at a degree of inclination, then the groove may be uneven.
Requires a minimum set of tools:
- Drill
- Chisel 19 mm
- Crown diameter 50 mm
- Spade drill 23mm wide
- Drill bit for wood or metal 4 mm
- Hammer
- crosshead screwdriver
- And a pencil
So, let's start cutting into the lock.


Drill a hole in the center with a 4mm drill bit.

We place the lock flush with the door and make a mark according to the fact

We drill through the hole with the same drill, maintaining a right angle.

Using a 50 mm crown we make a cut on one side of the door.
Attention!
Your specific case may require a different size crown.

Let's finish on the other side.


We take a self-tapping screw of a suitable length, close the door along the door frame and through the 50 mm hole, insert the self-tapping screw into the remaining 4 mm hole and, using pressure, make a mark in the door frame.


Using a 23mm feather drill, we cut a hole at the mark to a depth sufficient for the lock latch to engage.

Using the same drill, we drill a hole for the lock along the mark.

We insert the lock and make a mark with a sharp pencil to recess it into the door leaf.


Using a chisel, we make notches strictly according to the marks and make a selection so that the lock sits in the pocket, then we fasten it with self-tapping screws.

We begin to assemble the lock, insert the outer part into the grooves (as a rule, it does not require disassembly).


Then carefully remove the decorative “cup” sitting in the grooves, then press the latch and remove the handle.


We connect the two sides with screws.

We insert the handle so that the latch operates.

Snap the decorative “cup” into place.


We attach the striker, make a mark, use a chisel to remove the excess and screw it on.

Done!))) A correctly embedded lock closes freely by pressing the door leaf until it slams.
Video explanation for installing the lock
Instructions for installing a door lock (knob)
1.Marking the door

Apply markings on the door leaf to install the knob (lock) according to the template. Recommended distance from the floor is 965 mm.
2.Marking holes

After you have made the markings, drill two holes: 50 mm in diameter for the knob (lock) handle and 23 mm in diameter for the latch mechanism.
H. Installing the strike plate

Install the strike plate at the same height as the latch so that the additional tongue of the latch remains recessed into the body of the latch when closing, which is an obstacle when pressing.
4 Disassembling the knob (lock)
To disassemble the knob (lock), use a special key to press the spring-loaded latch at the place where the handle is attached and remove it.
5. Latch length adjustment

6. Installing the latch

Install the latch into the groove of the door (make sure that the bevel of the latch is directed towards closing the door). Install the cover plate with the rod so that the rod and coupling sleeves fit exactly into the grooves on the latch body.
7. Installing the knob trim(castle)

First, slide the inner jujube trim plate onto the rod and secure it with screws (or screws). Then screw on the outer part of the trim.
8. Handle installation

Install the handle so that the groove on the rod coincides with the groove on the knob handle, press the handle until it “clicks.”
9. Rearranging the mechanism in the halyard handle

For models of latches with a halyard handle (versions 01 and 03), installation is also provided for both left and right doors. To do this, it is necessary to remove the cylinder mechanism and the fixing mechanism from the handle body and swap them (according to the figure), in accordance with the side of the door opening.
Installation procedure.
1. Determine the installation location of the knob and apply markings, following the template and installation instructions.

2. Using the installed latch body, mark the installation location of the strike plate on the door jamb and select a groove for the strike plate.
3.Install the strike plate and secure it with screws.
4. Alternately check the operation of the knob from outside and inside the room.
5. For models of latches with a halyard handle (versions 01.03), installation on left and right doors is also provided. To do this, it is necessary to swap the locking mechanism and the cylinder mechanism from the handle body.

As you can see, fitting a lock into a door is not such a difficult task, the main thing is not to rush.
—————————————-
Photographer: Vladislav Mazitov
Inserting a lock is a responsible and quite labor-intensive undertaking. It is in the final stages of renovation. The whole process can be left to professionals in the workshop, or you can do the insertion yourself. To do this, you need to acquire a set of carpentry tools, since it will be impossible to embed a lock into an interior door without them.
Selecting a suitable lock
To choose a suitable lock for an interior door, you need to clearly define the requirements for it. The emphasis when choosing is on:- quality;
- unique design;
- color;
- noiselessness;
- key lock;
- latch functionality.
A handle is a must for an interior door, but a lock is not always necessary. The product is selected according to this principle. For the bathroom and toilet, a lock is required, but for the bedroom, an ordinary latch is enough. There are 3 types of mortise locks:
- WC type. This type of lock allows the user to close it on one side only, without using a key.
- Patent type. The most popular type of lock. Allows you to close the door with a key that fits all locks of a certain product model.
- Yale-type. Equipped with a Eurocylinder system, the uniqueness of the key depends on the secrecy of the lock. Such products are installed in the doors of a room to which access is limited, for example, in an office.
- Pen lock. This type of lock does not restrict access; it only makes it possible to close the door tightly.
Advice! If there are small children in the house, install locks with a child safety feature or a locking device.
Naturally, you can combine some requirements, but when you go to the store to buy a product, you should have a rough idea of what it will look like. The color of the lock is selected to match the door or, conversely, so that it contrasts against its background.
When purchasing a lock, you should pay special attention to the appearance of the product. Any scratch or dent is a sign of mechanical damage. You always have the right to refuse such an item before purchasing. Carefully examine all moving mechanisms. The springs must return the tongue and handle of the lock to the starting position without delay. Check the quality of the assembly: when the handle is turned, the tongue should be completely hidden inside the product. If you do not follow this procedure, you will not be able to open the door. Also make sure that your door leaf matches the thickness of the structure. And try opening/closing the lock (if you have one) several times to make sure it works without unnecessary squeaks or crackles.
Required Tools
To insert a lock, there is a special device that not only makes a through hole in the blade for installing a handle, but also cuts out a “pocket” into which the core of the lock is inserted. When installing a door with your own hands, the insertion is carried out using the following tools:- drill;
- set of wood drills;
- hammer;
- set of chisels;
- pencil;
- measuring tape;
- carpenter's knife.
Important! Observe safety precautions when drilling holes. When working, do not neglect glasses and a mask that protects the respiratory tract.
All tools must be in good working order. Knives and chisels are sharpened. If the tools do not work correctly, you will not only not be able to install the lock, but you will also ruin the blade.

Locks, regardless of their type, are mounted almost identically, the only difference is the “handle” type lock; its insertion is easier and faster.
Drilling a landing hole
Work on installing locks on door leaves is carried out at the final stage of finishing work in the room. No matter how much you cover installed handles and locks with plastic wrap, they will still get dirty or damaged. If the door is installed, and renovation work is ongoing in the room, it is best to screw a self-tapping screw into the place where the lock is installed; it will be enough to cover the door. Also, you should not attach the platbands to the door frame before inserting the lock; the door leaf is removed from the hinges for ease of operation, but they can interfere with this.To properly embed a lock into an interior door, you need to make precise markings. The product is installed at a distance of 80-90 cm from the bottom of the door leaf. Measure the required distance with a tape measure and mark the insertion location with a pencil. Attach the lock to the end of the door and mark the length of the hole.
Advice. When marking, make a small margin so that the product fits easily into the hole.
It is necessary to draw a line that runs through the center of the end of the door leaf. This will be the basis for cutting out the seat for the lock.
For ease of work, it is necessary to remove the door from its hinges, if it is installed in a door frame, and place the hinges to the floor. Place the canvas in such a way as to provide access from any side.

Drilling out the “pocket” for the lock is the most important step in the installation process of the product.
- Install a drill bit with a diameter corresponding to the width of the lock (1.2 mm) on the drill.
- Drill a hole (0.5 cm) at the intersection of the line of the middle of the end and the bottom mark of the lock location.
- Move the drill 7-8 mm higher and make another hole of the same depth.
- Continue making holes in 7-8 mm increments until the top mark of the lock location.
- Return to the bottom mark and cut another 0.5 cm deep along the hole left by the sharper drill. Continue to move carefully until you get an oval groove with a depth corresponding to the dimensions of the lock.
- Check how freely the lock fits into the resulting hole.
Important! Do not rush to drill the entire depth at once; a hole made in small steps will be neater.
Installing a lock escutcheon
When installing a lock with your own hands, some craftsmen install a lock plate on top of the door leaf, so that when the door fits tightly to the opening, it clings. To prevent this from happening, the lining is recessed into the canvas exactly to its width and compared with the surface of the door.Inserting a lock is an engineering process, so each stage requires detailed markings. Insert the lock into the drilled hole and make a mark around the entire perimeter of the plank. Make notches with a chisel along the edges of the intended place for the overlay. And carefully remove the inner part by lightly tapping the chisel with a hammer.
Advice. Work with extreme caution to avoid chipping the canvas. And do not drown the lock deep into the door leaf.
Hole for handle and lock core
After the above procedures, you can begin drilling holes to install the lock core and handles. Here the work is faster and easier. You need to drill 2 through holes - one for the handle, the other for the lock core.
But do not forget about the markings: here it must be done, taking into account the design of the lock and the drilling process. Please note that drilling must be done very carefully so that at the exit the pen does not break through, but drills through the front part of the canvas. It is best to avoid drilling through and make 2 marks on both sides of the door, then drill one hole and a second one on the other side.
Important! Make the marks for the holes as accurately as possible; if they do not match, further insertion will be impossible.
The main snag at this stage of the lock insertion process is drilling a hole for the lock core. To make a hole of the desired shape, you will need to work with a jigsaw or chisel.
Lock assembly and installation process
The final stage of the work being done is the assembly and final installation of the lock in the prepared place. It is very important to follow the sequence of certain actions:- Insert the lock into the prepared “pocket” that was cut in the center of the end of the canvas.
- Secure the product with two self-tapping screws at the top and bottom of the decorative strip.
- Install the core and attach it at the end by screwing in a long bolt. For the installation to take place correctly, you must insert the key into it with the tongue facing down. Try closing and opening the lock, then tighten the fastener (bolt) in the closed position.
- Insert the handle fastening pin into the corresponding hole, secure both handles on both sides of the door with self-tapping screws or ties.

The lock is installed and ready for use. If you have done all the work correctly, then the product will serve you flawlessly for many years, and you will not be tormented by the problem of “how to fit a lock into an interior door” for a long time. You can easily do this yourself. The video describes in detail all the points of the insert and shows the process in action.
How to embed a door lock with your own hands: video
If a lock is mandatory on entrance doors, then interior doors, as a rule, are not equipped with locks. However, quite often there is a need to provide this or that room with an “increased level of privacy”, and in this case it is impossible to do without a lock.
Of course, you can call “specially trained people” and ask them to install a lock on the interior doors, but why spend extra money when you can do such work yourself. Let’s not lie, this task is not so simple, but nevertheless quite feasible. So, we cut the lock into the interior doors with our own hands.
Different models of locks: main features
There are several types of locks for interior doors.
First of all, they differ in the location of the keyhole. The most popular are locks with a hole located under the handle, and with a hole located directly on it (such locks are called nobs).
The simplest lock for self-mortise
There are also systems without a lock, but with a latch, which allow you to lock the door on only one side.
The easiest ones to install on your own are knock-off locks.
In addition, locks may differ in the way the tongue is secured. And although the fixing option does not affect the insertion technology, we nevertheless list the main ones:
- Roller - operates due to rollers and springs;
- The halyard is a reed mechanism that secures the latch;
- Magnetic - the tongue attracts a magnet, and the spring blocks its movement.
Features of inserting locks into doors made of different materials
The technology for inserting a lock depends not only on its design, but also on the material from which the door is made.
The simplest, one might say “classical” technology is used when installing a lock on a door made of solid wood. In this case, it is enough to simply make all the corresponding recesses and holes, without particularly worrying about the various nuances.
The location of the lock when installing it in a wooden door does not matter.
When inserting a lock into an MDF door, be sure to take into account that such doors are hollow inside, and a special additional block for insertion is located at a height of exactly 1 meter from the floor. If you try to make a hole for the lock higher or lower, you will simply ruin the door leaf. Otherwise, the technology for inserting a lock into an MDF door does not differ from the “classic” one.
It is unlikely that you will be able to install a mortise lock on metal doors or doors made of PVC profiles yourself. This work requires certain skills and special tools, so it is better to entrust the solution of such problems to professionals.
Required Tools
In addition to the “standard” set of tools for working with wood, you will also need a set of crowns for cutting round holes in the wood. Without them, installing a lock on the door will be, if not impossible, then very problematic.
Using crowns you can make holes of various diameters
In addition to the piers (as circular crowns are called), you will need the following tools:
- drill or screwdriver with drilling function;
- hammer;
- chisel;
- screwdriver;
- roulette;
- pencil.
To conclude this section, I would like to say that there is a special tool for cutting locks, called a milling cutter. Of course, it doesn’t make sense to buy it to install one, two or even five locks, but if suddenly one of your friends happens to have such a device, then it will significantly facilitate the work of installing a lock. We will not focus on the technology of working with a milling cutter, but we suggest you simply watch a short video that clearly demonstrates the operation of this tool.
Video: inserting a lock using a router
Knob lock insertion technology
As already mentioned, the simplest technology is to insert a nob lock into an interior door, that is, a lock in which the keyhole is located directly on the door handle.
Standard kit of the lock-knob
Using the same technology, you can install a lock with a one-way latch.
The first step is to determine the location of the future castle. To do this, go to the door and “pull” the imaginary handle. Exactly the place to which your hand will reach will be optimal for installation.
If you follow the standard location of the door handle, then it must be placed at a height of one meter from the floor.
Having determined the height of the lock, it is necessary to make precise markings. To do this, measure the distance from the lining in which the lock tongue is located to the center of the hole into which the rotary mechanism will subsequently be inserted. It is this distance that needs to be measured from the edge of the door leaf at the height you choose.
Now you need to choose a crown of suitable diameter. It should be smaller than the decorative trim under the handle, but at the same time large enough for the lock mechanism to fit into the resulting hole without effort.
There are special sets of crowns designed specifically for inserting locks - nobs. They include only two nozzles of just the diameter you need.
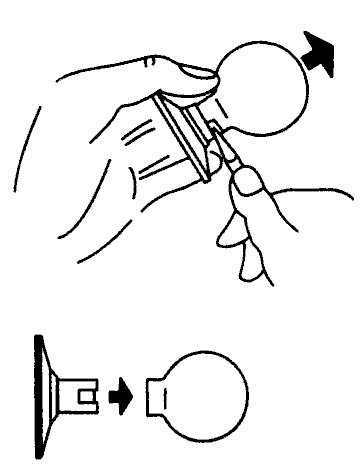
Now we drill a through hole in the door with the selected crown and the first stage of work on inserting the lock can be considered complete.
Drilling a hole with a core bit
The crown is removed along with unnecessary wood
All that remains is to drill a hole in the end of the door into which the locking mechanism will fit. When selecting a crown, follow the same rules as in the first case.
Please note that if, when drilling the first hole, a slight discrepancy in height with the markings made is not critical, then the second hole must be drilled exactly at the level that coincides with the center of the first. Otherwise, you simply will not be able to assemble the castle.
The end hole is drilled at the level of the center of the first
When both holes are ready, all that remains is to make a small recess in the end of the door into which the decorative trim will lie. To do this, attach the overlay to its location, outline it with a pencil and, using a small chisel, “select” a layer of wood that is equal to the thickness of the overlay.
Marking for the recess for the end plate
Now all that remains is to assemble the castle.
First, insert a part of the lock with a locking tongue into the hole in the end of the door. After this, insert the lock core with one of the handles into the socket, which should be in the center of the first hole.
Lock assembly
We put a second handle on the protruding part of the core on the other side of the door.
When assembling the lock, make sure that the handle with the stopper is on the correct side of the door.
If the lock works, all that remains is to fasten the entire structure using the screws and self-tapping screws included in the kit.
After checking, the lock is secured with screws and self-tapping screws
How to embed a lock with a hole under the handle
The insertion of a “classic” lock with a keyhole located under the handle differs from the installation of a knob lock only in the size of the end hole. It must be significantly larger to accommodate the entire lock mechanism.
It is most convenient to make such holes with a router, but if you don’t have one, you can easily get by with a “handy tool.”
Making an end hole with a router
At the selected height, attach the outer lock lining to the end of the door and trace its outline with a pencil. Now select a crown whose diameter will be slightly smaller than the width of the drawn outline. Next, you need to “drill out” the space needed to insert the lock mechanism. To do this, first make several adjacent holes to a depth equal to the width of the locking mechanism, after which the remaining wood at the intersection of the holes is removed using a chisel.
If you don't have a crown, you can use a regular large-diameter wood drill.
When the main end recess is ready, the lock mechanism is inserted into it so that the rotating core rests against the end of the door.
A mark is made at this point and a straight line is drawn through it using a square.
On the resulting segment from the edge of the door, measure a distance equal to the distance from the outer edge of the mechanism to the center of the core. It is at this point that the second hole is drilled using a crown.
When both holes are ready, all that remains is to assemble the lock in accordance with the instructions included with it.
Video: inserting a lock into an interior door
In conclusion, we bring to your attention a short story about inserting a lock into an interior door. We hope this video material will help you finally understand all the intricacies and nuances of this technology.
If you have all the necessary tools, inserting a lock into an interior door is not as difficult as it might seem at first glance. But if you are not confident in your abilities, we recommend practicing on an old door and only then proceeding with the “finish” insertion. Good luck with your renovation!


