Installation and connection of storage water heater
This article will probably be more useful to residents of high-rise buildings than residents living in private homes. Although, if there is no gas connected to the house, or it is a country house, then the storage water heater will be just what you need.
In urban apartments, hot water supply is turned off twice a year: in the fall before the heating season and in the spring after the heating season. Each outage lasts an average of 2 to 4 weeks. So it turns out that a city dweller for a year about a month or two washes in a basin. It's good who has a bath, and who has a shower ...
1. Choosing a storage water heater.
First of all, we determine the volume of the tank.
30 liters is enough for our family of three. True, it also happens that if someone decides to warm up a little and uses more water than they should, then the rest have to wait about 20-30 minutes until the next 30 liters are heated up.
Now we choose the design, and in what design the water heater will be: vertical or horizontal, flat or round, elongated or square, classic white or any other suitable color.
But, again, in order to choose the design and execution, you need to decide on the installation location of the tank. Typically, a water heater is installed in the toilet above the toilet. However, if you have a combined bathroom, then place the tank so that it fits into the design of the bathroom, does not take up the necessary space and does not interfere.
2. Installation.
Installation is simple and does not take much time.
Here you will need a hammer drill - if concrete, or an impact drill - if brick.
Drill or drill with a diameter of 10 mm, and two anchor bolts.
We make markings, drill, drive the anchors and hang the water heater.
3. Connecting the water heater to the water supply.
We will consider two connection schemes: the first is when you make repairs, and the water heater is initially installed permanently. The second is when repairs will only be or are not expected in the near future, but you want hot water. By the way, according to the second scheme, my tank worked for almost 6 years, until finally a repair was made.
In general, the water heater connection diagram is very, very simple.
It is connected in parallel to the domestic water supply system: the inlet to the cold water pipe, and the outlet to the hot pipe.

Let's take a look at the diagram.
When to the apartment hot water comes in- No water heater required. It is cut off from the apartment water supply system with valves №3
and №4
, that is, in normal mode, these valves are closed. Cold and hot water circulates through the pipes as it should be.

Now consider the scheme when the central water supply is turned off and hot water not received to the apartment.

We turn on the water heater.
For this close inlet valve №1
on hot water and open valve №3
and №4
. We supply 220 Volt power to the water heater, and wait about 40 - 50 minutes (depending on the capacity of the water heater) until the water in the tank heats up to the set temperature. Once the water has warmed up, use it as usual.
As hot water is used, the same amount of cold water enters the tank, where cold and hot water are mixed. When the amount of cold water exceeds the amount of hot water, the water in the tank will become warm, and you will have to wait a little for it to heat up.
Now consider temporary water heater installation diagram.
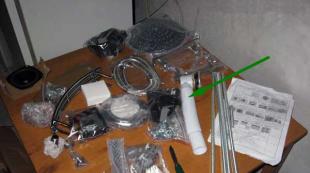
In this case, we need: 2 tees, 2 flexible hoses for connecting water, a fum tape and a plug with a cord. Cord enough to reach the nearest outlet.

First of all, we determine the place of installation of the water heater. It can be mounted on the wall, or you can just put it on the floor, or put it away somewhere.
When we have decided on the installation site, we measure the length from the water heater fittings to the nearest mixer. We purchase two flexible hoses of approximately the same length.
We remove the mixer and screw the tees in its place.
Wrap all threaded connections with fum tape.
Do no more than 3 turns.
Now we install the mixer in place, but already in a tee. Well, we screw the hose from the water heater into the upper part of the tee. As you can see, everything is simple.

Advice. First, assemble the connection diagram to the tee in the store, so that later you don’t run and change the part that doesn’t fit.
When hot water is given, and if the tank bothers you, it can be turned off and removed until the next time. And in the vacant place in the tee, screw the plug.
More to be said about safety valve that comes with the tank. On the diagrams, it is indicated under №5 . This is such a necessary element, without which it is impossible for the water heater to work.

As we know, water expands when heated. And since water is an incompressible medium, when heated, the water will expand, thereby creating pressure on the walls of the tank, as well as on the inlet and outlet pipes. The water has to go somewhere.
So, if there was no safety valve, then when a certain excess pressure was reached, the water would simply break the tank. When there is a valve, the maximum allowable pressure created by water is released through this valve.
The safety valve itself is set to a certain maximum pressure, upon reaching which it works. Therefore, if you notice that water is dripping from the valve - do not be alarmed, this means that it is dumping excess.
4. Supply voltage to the water heater.
For a water heater, it is desirable to stretch a separate power line of 220 volts.

The figure shows part of the access shield of high-rise buildings of the old building (copied from my own). In the driveway or in your shield are added: RCD - QF2, circuit breaker - SF1 and zero block N1.
Remember. Zero block N1 is in no way connected with a common zero.
The following figure shows a diagram with zeroing. That is, you zero on the body of the access shield, thereby forming third conductor necessary for the correct operation of the RCD.

These two water heater connection schemes are used in old high-rise buildings (system TN-C). But which one to use you decide. I personally have not installed an RCD, although I am thinking about it, but I have not yet decided on the circuit.
Be sure to read the articles: and. And only after reading these articles, choose according to which scheme you will connect the water heater.
Well, the electrical circuit for houses of modern construction (system TN-S). Perfect connection. Here, too, I think everything is clear.
Yes, I almost forgot. The supply cable is led directly from the shield to the water heater, and does not start into any junction boxes.

Now you can easily install and connect water heater to the domestic water supply system, as well as supply a 220 volt supply voltage to it.
Good luck!