Warm toilet in the country: 2 options for solving a delicate problem
Specialization: a professional in the field of construction and repair (a full cycle of finishing work, both internal and external, from sewerage to electrics and finishing work), installation of window structures. Hobbies: see column "SPECIALIZATION AND SKILLS"
A warm toilet and sewerage in a village house is the dream of every summer resident. And this is quite understandable: if a person at least once in the rain ran out into a wooden structure standing near the fence, then he will definitely appreciate the benefits of the bathroom located in the house itself.
In principle, the arrangement of the toilet is not one of the most difficult tasks. Having studied the specialized literature and developed a suitable project, it is quite possible to implement it with your own hands. Of course, you will have to work hard, but in one season you will definitely cope.
Circuit diagrams: 2 options
At one time, thinking about how to build a warm toilet in a private house, I analyzed several projects of such structures. By and large, they all came down to the implementation of one of two options:

In terms of comfort - not the best solution
- We make a classic bathroom with a water supply, a toilet bowl and the removal of wastewater through a pipeline into a storage tank - a cesspool or. A variation of this option is to connect the sewer circuit to a centralized sewerage system, but in the private sector, where my house was located, there was no such blessing of civilization.

- We equip a separate room in which we install a dry closet. In principle, for the operation of such a system, there is no need to lay a water pipe: it is enough to install a small washstand for hygiene procedures, and collect drains (there will be very few of them) in a container and pour them into a cesspool on the street.
By and large, the choice between these two options depends on the availability of water supply: if there is a water supply system, or we plan to do it, then we lay in the project a scheme with a toilet bowl and a drain through the sewer pipe. But for a small country house in which we do not spend much time, a dry closet would be a perfectly acceptable solution.

Since in my case the water supply was available, I chose the scheme with a septic tank. However, I also analyzed the options with a cesspool and dry closet in sufficient detail, so in the descriptions I will pay attention to the features of their implementation.
Place for drains
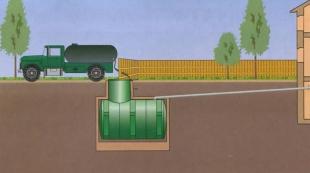
Cesspool
Before you make a comfortable bathroom in a wooden house, you need to make sure that we have where to remove the drains. There are two solutions here - one is simpler, the second is more convenient to use.
A simple solution is to equip a cesspool - a reservoir in which effluents accumulate until they are pumped out by a sewage plant. It is worth making a cesspool if you use the country house relatively infrequently: the smaller the volume of drains, the less often you will have to pump out, therefore, the financial costs will be less.

A cesspool is made very simply:
- We choose a place in the lowland, at a distance of at least 5 m from the wall of the house and at least 12 - 15 m from the water intake points (well or well).
- We remove the fertile soil layer to a depth of about 0.5 m and an area of about 3-5 m2. The excavated earth can be used in the beds, or it can be returned to its place by covering the cover of the pit with turf.
- We dig a pit up to a depth of 2.5 m and an area of 2-3 m2.
- To avoid contamination of soil and groundwater with fecal masses, we seal the bottom of the pit. I would use a 20cm layer of clay laid over three layers of plastic sheeting.

If finances allow, or you want to achieve maximum reliability, then about 10 cm of concrete can be poured over the clay.
- The option with earthen walls is quite viable, but short-lived. To fix the structure, it is better to use a crate of tightly fitted boards (serves up to 10 years). Well, if possible, fold a box of old ceramic bricks: if you believe the experts, then such a pit will definitely serve for 20-25 years.
- From above, the structure is covered either with thick boards or concrete slabs. A hole must be made in the ceiling for a hatch through which pumping will be carried out.

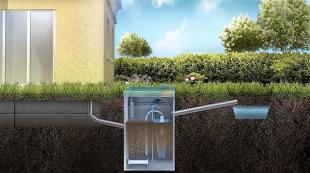
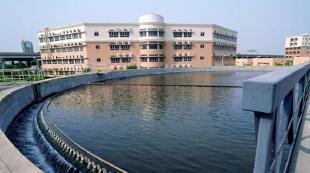
septic tank
The obvious minus of the cesspool is its inevitable overflow. To avoid the need for frequent pumping, I equipped a two-chamber septic tank in my suburban area.
The instructions for making a septic tank may differ depending on its configuration, but since I had the task of implementing the most economical option, I did this:
- First, at a distance from the house and from the well with the installed pump, a pit was dug 2.5 m deep, 3 m long and 1.5 m wide. Since the volume of excavated soil was impressive, I had to involve two assistants in the work, otherwise the work would have been delayed.
- Then two adjacent chambers of ceramic bricks were built inside the pit. At the same time, the first chamber was folded "solid", and holes were made in the lower part of the second chamber.
In no case should you use silicate brick, which does not withstand prolonged contact with a liquid, especially one as aggressive as sewage. Monolithic concrete chambers, concrete rings for sewer wells and even tires from heavy vehicles can become an alternative to ceramic bricks.
The ideal option is generally to buy a plastic container for a septic tank, but here a rather high price stopped me.
- The bottom of the first chamber - a sump - was covered with clay with a layer of 15 cm, after which I concreted it for maximum tightness.
- In the bottom of the second chamber - the filtration well - I made about a dozen holes with a depth of 0.5 m using an old auger ice drill to improve drainage. Coarse gravel was poured into the holes, and the same gravel was laid on the bottom with a layer of about half a meter.
- An overflow pipe was installed between the chambers at a height of approximately 1.7 m from the bottom.
- In the sump at a distance of 50 cm from the ground level, I made a hole for a drain pipe.
- From above, the entire structure was covered with a concrete slab with holes for two hatches. Separately, I had to drill a groove in concrete to install a pipe 1.5 m high.
The advantage of this solution, despite its laboriousness, was a long battery life: effluents entering the sump are divided into fractions, while the clarified liquid is poured into the second chamber, where it is gradually filtered into the ground.
Since I add special bacterial cultures to the septic tank and do not use the country sewerage so often, I have to pump out every three years. And then, to be honest, for prevention - according to my estimates, the system can work for a couple more years without compromising the quality of cleaning.
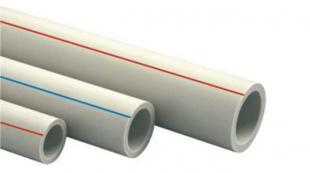
Pipe laying for the house
Installation in a private house of sewage in general and a toilet in particular involves the transportation of wastewater to a cesspool / septic tank / collector. To do this, we need to lay an underground pipe:
- We dig a trench at least 70 cm deep from the house to the tank. The deeper the pipe is located, the less risk that its contents will freeze in winter.
- We make the bottom of the trench with a slope of about 2.5 - 3 cm per 1 m.
- Under the pipes we lay a bed of sand. The optimal bedding thickness is 10-15 cm.
- We lay pipes (we use only products for outdoor work) and carefully seal all joints.
In my case, the pipe went in a straight line, but if you need to make a turn or lay a pipeline with a length of 15 m or more, then it is mandatory to equip at least one revision well. I became convinced of the usefulness of such a structure when I had to help in cleaning the sewers in a neighboring area: it is much easier to remove the blockage if there is access to the problematic point of the pipe.
- We insulate the pipes with mineral wool or fiberglass, then fill them with soil and carefully ram it.
- We pass the pipe outlet into the hole that we left in the wall of the cesspool or septic tank.
- At the entrance to the house, we lead the pipe into the hole in the basement and attach it to the internal riser.
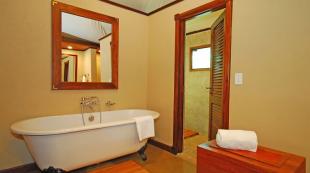
Toilet in a country house
Arrangement of the premises
Making a toilet in a wooden house with our own hands, we often encounter constant humidity in the selected room. You can solve the problem if you approach it as responsibly as possible:
- We choose the room itself in such a way that it is located at the outer wall of the house, as close as possible to the cesspool. So we will save on pipes, and we won’t have to pull communications through the rooms.
- If the bathroom was not originally laid out in the project of the country house, at the first stage we make a partition, separating it from other rooms with a frame wall with plywood or OSB sheathing. To make the toilet really warm, we lay heat-insulating material inside the frame.
- We install a door separating the bathroom with all its sounds and smells from other rooms. To ensure airflow between the lower edge of the door and the threshold, there must be a gap of at least 5 mm.
- We make holes in the walls and in the floor, through which we bring water pipes and a sewer pipe into the room. We fix adapters / taps on the walls to connect the toilet bowl and washstand.
- The floor is either left wooden, covering it with several layers of a waterproofing composition with an antiseptic, or we cover it with ceramic tiles.
- We also protect the walls from moisture by treating them with waterproofing or sheathing with plastic panels. In the second case, additional insulation can be carried out by laying foam plastic, mineral wool or a foil-coated polymer sheet under the sheathing frame.
- Under the ceiling, be sure to make a ventilation hole. You can get by with a simple air vent, but I preferred to install a simple electric fan, and brought its power to a separate switch - this made forced ventilation of the bathroom much more convenient.
Option with toilet
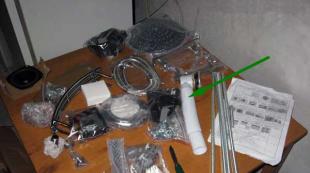
As I noted above, it is best to make an ordinary toilet in a private house with a classic toilet and sink. Installation of equipment in a room with communications connected is a fairly simple task:
- First fix the toilet. To do this, we fix a thick board impregnated with a moisture-proof compound with anchors to the floor (wooden or tiled). We put the base of the toilet bowl on the board and fasten it with the fasteners included in the kit.
- We attach the toilet drain to the outlet of the sewer pipe coming out of the floor or wall using a rubber cuff. To seal this node, we use sanitary silicone.
- We install a tank on the base of the toilet bowl, to which we attach a hose for supplying water from the water supply. Connect the other end of the hose to the faucet at the end of the water pipe.
- We hang the sink on the wall in the chosen place. We attach the drain elbow of the sink to the pipe, which is then brought into the general sewer circuit.
- Either on the sink or on the wall above it, we install a mixer. We fasten hoses with hot (from the boiler) and cold water to the mixer outlets.
The whole system we have created will only work effectively if both the toilet and the sink are above the level of the drain. Otherwise, and also if you plan to use the sewer very actively, I would recommend installing an additional sewer pump in the system, which will ensure the forced removal of drains.
Option with dry closet
It is also possible to make a comfortable toilet in the country without a cesspool and internal plumbing. Naturally, this will also have to equip the premises, but the direct disposal of waste will be carried out using biological treatment systems.
To date, there are several types of dry closets suitable for use in private homes:
| Device type | Description |
| compost | Partial waste disposal systems operate either on peat or on a mixture of peat and sawdust. When interacting with fecal masses, the material is effectively composted, and the following portions are poured into the container using an autosampler. Total recycling systems work on a similar principle, but composting is more efficient, and we additionally get a fairly effective fertilizer as a result. |
| Separation | In the waste disposal process, wastewater is separated into a liquid and solid fraction: solid feces are then removed for composting, and the liquid is filtered in a special unit. |
| Thermal | The system requires about 5 kW of power to operate, so you can install a toilet only in houses with a good power supply. During disposal, the waste is burned to ash, and the moisture evaporates through a special condenser. |
| cryogenic | The fecal masses that enter the dry closet are frozen, which allows you to destroy almost all microorganisms and get rid of the unpleasant odor. The downside is the dependence of the system on the presence of voltage in the network, therefore, for a private house, I would not recommend such a device. |
Even if we limit ourselves to the simplest models that run on peat, you can provide yourself with a fairly high level of comfort. However, this system is unlikely to be compared with a full-fledged toilet bowl, therefore I would still advise considering the possibility of creating a full-fledged waste disposal system - albeit based on the simplest cesspool.
Reference materials for budgeting
Getting started, you need to draw up an estimate that takes into account all costs. Doing the basic operations with your own hands allows you to significantly optimize the budget, but you still have to buy materials. At this stage, a table containing indicative prices will help you.
Using the information given in it, you will be able to predict at least the order of the amount that you will need.
| Material | Unit/capacity | Estimated cost, rubles |
| Sewer pipe for outdoor work 110 mm | 1 m. | 125 — 200 |
| Sewer pipe for interior work 50 mm | 1 m. | 75 — 150 |
| Metal-plastic water pipe 16 mm | 1 m. | 70 — 120 |
| storage tank for septic tank | 1 m3 | 18000 |
| Septic tank TANK-1 | 1.2 m3 | 19500 — 22000 |
| Impregnation waterproofing for wood | 10 l | 800 — 1500 |
| Penetrating primer with antiseptic | 5 l | 250 — 500 |
| Mastic waterproofing | 5 kg | 1200 — 1700 |
| Tile adhesive CM 9 | 25 kg | 220 — 400 |
| Grout for tiles | 5 kg | 600 – 1200 |
| Tile budget | m2 | 45 — 90 |
| Mid-Range Tiles | m2 | 250 -500 |
| PVC lining for wall cladding | m2 | 150 -250 |
| Wooden beam for the frame | Panel 6 m | 80 — 200 |
| Galvanized steel profile | Panel 3 m | 150 — 350 |
| Sink Rosa Standard | PCS. | 850 — 950 |
| Toilet-compact Santek | PCS. | 3100 — 3500 |
| Dry closet Thetford Porta Potti Qube 145 | PCS. | 4000 — 4500 |
| Dry toilet Biolan (separation) | PCS. | 26500 and above. |
Naturally, only some items of expenditure are taken into account here. To implement the project, you will need a lot more materials, including various mortars, sealants, fasteners, fittings, plumbing fittings, etc.
Conclusion
As practice shows, it is possible to make a warm toilet in a village house with your own hands. Of course, this is not a quick business, and it will require financial investments, but if you follow the advice I have given, and also carefully study the video in this article, then everything should work out.
In addition, questions that arise during the design process can be asked in the comments - I will answer you in the most detailed way.
August 2, 2016If you want to express gratitude, add a clarification or objection, ask the author something - add a comment or say thanks!