Plumbing in a private house: common organization options
Laying a pipeline for water supply is a task no less significant than choosing and connecting pumping equipment, arranging a water source. Incorrectly conducted plumbing in a private house can lead to pressure surges, disruption of the system. To avoid problems, you need to carefully study all the nuances of the work.
Plumbing can be carried out in two ways - with serial and parallel connection. The choice of scheme depends on the number of residents, periodic or permanent stay in the house or on the intensity of use of tap water.
There is also a mixed type of wiring, in which the mixers are connected to the plumbing system through a manifold, and the rest of the plumbing points and household appliances are connected using the serial connection method.
Series connection diagram (tee)
It is an alternate supply of pipes from a riser or water heater to plumbing fixtures. First, common pipes are diverted, and then, with the help of tees, branches are led to places of consumption.
This method of connection is more economical, it requires fewer pipes, fittings, it is easy to install. Pipe routing with a tee system is more compact, it is easier to hide it under finishing materials.
But a series connection is more suitable for municipal apartments, for houses with periodic residence or with a small number of residents. It cannot provide uniform pressure in the system when it is used by several users at the same time - at the most remote point, the water pressure will change dramatically.
With a sequential scheme for connecting a pipeline with hot water, discomfort is especially noticeable - the water temperature changes dramatically if several people use the water supply at once
In addition, if it is necessary to carry out repairs or connect a plumbing fixture, you will have to disconnect the entire house from the water supply. Therefore, for private houses with high water consumption and permanent residence, it is better to choose a scheme with parallel plumbing.
Parallel connection diagram (collector)
Parallel connection is based on the supply of individual pipes from the main collector to the water intake points. For cold and hot mains, their collector nodes are installed.
This method requires laying a large number of pipes and, accordingly, creates difficulties in masking them. But on the other hand, each water intake point will have a stable water pressure, and with the simultaneous use of several plumbing fixtures, changes in water pressure will be insignificant.
A collector is a device with one water inlet and several outlets, the number of which depends on the number of plumbing units, household appliances that use tap water for operation. The collector for cold water is mounted closer to the pipe entering the house, and for hot water - at its outlet from the water heater. A cleaning filter and a pressure regulating reducer are installed in front of the collector.

Each output from the collector is supplied with a shut-off valve, which allows you to turn off a specific water intake point, while other outputs will work in normal mode. In addition, each of them can be equipped with a regulator in order to maintain a certain pressure for individual devices.
Separation according to the principle of water supply
The installation of a DHW and cold water system can be carried out in two ways:
- With "deaf" wiring. The water supply pipe to the last water intake point ends in a dead end. Such a scheme is more beneficial for saving space and from an economic point of view, but it can create inconvenience during the operation of the water supply system. Water will enter the last node with a delay, and only after it reaches the plug will it begin to flow into the tap.
- With closed circuit. With this method, water constantly moves in a circle, has the same temperature at every point in the system, and flows to the user immediately after opening the tap. It is advisable to use the feature of this wiring method specifically for the hot water supply system - it is important to prevent sudden temperature fluctuations in it.
In order not to unnecessarily complicate the plumbing in the house, it is more rational to use a combined version. A cold water supply system is performed using a blind wiring, a hot one - using a circulation system.

On a simple diagram, the differences between different water supply schemes are immediately visible: 1 - standard, "deaf"; 2 - with forced circulation; 3 - "deaf" using a collector
How to make a diagram yourself
In order to properly plan the plumbing system, you must first draw up a plan for the house, placing in it all plumbing devices, equipment that will be connected to the water supply. All dimensions are indicated on a single scale, according to actual measurements of the premises. The more accurately the plan is drawn up, the more accurately it will be possible to determine the required amount of materials and components.
The water supply scheme should reflect as accurately as possible all points of water intake, the length and location of pipes for transporting water, and even sewerage, since these communications are often carried out nearby. The number of filters, the volume of the boiler, the parameters of pumping equipment are also taken into account.

The wiring diagram should be simplified as much as possible, trying to avoid crossing pipes. Water pipes are located closer to the sewer pipes in order to hide them with a common box. When placing pipes under the floor, the outlet of the tees is placed exactly up
Installation of a water supply system
A typical layout of a plumbing system with a well or a well can be used for serial pipeline wiring. It consists of the following nodes:
- Pump equipment. For a deep well over 8 meters or a well, only a submersible pump is suitable. For shallow sources, assembled pumping stations or surface pumps can be used.
- Transition nipple. Needed for connection with the following elements of the system, which in most cases have a diameter different from the outlet from the pump.
- check valve. Prevents water from flowing out of the system when the pump is idle, the water pressure drops.
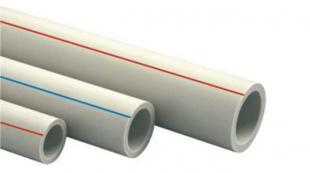
- Pipe. Pipes made of polypropylene, steel, metal-plastic or other materials are used. The choice depends on the wiring (external or internal, hidden or open), the price of the material itself, ease of installation. The pipeline that brings water to the house is supplied with a heat-insulating layer.
- Water fittings. It is used to connect pipes, shut off the water supply, install the pipeline at an angle, etc. It includes: fittings, taps, water sockets, tees, etc.
- Filter group. Designed to protect equipment from ingress of solid and abrasive particles, reduce the iron content in water and soften it.
- Hydraulic tank. It is required to create and maintain a stable water pressure, to prevent frequent operation of the pump.
- Security group. It is necessary to control the pressure in the system - a pressure switch, a pressure gauge and a dry-running switch. Automatic control devices help maintain a stable pressure in the system and extend the life of the equipment.
All elements of the system are connected in a certain sequence. More details can be seen in the diagram. Further, the installation of the system is described using the example of collector wiring, as more complex.

A simple diagram of the water supply system makes it possible to imagine how the wiring should be carried out from the source to the extreme point of consumption (+)
Assembly of the collector assembly
The collector unit in a private house is installed in special rooms - boiler rooms or boiler rooms - specially designated rooms of a residential building, in basements and semi-basements.
In storey buildings, collectors are installed on each floor. In smaller homes, the system can be placed behind a cistern in a toilet or hidden in a dedicated closet. To save pipes, the collector is placed closer to more plumbing fixtures, at about the same distance from them.
Installation of the collector assembly, if you follow the direction of the water, is carried out in the following order:
- At the connection site of the collector with the main water supply pipe, a shut-off valve is installed to turn off the entire system if necessary.
- Next, a sediment filter is mounted, which traps large mechanical suspensions that can lead to equipment failure.
- Then another filter is installed, which will remove smaller inclusions from the water (depending on the model, particles from 10 to 150 microns).
- The next in the installation diagram is a check valve. It blocks the return flow of water when the pressure drops.
After installing the above equipment, a collector is connected to the water supply pipe with a number of leads that corresponds to the number of water consumption points in the house. If not all plumbing fixtures are connected in the house yet, then plugs are placed on the unclaimed conclusions of the collector assembly.

Installation of water branches of hot and cold water supply systems is the same for central water supply. Installation in the house is a little different: one of the cold water outlets of the collector is connected to a water heater, from where hot water is sent to a separate collector unit
Methods for laying water pipes
Pipes in the water supply system can be laid in a closed and open way. The choice of one of the methods does not affect either the quality of the connections or the functionality of the entire system and depends only on personal preferences.
It would seem that it is not difficult to decide and the closed method is preferable as more aesthetic and allows you to save up to 10 cm of usable space. Why is an open pipeline still used in the installation of a water supply system? Let's try to give an answer.
Concealed and open wiring
Hidden wiring allows you to hide pipes and not spoil the aesthetic perception of the interior of a house or apartment. They hide it behind a decorative wall, for example, made of drywall, or ditch the walls and lead the pipes into the formed niches, covering them with facing material or plaster along the grid.
The pipeline should not be tightly adjacent to the surfaces - always leave a small gap for possible repairs. When installing a pipeline in a monolith, it is recommended to place them in a casing, inserting a pipe into a pipe.
The disadvantage of the method manifests itself when it becomes necessary to repair or replace the hidden elements of the system - the plaster or tiling has to be opened and then re-decorated. In addition, in the event of damage and leaks, the problem may not be detected immediately and lead first to the loss of operational technical characteristics of structures, then to flooding of the premises.

It is better to proceed with the installation of the water supply system with a pre-drawn scheme - otherwise, errors in calculations or assembly will lead to the fact that you will have to cut new grooves and re-mount the pipes
To avoid such difficulties, when installing the wiring, only whole sections of the pipe are hidden, placing the docking fittings in open areas. In places of installation of shutoff valves, invisible doors are made. This gives access for maintenance to pipe connections, which are the weakest links in the system.
It should also be noted that not all pipes from all materials can be hidden under a layer of plaster - only products made of polypropylene, metal-plastic or copper are suitable for this.
Pipe laying in an open way is carried out after finishing is completed. The method involves the uncovered laying of pipes and water supply elements. It looks ugly, reduces the usable area of the room, but at the same time this method is very convenient for maintenance, repair and dismantling of elements. Redevelopment and rearrangement of plumbing in the house with such a plumbing device will also not cause difficulties.

Open wiring makes it possible to quickly detect a leak and eliminate the cause of breakage or damage to system elements
General installation rules
Before installing the pipeline, it is necessary to install all the fasteners, complete the welding work. Pipes that were stored or transported at sub-zero temperatures before laying can withstand at least 24 hours at temperatures above 10°C. Before starting the installation, it is necessary to align them and in the future to prevent deflections.

Pipes to walls and supports are fastened with clamps or hooks. The distance from fasteners to threaded connections must be more than 5 cm
For interfloor risers, pipes with an outer diameter of at least 20 mm are used, for floor wiring - with a diameter of 16 mm and 14 mm. It is best to use as few collapsible connections as possible. It is necessary that all connecting elements correspond to the type (series) of pipes and, like fittings and revision, are in accessible places.
Horizontal sections of the water supply should have a slope towards the drain fittings to allow water to drain, the rise is made towards the device through which air will escape when the system is filled with water. When installing vertical structures, do not allow them to tilt more than 2 mm per meter.
Carrying out the vertical installation of the pipeline, the DHW pipes are placed to the right of the cold water pipes. With horizontal wiring, cold water supply is placed below the hot one to prevent condensation.
During the operation of a hot water supply, a phenomenon such as thermal expansion occurs, which is especially characteristic of polypropylene products. In this case, the pipes can lengthen, which leads to damage and leaks. The correct location of the fasteners and the self-compensation of such sections of the pipeline as bends, turns, gaskets "snake" prevent deformation.

They close the channels or carry out the monolithic pipeline only after a test run of the system and checking it for operability, leaks and damage
Plumbing options in the video
Wiring of the cold water and hot water system in a two-story house:
Features of installing hot water and cold water in the house:
How to compactly mount the collector assembly:
You can carry out the installation of wiring in your own home, but in order to avoid unpleasant consequences from unprofessional work, it is better to ask a specialist to help design the system. Professional advice will help you avoid mistakes, unnecessary expenses and rework.

