Door stopper: DIY manufacturing and installation. All you need to know about limiters: types by type of installation and fixation
”, sent us an email with a question:
Anna, I hope you enjoy this door stopper and the master class, we are waiting for your feedback in the comments, and if you make such a limiter yourself, please share the photo, I think everyone will be interested!


To begin with, I want to say that I, of course, proceeded from my preferences in the manufacture of this door stopper, so it is made in chrome color and decorated in the same style as the flower pot published in ! Friends, you can use absolutely any color of paint and threads that, in your opinion, will most harmoniously fit into the interior of a house or cottage! The decor of this stopper is not without reason combined with the style of the pot, the fact is that the door stopper does not really interest me, but I need a stopper for the window! For what? It's simple, there are flower pots on the windowsill, and when the window sash opens to the side, and does not recline in a vertical position, when the breeze blows, it beats against the pots, thereby harming the product itself and, accordingly, the flower in it.
Dear readers, this stopper has passed the "window test drive", so you can safely use it not only as a stopper for the door, but also for the window! Well, let's proceed directly to the manufacture of the stopper ...
How to make a door stop from a plastic bottle.
For the manufacture of the product you will need:
✓ Plastic bottle (volume 0.33 liters);
✓ Small stones or sand;
✓ Spray can with paint (chrome color);
✓ PVA glue;
✓ Spool of black thread;
✓ Scissors;
✓ Glue Moment (transparent);
✓ Awl or self-tapping screw;
✓ Rhinestones or decorative carnations (you need to “bite off” the legs of the carnations).

Door stopper from a plastic bottle, a step-by-step master class.
1. Fill the prepared bottle with small pebbles or sand. By the way, choose the volume of the bottle yourself, depending on what size you want the door stop. I used a 0.33 liter bottle.

2. We create a hole in the bottle cap, you can use a knife, an awl or a self-tapping screw. It seemed to me that it copes with the task perfectly - a self-tapping screw, just screw it in the center of the lid, when the hole becomes suitable for threading the tape (the future stopper handle), unscrew the self-tapping screw back.

3. We paint the bottle and the cap with spray paint, leave to dry for about 30 minutes.

4. We decorate the bottle with threads, wrap the entire central part of the painted container. Winding can be done randomly, or you can neatly thread to thread. I prefer the first decor option. We fix the ends of the thread with PVA glue (do not fix it with a moment, it corrodes the paint), it is completely invisible after drying.

5. We thread the tape into the hole in the lid, see the photo below for how to thread it. We tie a knot so that the ribbon does not slip through the hole. Screw the cap on the bottle.


6. Let's start decorating with rhinestones, in my case with decorative carnations, with the legs previously removed. By the way, such decorative items are sold in the "Everything for cutting and sewing" departments. We glue decorative carnations on the transparent Moment glue, disperse them over the entire surface of the bottle, i.e. not only in the central part of the product, where we wrapped the threads, but also closer to the bottom and neck. In the end, the product can be coated with a layer of transparent varnish if desired.
Probably, every person has encountered a problem when the door leaf slams loudly. In addition, when opening the door from hitting the wall, chips remain on it, which also do not decorate the room. To get rid of such problems once and for all, it is enough to buy and install a door stop. First you need to deal with the existing proposal, choose the type of limiter that is best suited in a particular case, and any home master can install it with his own hands.
What are door stops and locks for?
If you often hear the sound of a door hitting when you open it in your house, a door stopper will help solve this problem once and for all. It is a device that provides protection for doors, walls and nearby objects from chips and damage. This is a small detail, but it helps to significantly increase the life of the door leaf, as well as protect the walls from damage when the door is carelessly opened. By installing such a device, you will be relieved of the need to frequently change the decoration of the wall next to the entrance.
Without installing a door stop, opening the door may damage the wall or nearby furniture.
The door stop allows you to set the maximum opening width of the door leaf or reduce the speed of its movement. Some models securely fix the door in a given position, depriving it of the ability to open or close on its own. There is a fairly wide selection of such devices, which differ from each other both in shape and design, and in appearance.
Types of door stops
Door stops vary:
- at the place of installation - they are floor, wall or door;
- according to the principle of operation - there are ordinary, magnetic, vacuum and mechanical stops.
Since interior and entrance doors have different sizes and weights, different limiters are used for them. An ordinary person, faced with the problem of choosing such a device, may be confused by the available choice. To prevent this from happening, you need to navigate in the terms used:
- stop - a device that limits the opening angle of the web, and sometimes fixes it when it reaches the end point;
The stop allows you to fix the canvas in the desired position
- bump stop - prevents the canvas from hitting a wall, furniture or other object that is in the way of opening the door;
The chipper prevents the door leaf from hitting the wall
- stopper - designed to fix the door in a certain position;
The stopper allows you to fix the door in the desired position
- overlay - does not allow the door to slam arbitrarily;
The overlay does not allow the door to close arbitrarily
- latch - fixes the canvas in the closed position. Some experts attribute such a device to locks, others to stops;
The latch secures the door in the closed position
- closer - in addition to ensuring smooth closing of the door leaf, it also limits the angle of its opening.
The closer limits the opening angle of the door leaf and ensures its smooth closing
Floor models
Floor door stoppers are installed directly on the floor covering and are divided into two types according to the type of their action:
- holding the door leaf in a predetermined position;
- controlling the degree of opening of the door.
According to the installation method, such limiters are divided into:
- Mobile or mobile. In specialized stores, such stops are presented in a wide range and can have a wide variety of designs: in the form of letters, toys, wedges, etc. Models that are worn on the lower edge of the door leaf have become widespread. Such limiters have an anti-slip coating, abut on both sides of the door and do not allow it to move in either direction.
Mobile floor limiter can have a wide variety of shapes
- Stationary. Such models are mounted on the floor in a certain place and are intended for permanent use. They can be of several types:

When choosing a place for mounting a floor limiter, one must take into account the fact that it should not interfere with free movement, otherwise it is easy to injure the leg by hitting the latch rigidly screwed to the floor.
wall models
In those rooms where it is not possible or undesirable to fix the door stop on the floor (expensive parquet, natural marble floor or other unique coating), wall models are an excellent solution. Such devices are slightly more expensive than outdoor ones and there are several types:
- in the form of a rod - they are an emphasis with a platform for mounting and a rubber shock absorber mounted on a rod, the length of which can vary from 5 to 15 cm. Before buying a wall-mounted model, you need to decide which wall you will mount it on. There is no difference for a brick, and if it is made of drywall, then it is necessary that the size of the fastening part be at least 10x10 cm. This will ensure a reliable fastening of the stop, and the wall will not break through from the impact;
A conventional wall stop is a stop with a mounting platform
- with a magnetic latch - they differ from the floor version only in the place of installation;
- overlays. If you think that a wall-mounted shock absorber with a stem does not look very beautiful, you can install a pad under the handle. It is located on the wall opposite the door handle and is usually attached to double-sided tape, so you don’t have to drill the wall;
To limit the opening of the door on the wall, they often mount an overlay under the handle.
- with fixing the position of the door. In this case, the stopper is attached to the wall, and the hook is attached to the door. When the door is opened, the hook rises and the canvas is securely fixed in the open position. To close the door, such a latch must be unlocked manually.
After opening the door, the hook securely fixes it in the open position.
Door fittings
Overdoor stops are installed directly on the door leaf, so the walls and floor are not damaged. Fastening is done with glue or self-tapping screws.
- The simplest is the tape stop. It is a strong tape, at the ends of which there are places for fixing it to the jamb and the canvas. In order for the tape limiter to serve for a long time, it is necessary to purchase models that have high strength and elasticity.
The tape limiter has special platforms for fastening to the canvas and the jamb
- For an entrance door, a hinged stop would be an excellent option. During installation, the angle of stop relative to the floor must be observed. The best option is when it is 45 o, at a smaller angle, the mechanism may break.
The folding stop is activated by pressing the foot, and in the retracted position it securely snaps onto the clip
- Soft overlays. Protect the door from accidental slamming. Their use allows you to protect children's hands from the possibility of being squeezed by doors. To install such devices, simply put them on the door leaf.
Soft pads are installed on the door leaf and protect hands from accidentally getting into the space between the door and the jamb
The retractable stop is made with a rod and a brake shoe. Its installation is carried out in a vertical position. You can also operate such a device with your foot, and in order to raise it, you will need to manually bend the side plate.
Raise the retractable stop with your hands
The sliding door stop allows you to fix the canvas at different points, their number depends on the number of cutouts in the groove of the device. A rod is fixed on the canvas, and the device itself is installed on the door jamb. Since this limiter is installed in the upper part of the leaf, it does not interfere with the operation of the door.
The sliding limiter allows you to fix the canvas at several points
Anti-vandal restraints
There are models of limiters that allow you to protect the house from illegal entry. The simplest options can simply make a loud sound when in contact with the door leaf. More expensive models send an alarm signal to the security console or mobile phone.
Anti-vandal limiter allows you to protect the house from thieves
This type of limiters can be both floor and over-door. Floor models are available in the form of polymer wedges or other suitable shape. Overdoor stops are put on the door leaf and are also made of soft materials. The free-standing stops do not need to be locked in place, so they can be used anywhere and anytime.
Freely positioned stops do not require fastening and can fix the door in any position
Magnetic or vacuum stops
A feature of the magnetic limiter is that it not only prevents the door from swinging open at an angle greater than the specified one, but also ensures its fixation in the open position. A metal plate is installed on the canvas, and a magnet is placed on the limiter itself. To fix doors of different weights, you need to choose a magnet of the appropriate power.
Instead of a magnet, a vacuum lock can be used on such limiters. In this case, a rubber suction cup is installed on the door, which repeats the shape of the limiter. When opening the door, the suction cup is securely connected to the limiter and ensures that the door leaf is held open.
Vacuum stop keeps door open with suction cup
ball detents
Ball devices are designed to fix the door in the closed position and do not allow it to open spontaneously. These are small devices, one part of which is mounted in the door leaf, and the second - on the door jamb. These models are usually used on interior doors that do not need long-term locking. Due to the presence of an internal spring, the ball securely fixes the door, and after pressing the canvas, even a child can open it.
The ball lock securely holds the door closed, and it will not be difficult to open it if necessary
Video: types of door stops
Installation of door opening limiters
Most often, floor or wall door stops are used, so we will consider the installation process using their example. To complete the work you will need:

Mounting the floor stop
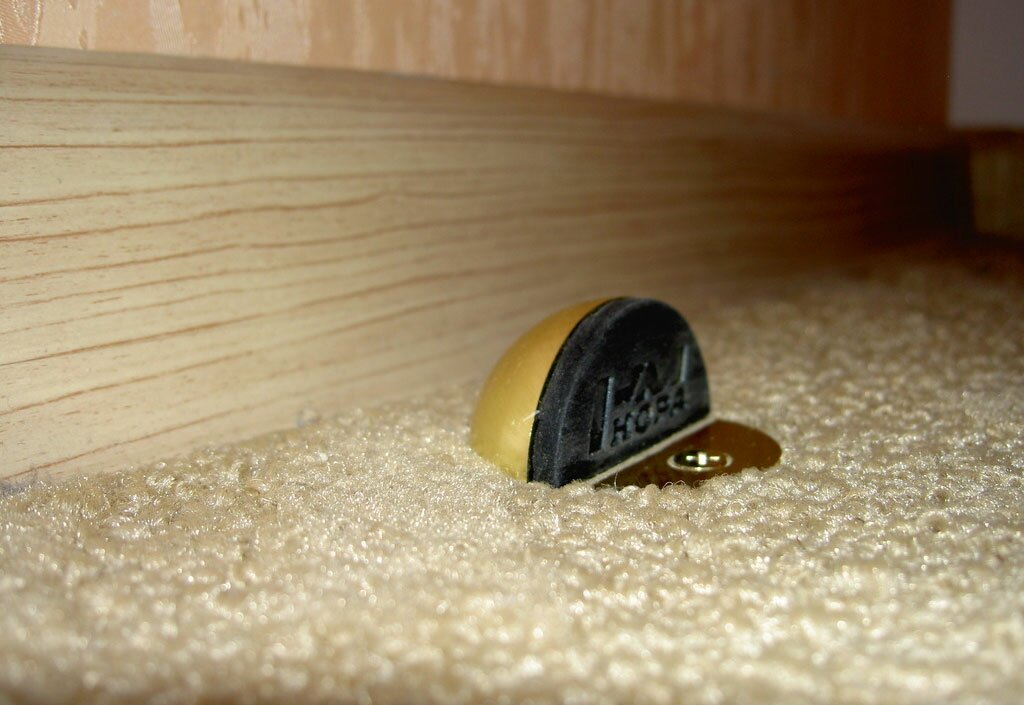
Consider the installation of a conventional metal floor door stop. It can have a different shape, for example, in the form of a pin or a hemisphere, as well as different heights.
Work on the installation of the floor limiter is carried out in the following sequence:
- Preparation of tools and inspection of the limiter assembly. Usually, the kit includes a screw and a dowel for fixing the stop, but if they are not there, you need to prepare the fasteners separately.
Checking the complete set of the door stop
- Site selection and marking. For the correct choice of the installation location, it is necessary to open the door leaf so that it does not reach the wall or furniture by 3–5 cm. Don't forget to consider the size of the door handle. The place for the stop is chosen approximately in the center of the door. Mark the installation site and check again if everything is done correctly.
- Creating a hole. Using a drill, make a hole in the floor and insert a dowel into it. For concrete pavement, a hammer drill must be used.
A hole is made in the floor into which a plastic dowel is inserted.
- Limiter installation. Install the door stop and fix it with one or more self-tapping screws. If the limiter has the form of a hemisphere, it must be turned so that the canvas is in tight contact with the rubber pad.
Using a self-tapping screw, fix the limiter
To keep the brass floor stopper shiny, it is recommended to periodically open it with varnish.
Video: installing a floor stop
Mounting the wall stop
If you want the limiter not to interfere with free movement around the room, you can install it on the wall. Installation of wall models is carried out in the same sequence as the floor options. The only difference will be that such a device is mounted on the wall, and not on the floor.
Repair of door opening limiters
A feature of door latches is that they have a simple design, so they have practically nothing to fail.
The main breakdowns of door stops will depend on the type of device:
- failure of the rubber lining. If the rubber lining is damaged on the floor or wall model of the limiter, then it must be replaced;
- weakening of the suction cup. If the suction cup is damaged in the vacuum limiter, then it will not provide reliable fixation of the web and it must be replaced;
- damage to the stop for over-door models is eliminated by replacing such a device;
- the weakening of the spring in the ball stopper leads to the fact that it cannot perform its functions. This device must be replaced.
To avoid the appearance on the walls of the apartment of traces of door handles that open wide, a do-it-yourself door stopper will help. It may vary in appearance. The design, shape, material, color, price, and place of its attachment differ in the limiters. The main thing is that this item fulfills its purpose, stopping the door beating against the wall when opened.
The limiter is used to ensure that when the door is opened, the handle does not hit the wall, thereby not spoiling its coating.
Floor stop for door
Such irreplaceable accessories can be purchased at the store. But it is possible to make them yourself. The simplest limiter is made of sheet steel. For manufacturing you need to purchase:
- steel;
- metal scissors;
- drill for metal;
- hammer;
- square;
- pencil;
- perforator;
- screwdriver;
- screws.

The floor limiter can be made from a self-tapping screw by screwing a wooden or metal knob onto it.
You can simply cut a strip of steel and bend it at a 90º angle, or even take and screw a ready-made furniture corner used in furniture installation to the floor. But it will not take much time to give the sheet an intricate shape with scissors. With a wider range of tools at hand, the steel stopper can be slitted or engraved. But, if there are no such tools, you can get by with painting or a layer of varnish.
Do not make parts protruding towards the door on the stopper, as this will ruin its coating. On the bottom side, 2 or more holes are drilled, with which the limiter will be attached to the floor. When mounting on a carpet, you should be especially careful, since the pile, when fastened, can wrap around the screw and, as a result, a hole is formed. It is better to cut a hole to the size of the stopper immediately and only then fix it.
You can place the door stopper with your own hands in any convenient place, there are no clear rules about its location. They are usually located on a line from the middle of the door leaf to its outer edge. The closer the stop is to the door frame, the more load falls on the door hinges, which loosen faster than usual. Therefore, the stopper is located approximately in the middle, slightly moving towards the edge.
When the place for the location of the stopper is chosen, the door is opened so that the distance from the lock handle to the wall is at least 1 cm. At this place, the limiter is installed. 2 holes are marked and drilled in the floor, a fixing dowel is inserted into one of which, and a pin or guide pin is inserted into the other. The dowel is hammered into the required hole, the limiter is put in place, and you need to carefully monitor that the pin also takes its place. The structure is finally fixed.
It is possible to carve a stopper out of wood, but this material may not be able to handle the stresses of a constantly opening door. Such a figure must be covered with several layers of durable parquet varnish.
Soft stops for doors

The soft limiter can be sewn from any fabric and decorated with bows, beads and buttons.
The figure of such a limiter can be any animal or figure. They are sewn from any fabric. Installation does not require special tools, and for tailoring you will need an almost standard set:
- tracing paper;
- fabrics;
- sintepukh, holofiber;
- pencil or fabric marker;
- threads in tone;
- sewing machine;
- threads in color;
- scissors;
- tailor's pins;
- weighting agent;
- accessories for decorating the stopper.
The pattern is transferred to tracing paper or drawn directly on it. The size, as a rule, does not exceed 40 cm, but it should not be done much less, since it will be difficult for such a figure to cope with its duties. All details are cut out of tracing paper and superimposed on the fabric. The figurine can be one-piece, but ears and tail, and sometimes paws, are often sewn on to animals. This gives freedom in tailoring and sometimes saves fabric.
All parts, including the body, legs, ears and tail, are made in pairs. If you cut them out of fabric of different shades, the figure will have more liveliness, and it will look more interesting. To cut out the details evenly, they are pinned to the fabric with pins before being circled with chalk. When cutting out, you should remember about seam allowances, which should be at least 1.5 cm. Paired parts are folded with their right sides and stitched with small stitches on a sewing machine, be sure to leave an area for turning the part inside out and stuffing it.

Patterns of soft limiters are a typical body with a twisted tail, and the head can be any animal.
The ears, paws and tail, if any, are completely filled with synthetic soft filler and temporarily set aside, as they are sewn to the finished body as a last resort. The body is stuffed with sand or small even stones as a weighting agent, which will take about 300 g. the sand did not spill out, you can put it inside tied up in several sealed plastic bags. Do the same with pebbles. It is better to choose stones without sharp corners, as they can tear the fabric and damage the door or wall during the operation of the soft stopper.
The remaining free space inside is tightly stuffed with synthetic filler, then the stuffing hole is carefully sewn up with small blind stitches. Paws, ears and tail, if any, are sewn into place. The figurine of the animal can be additionally decorated with a scarf, collar or bell around the neck. Each one decorates the muzzles of animals as they wish, sewing on beads, buttons or drawing eyes, nose and mouth.
The finished soft stopper can be hung on the door handle, in which case it should be large enough to take up more space than the distance from the door leaf to the end of the door handle.
You can fix it on the wall in the right place so that the door handle hits it instead of the wall. The weighting will help it stay in place and not move from the air currents when the door is opened. You can put such a toy on the floor, but there it will quickly get dirty. And if you do not fix it, then it will move from the desired location.
You will need:

- two pieces of cotton fabric measuring 50 x 50 cm
- piece of thin fleece measuring 30 x 30 cm
- double-sided interlining with adhesive backing
- waxed cord 25 x 10 cm
- 2 plastic bags
- textile marker
- embroidery threads
- embroidery needle
- synthetic winterizer
- sand 900 g
- voschanka

Print the template. Iron non-woven fabric to all cuts of fabric and to the underside of wax. Transfer all the details to the fabric and cut out. Iron the reinforced part of the wax cloth onto the front side of the fabric for the body of the dog.
Step 1

Sew the longitudinal sides of thin fleece with a zigzag stitch to the fabric.
Step 2

Fold the two pieces of the ear right side in and sew along the edges. Trim the fabric with scissors at the curves so that the fabric does not stray when turned inside out. Turn the ear inside out and sew the second one.
Step 3

Fold the parts of the torso with the right sides inward and sew the longitudinal sides with straight stitches. Fold the corners on top of each other and also sew with straight stitches, spreading out the side seam allowance in advance. Treat the other side in the same way. Turn out the body.
Step 4

Pour sand into a double bag, tie and secure with tape.
Step 5

Put a bag of sand in the body and fill the space around it with padding polyester, but not tightly, otherwise it will be difficult to complete the top seam.
Step 6

Turn the top edge 5 mm to the wrong side. Lay a crease in the middle of the ears, pin the right and left ear to the corners.
Step 7

Baste the top seam by sliding the padding down and sew with waxed cord.
If you do not limit the course of the door, the handle installed on it may damage the wall covering when opened. To avoid this, a door stop must be installed. Depending on the place of installation, they are divided into floor and wall. In addition, opening limiters for interior or entrance doors may differ in design, that is, they can be stationary or mobile (portable). Which type to choose depends on both your preferences and the layout features.
The design of these simple, but at the same time very useful devices, is quite simple, so it’s not difficult to make them yourself, the main thing is to find some free time and patience for this.
We make a limiter with our own hands
Consider two versions: one stationary - floor, the second - mobile. The first will require skills in working with a hand tool, the second will be more appealing to those who love to do needlework.

Production and installation of a floor stop for a door
To make a floor stop, you need to prepare the following tools:
- ordinary scissors for cutting metal;
- drills for steel and concrete;
- impact electric drill or puncher (for the latter you will need a nozzle for conventional drills);
- screwdriver or screwdriver;
- soft pencil for drawing on metal and a corner.

Necessary materials:
- steel plate;
- "quick mounting" (screws with dowels), needed to attach the floor stop.
The manufacturing technology is quite simple:
- using scissors, cut a steel strip of arbitrary length;
- the finished strip is bent at an angle of 90 °;
- holes are drilled for fasteners in the strip and in the floor;
- using the "quick installation", we screw the steel corner.
So that the floor stop does not spoil the upholstery or door covering, we recommend making a soft cover for it, for example, make a cover from leatherette with foam rubber stuffing.
If a wall stop for doors is required, the same principle is used, except for the attachment point of the device, it is not mounted on the floor, but on the wall.

Having shown a certain imagination, it will not be difficult to make and install with your own hands a floor limiter for opening the door, which succinctly fits into the style of the interior of the room.
Mobile soft fabric restraint
The shape of the limiter can be any, it all depends on your taste and imagination, for example, you can make an animal figurine with your own hands or in the form of a leaf of an exotic plant. For work, we need the following materials and tools:

- sheet of tracing paper;
- piece of fabric (the choice depends on your preferences);
- any material for stuffing, for example, sintepuh or foam rubber;
- chalk or pencil for drawing on fabric;
- a skein of threads of the same tone with the selected material;
- any model of sewing machine;
- tailor's scissors;
- a set of pins;
- if you want to decorate the stopper, then you should choose the appropriate accessories.
As you can see, this is almost a standard sewing kit.
The most optimal size for the figure will be in the range from 30 to 40 centimeters. A large product looks bulky, and a small one will not perform its function. After you decide on the pattern, you can start making patterns. To do this, transfer the pattern to tracing paper and carefully cut it out. The pattern is pinned to the fabric with pins and outlined in chalk or pencil. Before trimming, be sure to leave a margin (seam allowances).

When all the details are cut out, they are folded face to face and grinded with a small seam, so that it is possible to turn them inside out and insert the packing.

Small details of the figurine, for example, petals (if you are making a plant-shaped limiter) are completely filled with stuffing, a weighting agent must be added to the main part. Sand or sea pebbles can play its role. The weight of the weighting agent should be in the region of 250 - 350 grams. To prevent small fractions from waking up through the fabric, they should be placed in an airtight bag. As it can be used a regular plastic bag. Make sure that the material used for the filler does not have sharp edges that can cause damage to both the fabric and the door upholstery or wall covering.
This type of do-it-yourself limiter does not require special installation, it is hung on the door handle and can be removed at any time if necessary. As for the shape and color, there are no restrictions for the manifestation of your imagination.


