How does a pressure switch on a hydraulic accumulator work?
A hydraulic accumulator, together with a pressure switch and a pump, are the most important parts of the water supply for a summer residence, a farm and other buildings. A properly configured and installed sensor allows you to save the owner from most of the problems associated with water.
Connecting a pressure switch and installing additional equipment is not an easy process, it requires attention and specific knowledge in electronics and the operation of a pumping station with a hydraulic accumulator.
1 Description of sensor and pumping system
The water pressure sensor is an electrical device that regulates the pressure in the accumulator for a pumping station. It also monitors the pressure of the liquid in the pipeline and turns on or off the water supply to the accumulator tank.
This happens due to the short circuit of the wires. Exceeding the allowable threshold opens the contacts and the relay turns off the pump. A drop below the set level closes the contact of the device, including the water supply. You can manually adjust both the upper and lower thresholds.
Basic concepts of a pressure switch for a system with a hydraulic accumulator:
- Rvkl - lower pressure threshold, power on, in standard settings it is 1.5 bar. The contacts are connected, and the pump connected to the relay begins to pump water;
- Roff - the upper pressure threshold, switching off the power supply of the relay, it is better to set it to 2.5-3 bar. The circuit is disconnected and an automatic signal stops the pumps;
- delta P (DR) - an indicator of the pressure difference between the lower and upper thresholds;
- maximum pressure - as a rule, does not exceed 5 bar. This value is displayed in the characteristics of the control device for water supply systems and does not change. Excess leads to damage to the equipment or a reduction in the warranty period.
The main element of the pressure switch for the accumulator is a membrane that responds to water pressure. It bends depending on the pressure and tells the mechanism how much the water pressure in the pumping station rises or falls. The bend switches the contacts inside the relay. A special spring counteracts the onslaught of water (which is tightened for adjustment). The smaller spring determines the differential, that is, the difference between the lower and upper pressure thresholds.
Relays can be of two types. The first, power, directly acts on the contacts of the pump. The control type interacts with the automation of the station and through it affects the operation of the pump.
A hydraulic accumulator and a pressure switch form a reliable system for providing water supply to any premises, outbuildings, fields and more. Automation for the pump is also a necessary part - thanks to it, it becomes as simple as possible to control the collection of water and quickly pump liquid into the tank and into the pipes.

You can always connect an additional accumulator, as well as relays, automation, sensors and pumps.
1.1 Adjusting the pressure switch for the accumulator
Before connecting the equipment to the tank, you should check the operation of the relay and adjust it. It is recommended to take readings with a mechanical pressure gauge. It is more points and less prone to internal breakdowns, due to which its readings may not correspond to reality.
The following will be instructions on how to properly set up the pressure switch. First of all, you need to familiarize yourself with the passport of the device, the pump and the accumulator tank in order to find out the pressure limits for these elements of the pumping station. Best when buying familiarize yourself with these parameters in advance and adjust them to each other.
- Open the water intake (faucet, hose, valve) so that, thanks to the pressure gauge, you can see the pressure at which the relay trips and the pump turns on. Usually it is 1.5-1 bar.
- The water consumption is turned off to increase the pressure in the system (in the accumulator tank). The pressure gauge fixes the limit at which the relay turns off the pump. Usually it is 2.5-3 bars.
- Adjust the nut attached to the large spring. It defines the value at which the pump is switched on. To increase the switching threshold, tighten the nut clockwise; to decrease it, loosen it (counterclockwise). Repeat the previous points until the switch-on pressure does not correspond to the desired one.
- The switch-off sensor is adjusted with a nut on a small spring. She is responsible for the difference between the two thresholds and the setting principle is the same: to increase the difference (and increase the shutdown pressure) - tighten the nut, to reduce - loosen.
- It is not recommended to turn the nut more than 360 degrees at one time, as they are very sensitive.
1.2 How to set up a pressure switch at a pumping station? (video)
2
Since the sensor also determines the air pressure in the accumulator of the pumping station, you should also know the description of this equipment. This will ensure proper connection of the accumulator. If you seriously think about how to choose a hydraulic accumulator, then you should pay attention to the following items.
The device is a metal tank of 19, 24, 50 liters or more, up to 1000. Tanks of 50 and 24 liters are the most common for summer cottages and small country houses. However keep in mind that the total volume of the tank is not the volume of water that it may contain. Inside the accumulator tank, the air pressure should be approximately 0.2-0.3 bar less than in the pipeline.
It is necessary to choose taking into account the settings of the pressure switch, the higher the settings and the more durable the device, the more water can be loaded into the tank. So in a pumping station with a tank of 24 liters, at a pressure Рoff equal to 2.5, and Рon equal to 1.0, the volume of stored water will be 9 liters with a little. Special tables will allow you to correctly select the volume of the tank and the power of the pressure switch. Which one is better depends on the depth of the well, the length of the pipeline and the frequency and purpose of use.
Pumping stations with a hydraulic accumulator are pear and membrane. The first type has an internal rubber container, a “pear”, into which air is pumped by a pump. The pear expands and presses on the water inside the tank, ensuring its flow through the pipes. How to pump air into the "pear"?

To do this, use a conventional air pump and automobile nipple. In the membrane, it is arranged a little differently: water is pumped into the rubber container (from butyl), while air presses from the outside of the container. Air is located between the metal walls of the tank and the membrane with water.
The hydraulic accumulator is connected to the submersible pump through a system consisting of the following elements:
- pressure switch;
- pipeline circuit;
- water purification filters;
- automation unit and additional equipment.
2.1 Checking the accumulator pressure
Before being connected to the network and the pumping system, the accumulator must pass a pressure test. Since the principle of operation of the pumping station is to pressurize the pipes using relays, pumps and a hydraulic accumulator, checking is an extremely important operation. Monitoring the level of air pressure, which will change over time due to wear, breakdowns, clogging, is the most difficult part of pumping station prevention.
Indicators are taken with a manometer. It is necessary to remove the decorative cap and connect the pressure gauge to the accumulator tank nipple. A figure of 1.5 bar is usually considered acceptable., however, less is suitable - up to 0.8, depending on the type of tank. Thus, the accumulator for the pumping station is configured.

Adjusting the air pressure inside the tank will allow you to change the water pressure. The higher the water pressure, the faster the wear of the system. Low water pressure will not allow you to use a hydromassage shower or jacuzzi, but will significantly save money on repair and replacement of parts of the hydropump system.
2.2 How to connect the accumulator to the relay?
The relay is connected to the mains with two pairs of contacts. The connection to the pipeline is made using a threaded hole, the standard diameter of which is 0.25 inches (6 millimeters). In order to independently provide a pressure switch pumping station, the following tools are required:
- coupling with a union nut (popularly "American"), as a rule, a diameter of 1 ”is used;
- coupling with collet clamp;
- MRN clutch;
- brass adapter;
- hermetic sealing tape (preferably FUM, it ensures a stable connection of the pump to the accumulator);
- pipes, fittings, pressure switch, hydraulic accumulator.

The scheme for connecting a hydraulic accumulator to a pumping station with your own hands is as follows:
- The accumulator tank threads need to be sealed with tape to avoid water leaks, air intrusion into the system, facilitate maintenance, and also for easier subsequent repair and replacement of pipes.
- The pressure switch is not connected directly, but using a coupling with a union nut. This is also done for ease of further repair of equipment and tighter insulation of the pipeline. This coupling, among other things, facilitates both connection and subsequent adjustment of automation.
- The relay is connected at the required angle so that when the equipment is installed, you can easily monitor the indicators. Here they take into account that sometimes all automation is placed in hard-to-reach places - in narrow nooks and crannies, small technical rooms, even lowered inside a closed well or well. Therefore, it is very important to determine the required angle of the relay and it is possible to connect it to other works, and not directly to the tank.
- Just in case, the pressure gauge can also be glued with sealed tape, although a gasket is used there.
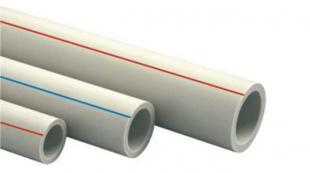
- From plastic pipes and fittings, it is required to solder an elbow for the consumer line.
- The regulator is connected to the knee thanks to the MPH coupling soldered to the pipe and using a brass adapter.
- For deep, submersible pumps, polyethylene pipes are more often used. To hermetically connect them to the relay, a collet coupling is required.
- The preparatory part is completed and then it is required to connect the accumulator and pressure switch to the rest of the pumping station.
- After connecting to the pipeline, it is necessary to connect the electricity.
- The fastening of the regulator cover is unscrewed with a conventional screwdriver. Inside there are inlet holes to which power wires are connected. and pump cable. Contacts are signed, or they are indicated in the instructions.
In this way, the pressure switch and the hydraulic accumulator are connected to the pumping station.