How to properly connect an electric boiler to the water supply and power supply
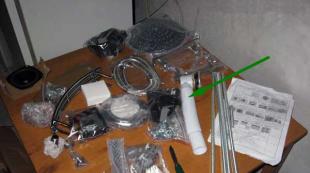
Boiler installation includes two steps. The first is the supply of power to the installation site of the boiler and the installation of an electrical outlet for the boiler, the second stage is the connection of the boiler installed locally to the water supply system of the apartment (the so-called piping). We will analyze the two stages of installing the boiler in more detail.
Connecting the boiler to the power supply
For the operation of an electric boiler, a separate power supply of 220 volts coming from the apartment electrical panel is required.
The boiler must be earthed. Therefore, a three-core cable must be used for the power supply. The cable must be with copper conductors, double insulated, for example VVGng. The cross section of the cable is calculated depending on the power of the boiler. (Read about the calculation of the cable section)
One of the cable cores (usually yellow-green) must be used to ground the boiler. The ground wire must go without interruption from the ground bus in the apartment electrical panel (if the switchboard is installed in the apartment) or from the building of the floor electrical panel to the ground terminal of the boiler outlet.
Metal structures that can be found in the bathroom, as well as water pipes, cannot be used to ground the boiler.
The power supply of the boiler must be allocated to a separate group. To protect the power supply line of the boiler, you need to install a two-pole circuit breaker with a rating calculated according to the power of the boiler. (How to calculate the value of the circuit breaker read)
The RCD of the boiler is installed after the circuit breaker for the boiler, the value of the RCD must be one step less than the value of the circuit breaker.
Instead of a protective pair, a circuit breaker plus an RCD, one unifying differential circuit breaker can be installed.
The socket for the boiler must have a housing protection degree of at least IP 44. The socket must be installed above the junctions of the water pipes and at a distance of at least 40-50 cm from the boiler.
The boiler body must not only be grounded, but also connected to an additional potential equalization system (DUP) of the apartment.
The electric cable for powering the boiler must be immured in the wall or laid openly in flame-retardant pipes or corrugations. The distance from the openly laid cable to the hot water pipes must be at least 50 cm.
class="eliadunit">
Now we will analyze how to connect the boiler to the water supply network.
Connecting the boiler to the water supply
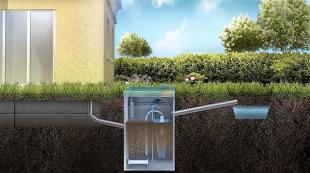
The boiler has at least one cold water inlet and one hot water outlet. You need to connect the boiler to the water supply according to a special scheme.
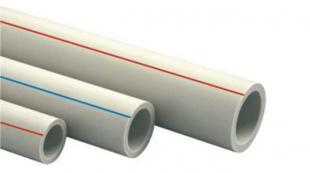
I would like to draw your attention to the fact that we are considering the installation and connection of a storage water heater, not an instantaneous water heater. The storage water heater, also known as a boiler, is installed permanently, with the “correct” plumbing pipes, and not flexible, temporary hoses. In the photo, the plumbing is made with cross-linked polyethylene pipes. Possible wiring with pipes made of metal-plastic, copper steel.
The general principle of connecting the boiler to the water supply
Water enters the boiler from a separate cold water line with a collector wiring or from a tee with a tee water supply. In the boiler, the water is heated and supplied to the input of the hot water supply system of the common water intake unit of the apartment.

- To disconnect the boiler from the water supply, shut-off valves are installed (ball valve 7 in the figure).
- To clean the incoming water, a coarse mechanical filter (mesh 5 microns) is installed.
- For emergency or technical draining (when cleaning the boiler) of water from the boiler, a drain outlet is made from the cold water side with a separate shut-off valve (7b).
- On the hot water side, a ball valve (7a) is also installed to create the necessary air pressure in the boiler to drain the water from the boiler. That is, if there is no tap (7a) on the hot side, then when the tap (7b) is opened on the cold side, the water will not drain.
- To protect the cold water supply from emergency inflow (at an excess pressure of more than 7 atmospheres, in the boiler) of hot water from the boiler, boiler safety systems are installed on the side of the cold input. The boiler safety system has its own drainage drain into the sewer.
Note: The design of the boiler may be provided with a factory outlet for draining water from the boiler. In this case, a drain outlet with a tap on the cold water side does not need to be installed.
It is also possible not to put the ball shut-off valve (7) on hot water if it is already installed on the hot water inlet going from the boiler to the apartment water intake.
Important! With a high pressure in the water supply system of the apartment (more than 6 atmospheres), a pressure reducer must be installed at the water inlet to the boiler, after the water purification filter. If pressure reducers are already installed in your apartment water intake unit, you do not need to duplicate them.
How water moves from the water supply of the apartment when the boiler is running
- Before turning on the boiler, prepare your plumbing system. Turn off the domestic hot water shut-off valve.
- Open the drain cock (7a) on the hot water outlet to check the filling of the boiler;
- Open the inlet valve (7) for cold water going to the boiler;
- Fill the boiler completely with water - the water from the open tap (7a) in point 1 should start to flow out. Close this tap (7a);
- Connect the boiler to the mains and open the ball valve on the side of the hot water outlet (7) to the water supply.
Scheme of connecting the boiler to the water supply
Diagram of the boiler security system

- Opening for check valve control
- Built-in non-return valve to prevent hot water from flowing back into the potable water system
- Shut-off ball valve with 90° closing-opening stroke
- Safety valve. Limits the pressure in the boiler to 7 bar.
- Water guide, prevents splashing
- Nozzle for discharged water
By the way, an example of connecting a boiler is taken from this general axonometric plumbing scheme:

Three more installation drawings of the OSO Wallsmart boiler safety valve.