How to connect the boiler to the water supply
It is hardly possible to call living in a house or apartment fully comfortable if for some reason, temporarily or permanently, but there is no hot water supply. Even residents of high-rise buildings in large cities are not insured against this - accidents occur, interruptions in the operation of boiler houses, planned supply stops, etc. And about the inhabitants of the private sector or suburban housing, the conversation is generally special - all the problems of providing themselves with hot water completely fall on the owners.
How is it solved? Heating water in a saucepan is not even discussed ... Install a flow water heater option good and not too difficult to perform. But it would probably be wiser to always have at least a small supply of heated water - that is, to install a storage water heater, in other words, a boiler. This publication will discuss the main theoretical issues and give practical advice on how to choose such a device and how to connect the boiler to the water supply.
So, leaving "out of the brackets" instantaneous water heaters, as well as outdated and inconvenient solid fuel"titans", let's pay attention to modern models of boilers. They can be divided into direct and indirect heating devices. And according to the type of energy carrier used, direct heating boilers are divided into gas and electric. In addition, there are models that combine several principles of work.
Boilers for direct heating
In installations of this type, the incoming energy carrier (electricity or natural gas) is consumed exclusively for the needs of hot water supply, without intermediate steps.
Gas storage boiler
Such a device is not very widespread - it is quite complicated to install, requires mandatory approval from the technical supervision authorities, it requires the construction of a chimney system of one type or another, corresponding to supply ventilation to ensure normal gas combustion. In a number of regions, the presence of a special device - a gas analyzer - became a prerequisite for installation. All this does not add to their popularity with homeowners.
Nevertheless, such boilers still "have the right to exist", and in terms of efficiency, they, of course, are superior to electric ones.
What is the device of a gas storage boiler:

- Pos. 1 - a container in which heating and accumulation of hot water is carried out. It is supplied through a pipe (pos. 5), and the intake is through a branch pipe (pos. 6). Not shown in the diagram, but the water tank has a fairly thick outer casing with polyurethane foam insulation, which ensures long-term maintenance of the required water temperature.
- The water tank has a common lower heat exchange wall (pos. 2) with a combustion chamber in which a gas burner (pos. 3) is installed. In addition, heat exchange is carried out when hot combustion products pass through the central channel (pos. 9) before exiting the chimney (pos. 10 )
- The control device as part of the installed temperature sensor and thermostat (pos. 4) constantly monitors the level of water heating, as necessary, turning on or shutting off the gas supply to the burner (pos. 3).
- The safety group (pos. 7) necessarily includes an emergency valve, which will relieve excess pressure if the thermostat suddenly fails in its task of maintaining a certain temperature.
- To prevent the walls of the tank from becoming overgrown with scale, a magnesium anode (pos. 8) is installed in the boiler. This material has a much lower electrical potential, so free ions of salts dissolved in water will be deposited on it. These anodes are easy to change as needed.
So, despite the excellent performance, such boilers did not become "bestsellers", as they are difficult to install, and their cost is much higher than that of conventional electric ones.
electric boiler
This type of storage boiler is the most popular among homeowners. Installation of such a device does not require tedious conciliatory procedures, significant alterations or construction and installation works. With a reliable power line, any good owner who has a basic understanding of plumbing work can probably install an electric boiler.

How are electric boilers arranged? They may have a different layout, but the circuit diagram still remains the same:
- The outer body of the boiler (pos. 1) may have one or another decorative design. From separated from the internal water tank (pos. 3) with a layer of polyurethane foam thermal insulation (pos. 2).
- The supply of cold tap water is always carried out to the lower part of the tank through the welded pipe (pos. 4). To avoid creating turbulent fluid flows in the tank, the incoming water is distributed using a special diffuser (pos. 5).
- Hot water, on the contrary, is always taken from the top of the tank through the installed pipe (pos. 9 )
- Water heating occurs with the help of electric heating elements (heaters) of various types (pos. 7).
- The purpose of the magnesium anode (pos. 6) has already been described above.
- The temperature sensor (pos. 8) is connected by an electrical circuit to an electronic or electromechanical thermostat that provides water heating to the temperature set by the user.
Such a scheme of operation of the boiler shows itself perfectly in practice, if the device is chosen correctly, taking into account the need for power and volume. Electric boilers are available in a wide variety of shapes and sizes, they are quite compact, and most importantly, they have a very affordable price.
Indirect heating boilers
In those private houses (sometimes in city apartments) where an autonomous closed-type water heating system with a single-circuit boiler is installed, indirect heating boilers are often used for hot water needs. In these devices, the water that is used for domestic and hygienic needs (in other words, sanitary) receives heating not from direct heating, but from heat exchange with the heating circuit through which the liquid heat carrier (technical water or other liquid) circulates.
The principal device of an indirect heating boiler is shown in the diagram:

Outer shell (item 1) thermal insulation layer (item 2) and inner tank (item 3) — , all by analogy with a conventional direct heating boiler.
Through the branch pipe (pos. 4), cold sanitary water enters the tank, the flow of which is sprayed using a special baffle (pos. 5). Hot sanitary water is taken in through the pipe in the upper part of the boiler (pos. 6).
In addition, a circulation pipe (pos. 7) is usually provided. A separate additional contour is created, for example, through heated towel rail, with constant circulation of hot water. This achieves two goals: firstly, in the DHW pipe there is always hot water of approximately the same temperature; a in– secondly, such a scheme somewhat simplifies the rather complex system of maintaining the desired temperature for heating sanitary water.
Branch pipes pos. 8 and pos. 9 - tie-in to the house heating system, entrance and exit to the spiral heat exchanger (pos. 10), through which heat energy is transferred from the heating boiler to the hot water supply system. There may be more such "coils", for example, one is connected to the heating system, and the second - to the system of solar heat accumulators.
Boilers of large volume (more than 150 l) usually have an inspection window (pos. 11), closed with a flange plug. In this window, by the way, it is often possible to install an electric heater - a heating element, thus making the boiler more versatile.
Magnesium anode (pos. 12) is an indispensable element for all modern boilers.
An indirect heating boiler must necessarily have its own safety group, monitoring and control device (pos. 13), thermal sensors for generating control signals (pos. 14).
An indirect heating boiler may have a slightly different design, so-called "tank in tank» :

Boiler of indirect heating according to the principle "tank in a tank"
Everything is almost the same, only the circulation of the technical fluid of the heating system goes through the external vessel "A2. An internal tank "B" is installed inside it, in which sanitary water is heated. The surface of the inner tank is made corrugated to increase the area of active heat exchange.
Boilers of indirect heating are distinguished by high productivity (naturally, with the corresponding power of the heating boiler), economy. Alas, they also have many shortcomings. Firstly, they are “tied” to the heating system, and when warm days come and the boilers are turned off, they simply stop working. Secondly, such a boiler is a rather massive structure that takes up a lot of space, which is especially important for cramped conditions in city apartments. Probably, from the point of view of convenience, a double-circuit boiler still looks preferable. And thirdly, indirect heating boilers are somewhat “capricious” in terms of adjustments and maintaining the required temperature - they need a rather complicated and cumbersome control system and coordination with the heating circuit.
Combined boilers
Boilers of both direct and indirect heating have their own significant advantages and significant disadvantages. To fully take into account both those and others, to create a kind of "symbiosis" of both schemes - this is the task set by the developers of combined boilers.
The diagram shows one of the typical examples of such devices, a boiler from the SMART family of models.

As can be seen from the figure, this boiler is assembled according to the “indirect” “tank in tank” scheme, but additionally has its own electric heaters ( heating elements). They can be switched on, for example, when the heat energy of the heating system is not enough to raise the temperature of the sanitary water to the required level (often this happens when during the off-season, in autumn or spring, the heating boiler is not used at rated output). Naturally, when the heating season ends, the heating elements will bear the full burden of providing the house with hot water. On the one hand, it is convenient, on the other hand, the system is quite bulky, and besides, the combined boiler does not solve the problem of saving space - it also needs a lot of additional space.
So, to draw a line under the first section of the publication, we can state that the best choice in terms of ease of installation, reliability and ease of operation will still be an electric direct heating boiler. And the fact that it is somewhat less economical - this issue should be addressed by a prudent approach to the use of hot water.
How to choose the right boiler
The range of modern household appliances stores can easily confuse you - which boiler model for an apartment should you prefer, what parameters should you rely on? It is clear that the device must "fit" into the interior of the room - however, this selection criterion should not become decisive in any way. First of all, attention is always paid to operational characteristics, materials for the manufacture of the main components, the availability and reliability of control, monitoring and emergency protection systems.
Required capacity of the water tank of the boiler
Boilers are produced in a wide variety of volumes - from mini-devices with a capacity of about 8 ÷ 10 liters, to powerful installations with storage tanks of 200 liters or more. The “more is better” principle here absolutely unacceptable. There is no point in overpaying for a completely unclaimed volume of heated water, and, in addition, wasting precious space in a cramped apartment. It is better to approach the choice from a practical point of view.
The volume of the heater should depend on the number and type of hot water points in the apartment or house, on the number of people living in it, so that the needs of all residents are met evenly and to the maximum extent, without any inconvenience to others.
Boilers are capable of heating water to very significant temperatures, close even to the boiling point. However, from the standpoint of economy and safety, +60 ° is considered the optimal level of heating. With. Let this value not seem small - this is very hot water, the temperature of which the hand cannot withstand. Naturally, such water needs to be diluted with cold water. The table below shows the approximate consumption of hot (60 °) water and, accordingly, diluted to a comfortable temperature:
| Hygienic and household needs | Optimum water temperature (°С) | Approximate total water consumption (liters) | The required amount of water heated to 60 ° (liters) |
|---|---|---|---|
| Routine hand washing | 37 | 1.5 ÷ 4 | 1 ÷ 3 |
| Taking a shower | 37 | 35 ÷ 50 | 17 ÷ 25 |
| Bathing with a bath | 40 | 150 ÷ 180 | 85 ÷ 120 |
| Morning wash, brush teeth, shave | 37 | 12 ÷ 15 | 5 ÷ 8 |
| Washing kitchen utensils | 50 | 15 ÷ 25 | 14 ÷ 17 |
Guided by these values and knowing the number of people living in the house, armed with a calculator, you can calculate the required volume of the water heater, so that there is enough water for everyone without additional waiting for it to be heated. It is clear that in this case one should proceed from reasonable consumption - if someone needs to take a bath, then there will not be enough hot water for anyone else.
To simplify the calculation as much as possible, a table will be given by which you can quickly determine the recommended boiler volume for specific conditions:
| Number of cohabiting water consumers | Number of residents taking evening showers directly one after another | The number and type of water intake points in the apartment (house) | Minimum allowable volume of storage boiler | Optimal boiler volume |
|---|---|---|---|---|
| one adult | - | only washing | 10 | 30 |
| one adult | 1 | Wash and shower | 30 | 50 |
| two adults | 2 | Wash and shower | 50 | 80 |
| Family: two adults and a child | 3 | Sink, dash and sink | 80 | 100 |
| Family: two adults and two children | 4 | sink, shower, sink, bath | 100 | 120 |
| Family: two adults and three children | 5 | sink, shower, sink, bath | 120 | 150 |
Rated and maximum power of the water heater
It is clear that the more powerful the heating elements of the boiler, the more of them, the higher the total load and power consumption of the installation, the sooner the water will heat up to the set temperature. However, to strictly follow this approach - to choose a device with maximum power, would be a mistake. Do not forget that in-house electrical networks have certain load thresholds, exceeding which, at best, will cause constant operation of protective equipment, and at worst, overheating of the wiring and even the occurrence of a fire hazard.
For the conditions of apartments, private houses, a water heater with a capacity of up to 2500 W will be sufficient. For conventional household electrical networks, this consumption is not extreme, and standard sockets with a ground loop are usually rated for loads up to 3500 watts.
Despite this, any electrician will still give advice - do not rely on the wiring once made by someone, but stretch a separate line from the shield to the boiler. The second tip is that if a boiler with a power of more than 3000 W is selected, then the socket will not be the best option for connecting it - for the complete safety of the line, it is better to organize the connection point of the water heater through an automatic machine designed for currents of 16÷ 25 amperes.
Water heater dimensions and its external layout
Here, it would seem, everything is simple - the boiler is purchased in the right volume, and with the dimensions already - how it will turn out. Not certainly in that way.
- Traditionally, from the moment they appeared in everyday life, electric boilers had a vertical orientation and represented themselves a cylinder suspended from a wall or, for very large volumes, permanently mounted on the floor. The disadvantage of such a cylindrical shape is the irrational use of space, since the device protrudes excessively from the wall.

If a small boiler, up to 30 ÷ 50 liters, can still be raised higher, and it will not be a particular hindrance, then with larger capacities, the loss of space becomes significant.

"Squat" boilers take up less space, but they also have disadvantages
From this point of view, it will be much more convenient to use a vertical “flattened” boiler, and sometimes - parallelepiped designs. They are closer to the wall and allow more free use of space in a cramped room. True, such models are much more expensive, and besides, their inner tank always has several welds, and this is always a kind of "Achilles' heel" for any structure that is constantly in contact with water.
- If the room where the boiler is planned to be installed is wide enough, then it makes sense to consider the feasibility of purchasing a device with horizontal placement on the wall.

In addition to the fact that this saves space, such boilers are praised for the rapid heating of water. True, the overall performance of such water heaters is still lower than that of vertical ones.
The model of the boiler according to the type of body and its placement on the wall must be determined immediately. It is absolutely unacceptable to change the direction of installation, for example, hang horizontally vertically or vice versa - the design features of each model predetermine its placement and connection to water supply networks only in a position strictly specified in the instructions.
Anti-corrosion protection
Without magnesium anodes, perhaps, modern boilers are no longer produced - this simple device allows you to maximize the life of the heaters and the internal capacity of the boiler.

Magnesium anode significantly "pulls" corrosion processes on itself
To purchase such an anode and replace it is not particularly difficult.
What can be added in this aspect - there are more modern anti-corrosion systems with so-called inert anodes. The degree of security of the boiler is much higher here, although the price of such a model is also the same.
Kinds heating elements
- From the very beginning of the appearance of boilers in everyday life, they are installed so-called "wet" electric heaters - heating elements.

Wet heating elements are constantly in contact with water ...
They are directly immersed in the heated water, which means that the heat transfer process is more efficient. However, here lies the main vulnerability of such devices - the water quality can be such that even magnesium anodes do not help, and heaters become overgrown with scale and corrosion deposits in a matter of months.

... and this contact, alas, does not pass without a trace - such heating elements do not differ in durability
- Heaters with "dry" elements are considered more advanced. This, by and large, is no longer a heating element in the literal sense (not a tubular electric heater), but rather a system of powerful heating coils on a ceramic case.

"Dry" heaters are much safer and more durable
Such a "dry" heater is placed in a completely sealed capsule, which is located in the internal volume of the boiler. Contact with water simply cannot be, and such a heater lasts much longer. And it’s easier to change it - for this you don’t even need to drain their tank of water.
Boiler storage tank material
- If you approach from the point of view of the cheapness of the model, then you can purchase a boiler with a conventional steel inner tank with an enamel coating. Perhaps, apart from the low cost, this design has no other advantages - - it is the least resistant to pressure or temperature increase - the enamel can become cracked and start chipping.
- Much more practical in this regard are water heaters with a stainless steel tank. They are not so picky about the hardness and chemical composition of the water heated in them, they are much more hygienic. Stainless steel is a fairly plastic material, therefore it is not afraid of significant temperature changes and, accordingly, pressure - steel compensates for all expansions, and deformation will not occur.
Some boilers with a high-quality stainless steel tank and with a “dry” heating element are not even equipped with magnesium anodes due to the lack of such a need.
- The most modern are water heaters with tanks made of glass-porcelain composite. Here we can talk about absolute neutrality to any chemical reagents, the complete absence of even a hint of corrosion or surface deformation.
Under no circumstances will the heated water smell, as is often the case with enameled containers. Moreover, the glass-porcelain coating even has a certain antibacterial effect.
The disadvantage of such water heaters is one - they are still very expensive compared to other models.
Water heater control mechanisms
On the simplest models, there is a simple electromechanical control - a rotating handle, through which the required temperature for heating and maintaining water is set. An obligatory element, as a rule, is a pointer indicator - a thermometer and a light bulb (LED) indicating the heating process or a pause.

In principle, such a scheme of control and management in most cases is quite enough. However, if you wish, you can also purchase more “fancy” boilers, which have a liquid crystal indication of operating modes, and the possibility of programming has been implemented. For example, with the setting according to the switching on time, according to the heating power level, etc.

Modern boilers may have multifunctional electronic control systems
Such models can be included in the “smart home” system, controlled using special remote controls, and have other interesting, but probably not so popular functions in everyday life.
Fame manufacturer
The question is also important. Giving even if not too much money for an absolute "pig in a poke" is probably not very prudent. Who knows, you might be lucky, but very often the result is just the opposite, and the saddest thing is that there is also no one to claim any warranty obligations from.
In the middle price category, as a rule, Italian, Slovak, Turkish water heaters. They have a solid, neat assembly, but Chinese spare parts are most often used as components, which cannot be called low-quality, but they are still far from world standards.
If the aim for the purchase is guaranteed quality and longevity, along with the most advanced technologies, then German manufacturers have no equal here. In addition, real heaters from Germany are famous for their excellent heat retention characteristics - a fully heated boiler, disconnected from the power supply, will lose no more than 6 — 7 degrees per day.
How to connect the boiler correctly
The installation of an electric direct heating boiler in its regular place can be divided into several distinct technological stages:
- Choosing the optimal location and hanging the water heater on the wall.
- Pipe connection to the boiler and its insertion into the plumbing system.
- Installation and debugging of control and security systems.
- Connecting the boiler to the electrical network.
Mounting the boiler on the wall
It would seem - what is easier than hanging a water heater on the wall in the chosen place? However, frivolity in such a matter absolutely not allowed. Judge for yourself - even a small boiler, say 50 liters, with full filling will weigh about 70 kilograms. What can happen if the mount is unreliable - you can see in the photo.

Even in the best case, if at the time of the fall there were no people below - this is a broken appliance, damaged plumbing, for sure - leaking water, etc. And at worst - in addition to impact injury - there is also the danger of scalding with hot water or getting an electric shock.
- So, the wall material must be such that fasteners are securely held in it. In this capacity, plasterboard walls can not even be considered - in no case can you hang the boiler without a special metal structure.
- The suspensions themselves - dowels or anchors with hooks, must withstand twice the maximum load. For example, fasteners for a boiler with a volume of 120 liters must withstand a shear and bending force of 250 kg.

Usually, conscientious manufacturers complete their models with mounts that are guaranteed to withstand loads. if you have to purchase fasteners on your own, then the golden rule should apply - it is better to take with a huge margin than to doubt whether it is enough or not. Usually, for domestic class boilers, there are enough dowels or anchors with a central rod with a diameter of at least 8 mm, with an outer diameter of a collet or plug - at least 12 mm. The length of the dowel is about 100 - 120 mm.

- The boiler must not be located too far from the draw-off points. The "classic" place of its installation is considered to be a bathroom, a wall above the toilet. True, there may be obstacles to such placement. For example, an overly large water heater simply does not fit there. In addition, there are apartments that have more than one pair of hot and cold water risers - this happens when the “bath-toilet” block and the kitchen are separated. It makes no sense to pull long communications, powering all points from one boiler. The best solution would be to install two heaters - for the bath, and the second, more compact - for kitchen needs.
- The boiler must be placed on the wall in such a way that all its indication and control elements remain open for control, so that there is free access to plumbing fittings and a power supply switch.
- It is recommended to leave a distance of at least 100 mm between the boiler and the ceiling. The suspended water heater should not be placed lower than 500 mm from the floor surface.

- Most suspended boilers have one or two metal mounting strips or brackets welded to the body with holes for hooks. Before marking, carefully measure the distances between these holes so that they can be transferred to the wall. Sometimes in the technical documentation of the water heater, a paper template is attached to the installation instructions for the most accurate marking - this will be even easier.
Vertical axial and horizontal lines are beaten off on the wall, with control at building level assistance. But it marks holes for dowels or anchors. After drilling holes and hammering fasteners into them, the hook is screwed in so that approximately 5 - 7 mm remains outside.
After that, you can hang the boiler on hooks.
- There is another option - the water heater is equipped with a special bracket that is attached to the wall, and on the boiler body there is a “mate” for hanging on this bracket. Then they are used on hooks, and dowels or bolt-type anchors, with a hex key.
Inserting a boiler into the plumbing system of an apartment
This is one of the most difficult tasks. Its meaning lies in the fact that it is necessary to install tees on the cold and hot water lines. Through the "cold" water will be taken to the heater. Through the "hot" boiler will be connected to the internal wiring of hot water.
The classic boiler piping scheme is shown in the diagram:

Time-tested electric boiler to the plumbing system
Blue arrows show the movement of cold water, red, respectively, hot.
By. 1 is the water heater itself.
Pos. 2 and 3 - cold and hot water supply risers. As a rule, at the inlet, in front of the water meters (they are not shown in the diagram), there are shut-off valves - pos. 4 and 5. An important note - when working offline, that is, when using a boiler, the valve pos. 5 is necessarily in a completely blocked state.
Valves pos. 8 and 9 - an element, in principle, optional, but highly recommended. With these taps, it will be possible to turn off the boiler, for example, for preventive maintenance or for repair, in no way without affecting all the rest of the apartment layout.
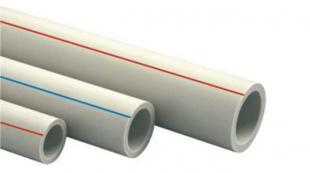
From these valves, the supply usually begins (pos. 10 and 11) to the water heater itself. Flexible hoses or plastic pipes, polypropylene or metal-plastic can be used.
If the hot pipe connection is connected, most often, directly to the boiler, then for cold water it is required to install a safety valve (pos. 12), which can be connected to the drainage system with a thin flexible hose (pos. 13).
Theory is over. Now let's see how this can be done in practice.
- You will need a certain tool and accessories - wrenches (for 22, 24, 27 and 32), gas wrenches, a cutter for plastic pipes, tow for winding joints and a special paste for the same purposes. You can have a few ½ inch and ¾ inch rubber spacers in stock.
- First of all, before starting installation work, both valves at the inlet (pos. 4 and 5) must be closed.
- The next knot is tees. There will be no particular problems if the internal wiring in the house and whether the apartment is made of polypropylene or metal-plastic - you can cut the desired fragment of a pipe, weld or mount a tee on the fittings, and then lead further laying from it to the boiler.

It is more difficult if the pipe is laid steel, and its replacement with a more perfect one - plastic, is not yet planned. So, you have to embed a tee.
In principle, a simple and acceptable solution may be to install a collapsible clip-clamp. A hole is drilled in the pipe, a clip is put on top, it is tightly tightened, and further wiring is made from the resulting outlet.

A tee - a clip allows you to solve the problem to some extent, but it’s still better to make a “major” tie-in
However, this option is not considered too successful - there may be leaks, and there is a high probability of a quick clog in the place of the drilled hole. It is better to cut a pipe section with a grinder, cut the thread with an appropriate lerk, and then “pack” a full-fledged brass tee using a conventional drive or, which is much better - with swivel nut couplings - so-called "Americans".

The most convenient way is to use connections with union nuts - American
Video: how to switch from a metal pipe to a plastic one
- From the installed tee, of course, it is already worthwhile to “get closer” to the boiler by installing plastic pipes.
It is recommended to bring the pipes as close as possible to the water heater. As the last section of the eyeliner, flexible hoses in a metal braid are most often used. So - the shorter they are, the more durable. Long hoses vibrate strongly when starting and closing the water, and this causes accelerated wear.
A prerequisite is that if such flexible hoses are installed, they must be of exceptionally high quality.
However, many craftsmen still prefer to make the eyeliner entirely from polypropylene or metal-plastic pipes.

Connection without flexible hoses - only from polypropylene pipes
Do not forget that it is recommended to install another pair of shut-off valves before the last section of the piping.
The hot pipe is connected directly to the red pipe of the water heater. You can find recommendations to install an additional tee here with access to the drain tap - but from a practical point of view, such an element has no special application.

On the left, a tee with a diverter valve is mounted on the hot pipe. From a practical point of view - not a particularly necessary detail
Particular attention to the connection of the cold pipe
Here, there are much more strict requirements for connecting water to the boiler.
The main one is the mandatory installation of a safety valve immediately before entering the water heater pipe. This device is essentially represents double acting valve.

Without any exaggeration - the most important element of safety, the safety valve
- A poppet check valve is located in a longitudinal cylinder with a threaded connection - it will not allow water to flow out of the boiler even if there is no pressure in the supply pipes at all.
- The perpendicular cylinder also houses a poppet valve, but with a much stronger spring. Its compression force is calculated in such a way that the valve will open when the pressure in the boiler exceeds the critical point, for example, if the thermostat fails, overheats or even boils water. In this case, excess liquid will be discharged into the drain pipe, and the pressure in the device will return to normal. The drain pipe is often connected with a transparent flexible tube to a sewer or toilet flush tank.
On many models, a lever is provided - it allows you to open the emergency valve manually, for example, to drain water from the tank.
You can often hear complaints that water is dripping from such a valve. You can’t complain about this - you need to rejoice that the valve is working correctly. A valve that is always dry should cause much more concern - there is a possibility that it is clogged.
There are smart people who believe that only a check valve will be enough. This is the worst delusion., which has led to real tragedies more than once.
Another important warning is that no locking devices are allowed to be installed after the valve and before entering the boiler.
Video: The Importance of Installing a Relief Valve
The picture shows the installed valve, above which a tee is packed, which has a lateral outlet through a shut-off valve. This is a completely acceptable and quite convenient improvement in piping the boiler - it is always possible to quickly drain the water from it or use the water supply when for some reason it is not in the water supply.

It happens that the pressure in the plumbing system at home is extremely unstable - there are strong jumps. This is unsafe for the boiler in terms of the occurrence of water hammer. In addition, at elevated pressure, an emergency valve may operate, uselessly discharging water into the sewer system.
It is not difficult to eliminate such a nuisance - you need to install a pressure reducer at the entrance to the apartment or directly in front of the boiler - usually purchased with a nominal value of 2 atmospheres.

When installing valves and reducers, be sure to pay attention to the direction of the arrows printed on their body and indicating the direction of water flow.
“Packing” of threaded plumbing connections is best done on tow using a special sealing paste (for example, Unipack). Tow fibers are wound along the threads strictly clockwise, then smeared with paste on top. It is not required to especially tighten such a pairing with a key - it is twisted all the way, but “without fanaticism”. If necessary, it will even be possible to even make a quarter or even half a turn back - this should not affect the tightness of the connection. In this, this type of winding is much more advantageous, for example, fum tapes.

When connecting flexible hoses and union nuts of American couplings, winding is not required - rubber gaskets cope with the task of sealing.

Boiler piping completed
After all nodes are connected according to the scheme, the quality of all connections is checked, you can conduct a test set of water in the boiler.
- For this, primarily, the shut-off valve at the hot water inlet to the apartment is closed.
- Then, at one of the points of water intake on the mixer, a “hot” tap opens - the air displaced from the tank will exit through it.
- The valve for supplying cold water to the boiler opens.
- The water heater starts to fill up. It is necessary to monitor the moment until water starts to run from the open tap - this will indicate that the boiler is full. After that, close the tap on the mixer. The valve for supplying cold water to the heater always remains open for the entire time the appliance is used.

On this, the final tie-in of the boiler into the water supply system can be considered completed. It remains only to connect the boiler to the power supply, set the required heating temperature on the control panel, and, as it heats up, it is reasonable to use hot water.